ScreenShare with iOS
This article describes how to build an iOS application with device-level screen-sharing.
How does it work?
To share a screen at the device level, the iOS SDK uses the ReplayKit2 framework and the Broadcast Upload extension, as well as the VoxeetScreenShareKit that manages the screen broadcast.
The following workflow describes the screen-share process:
1. The presenter enables screen-sharing on the iPhone to record the screen. This activates ReplayKit 2, which starts recording the screen and creating media samples.
2. The Broadcast Upload extension retrieves the recorded media samples in real time, encodes the samples, creates a video stream, and uploads the stream to the broadcast service. The extension gets the CMSampleBuffer object and transfers the object to the VoxeetScreenShareKit.
3. VoxeetScreenShareKit uploads the CMSampleBuffer object to the App Group Shared Data shared repository.
4. VoxeetSDK retrieves the CMSampleBuffer from the App Group Shared Data repository.
5. VoxeetSDK uses CMSampleBuffer to receive the shared content, create a screen-share stream, and send the stream to the conference.
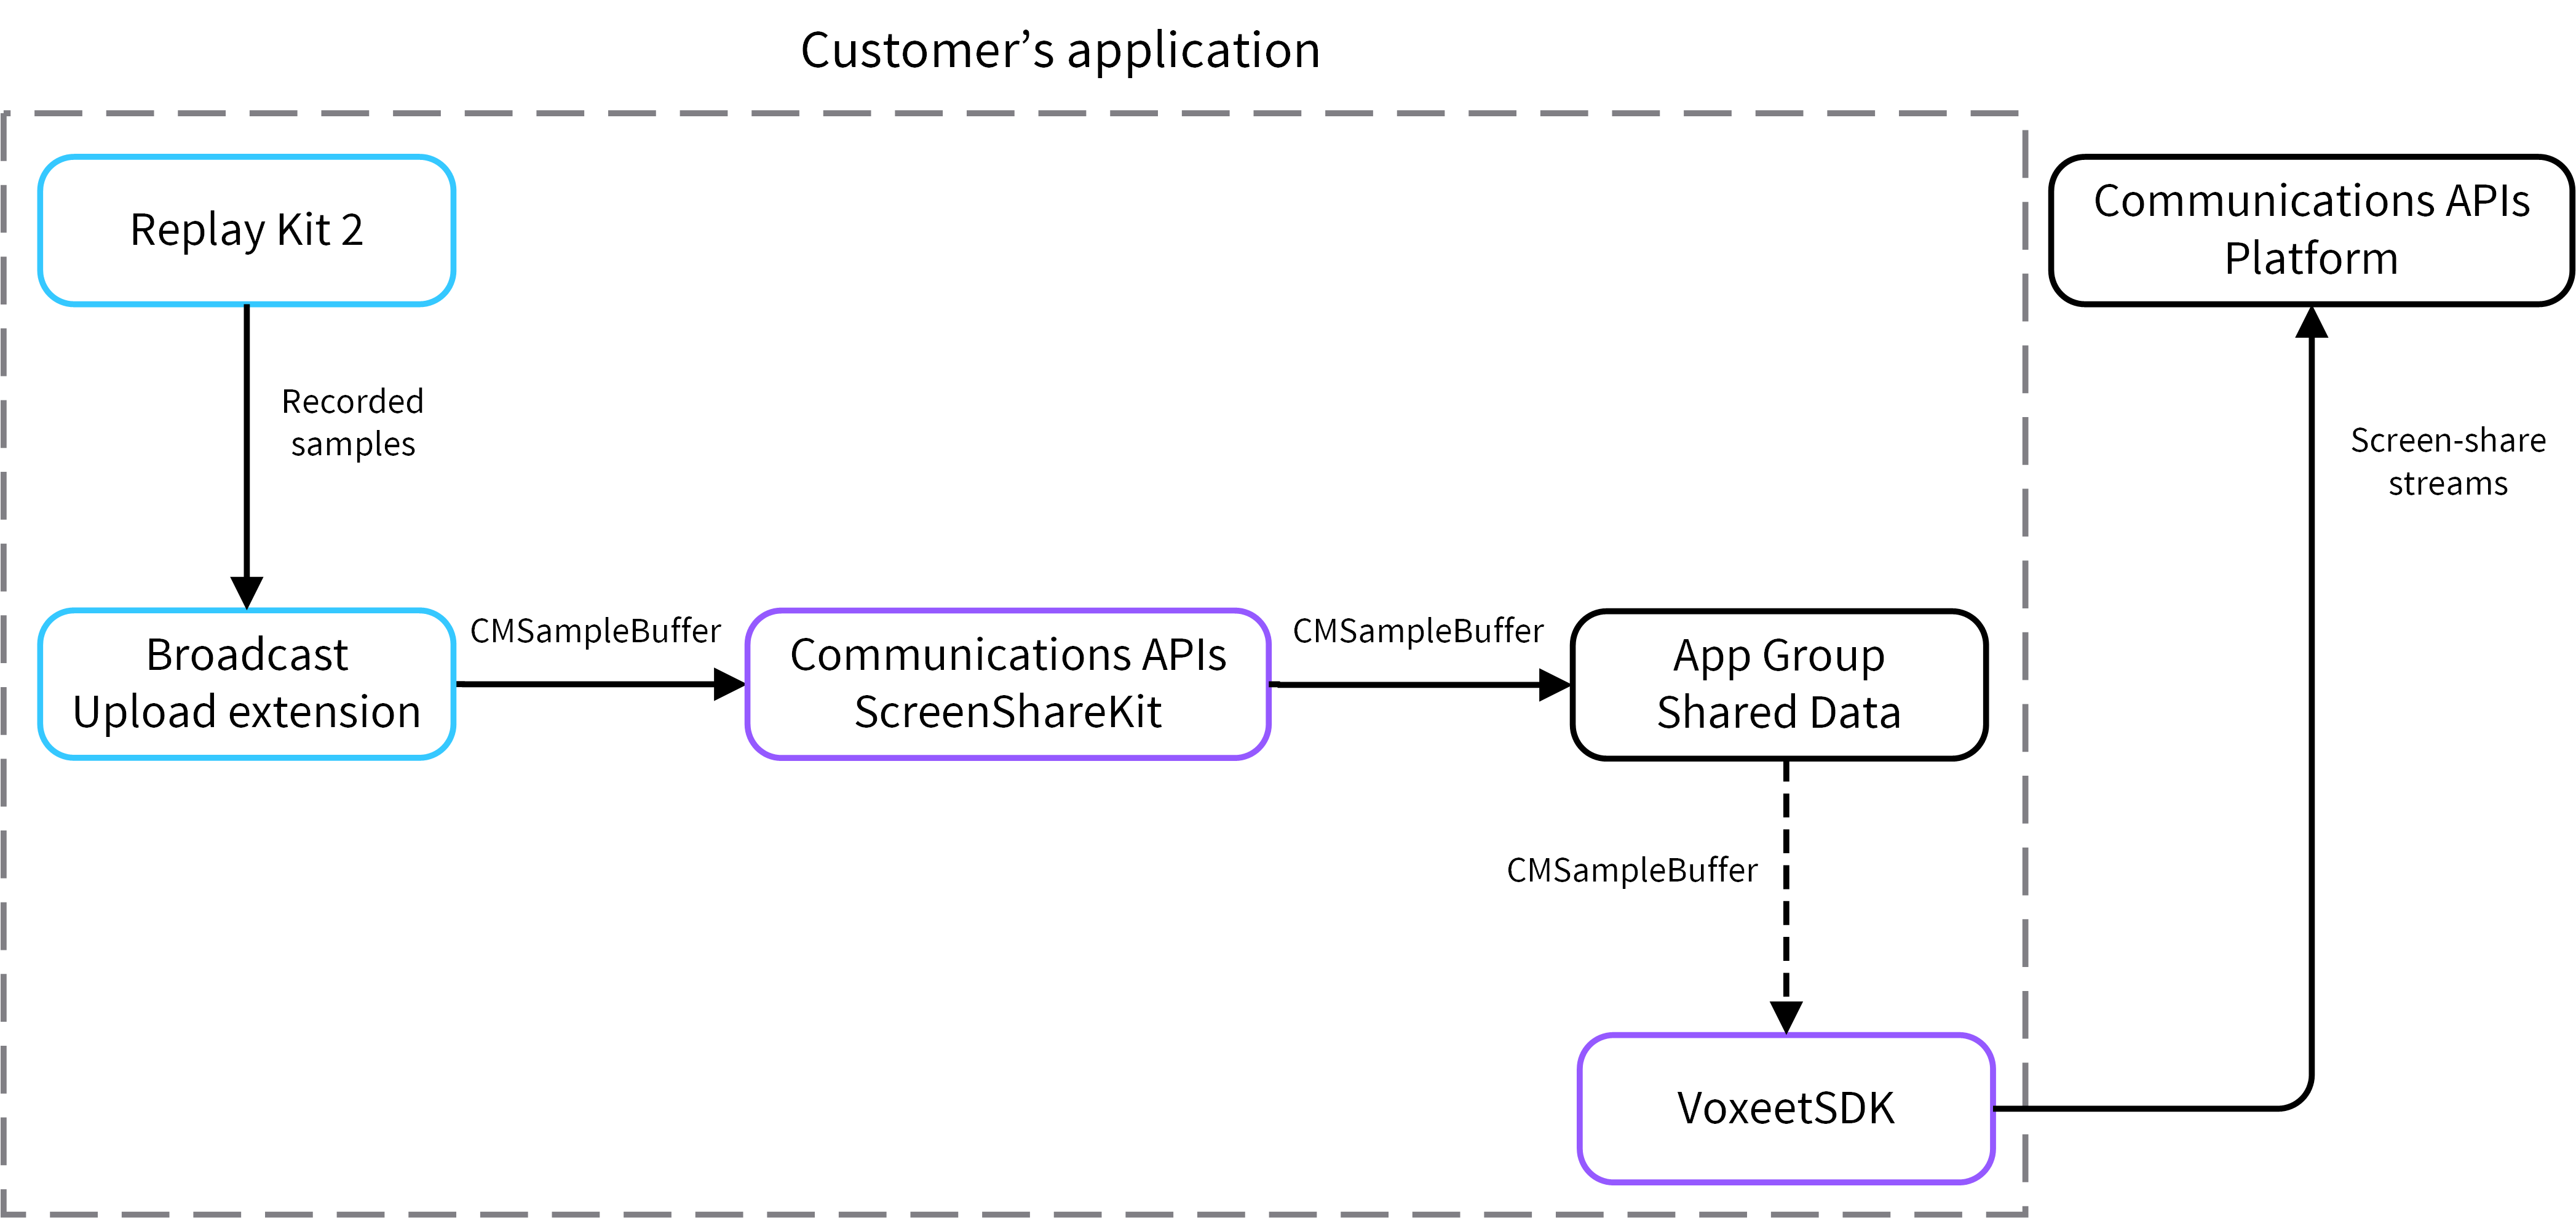
The screen-share workflow
API reference
The iOS SDK offers the startScreenShare API that contains the broadcast parameter. The parameter is a boolean that specifies whether the shared screen should be used inside (false) or outside (true) the application.
.startScreenShare(broadcast: boolean, completion: ((_ error: NSError?) -> Void)?)
Note: Calling this function causes calling the completion handler with a non-nil error object, even when the function does not cause any error.
Implementation guide
The following steps describe how to add the screen-sharing feature to your application.
Prerequisites:
- A valid Apple developer account
- A valid Apple provision file supporting app groups
- Apple iOS 12 or later
1. Download VoxeetScreenShareKit using either the Swift Package Manager, Carthage dependency manager, CocoaPods dependency manager, or download the package from GitHub. We recommend using the Swift Package Manager because it automatically adds VoxeetScreenShareKit as a dependency and embeds the kit in the application's bundle.
-
Swift Package Manager: Add voxeet-screensharekit-ios as a package dependency.
-
Carthage: Use the following command:
binary "https://raw.githubusercontent.com/voxeet/voxeet-screensharekit-ios/master/VoxeetScreenShareKit.json"
- CocoaPods: Use the following command:
pod 'VoxeetScreenShareKit'
- GitHub: Go to the VoxeetScreenShareKit.json file and select the preferred version that you want to download.
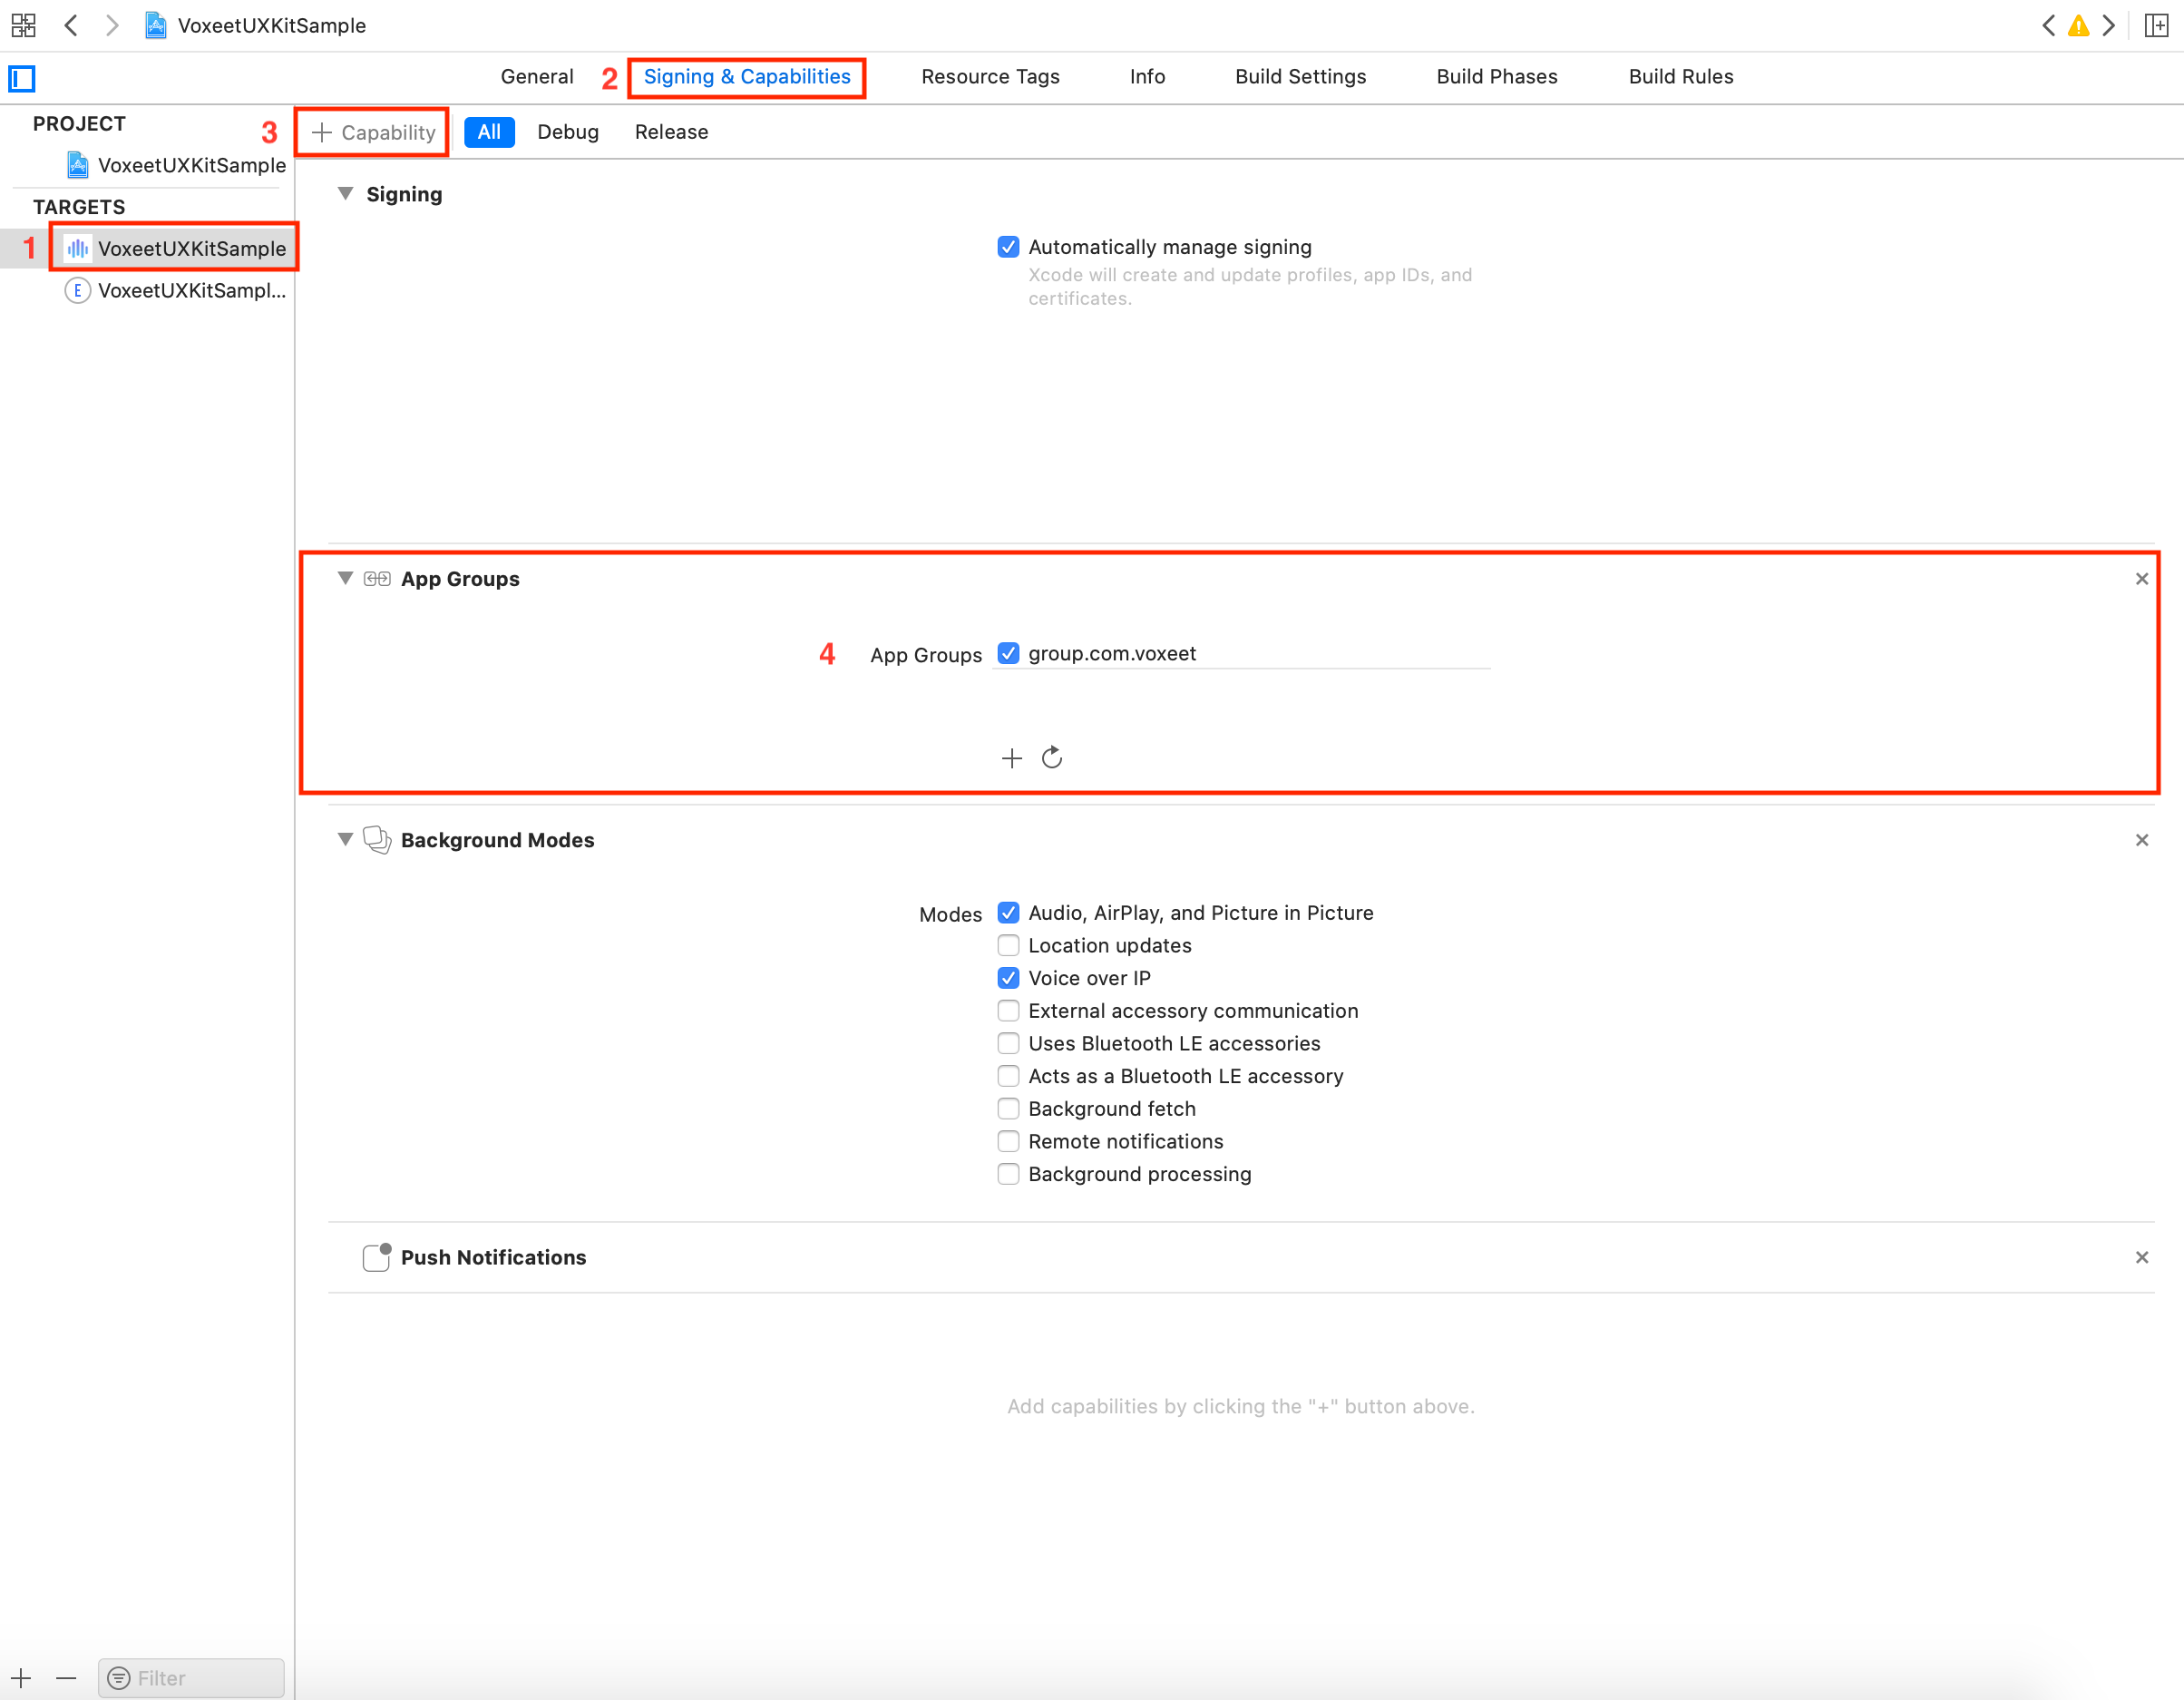
2. Open your project in Xcode and click the Signing & Capabilities tab to access the configuration page.
3. Select + Capability, navigate to the App Groups section, and select the valid App Groups.
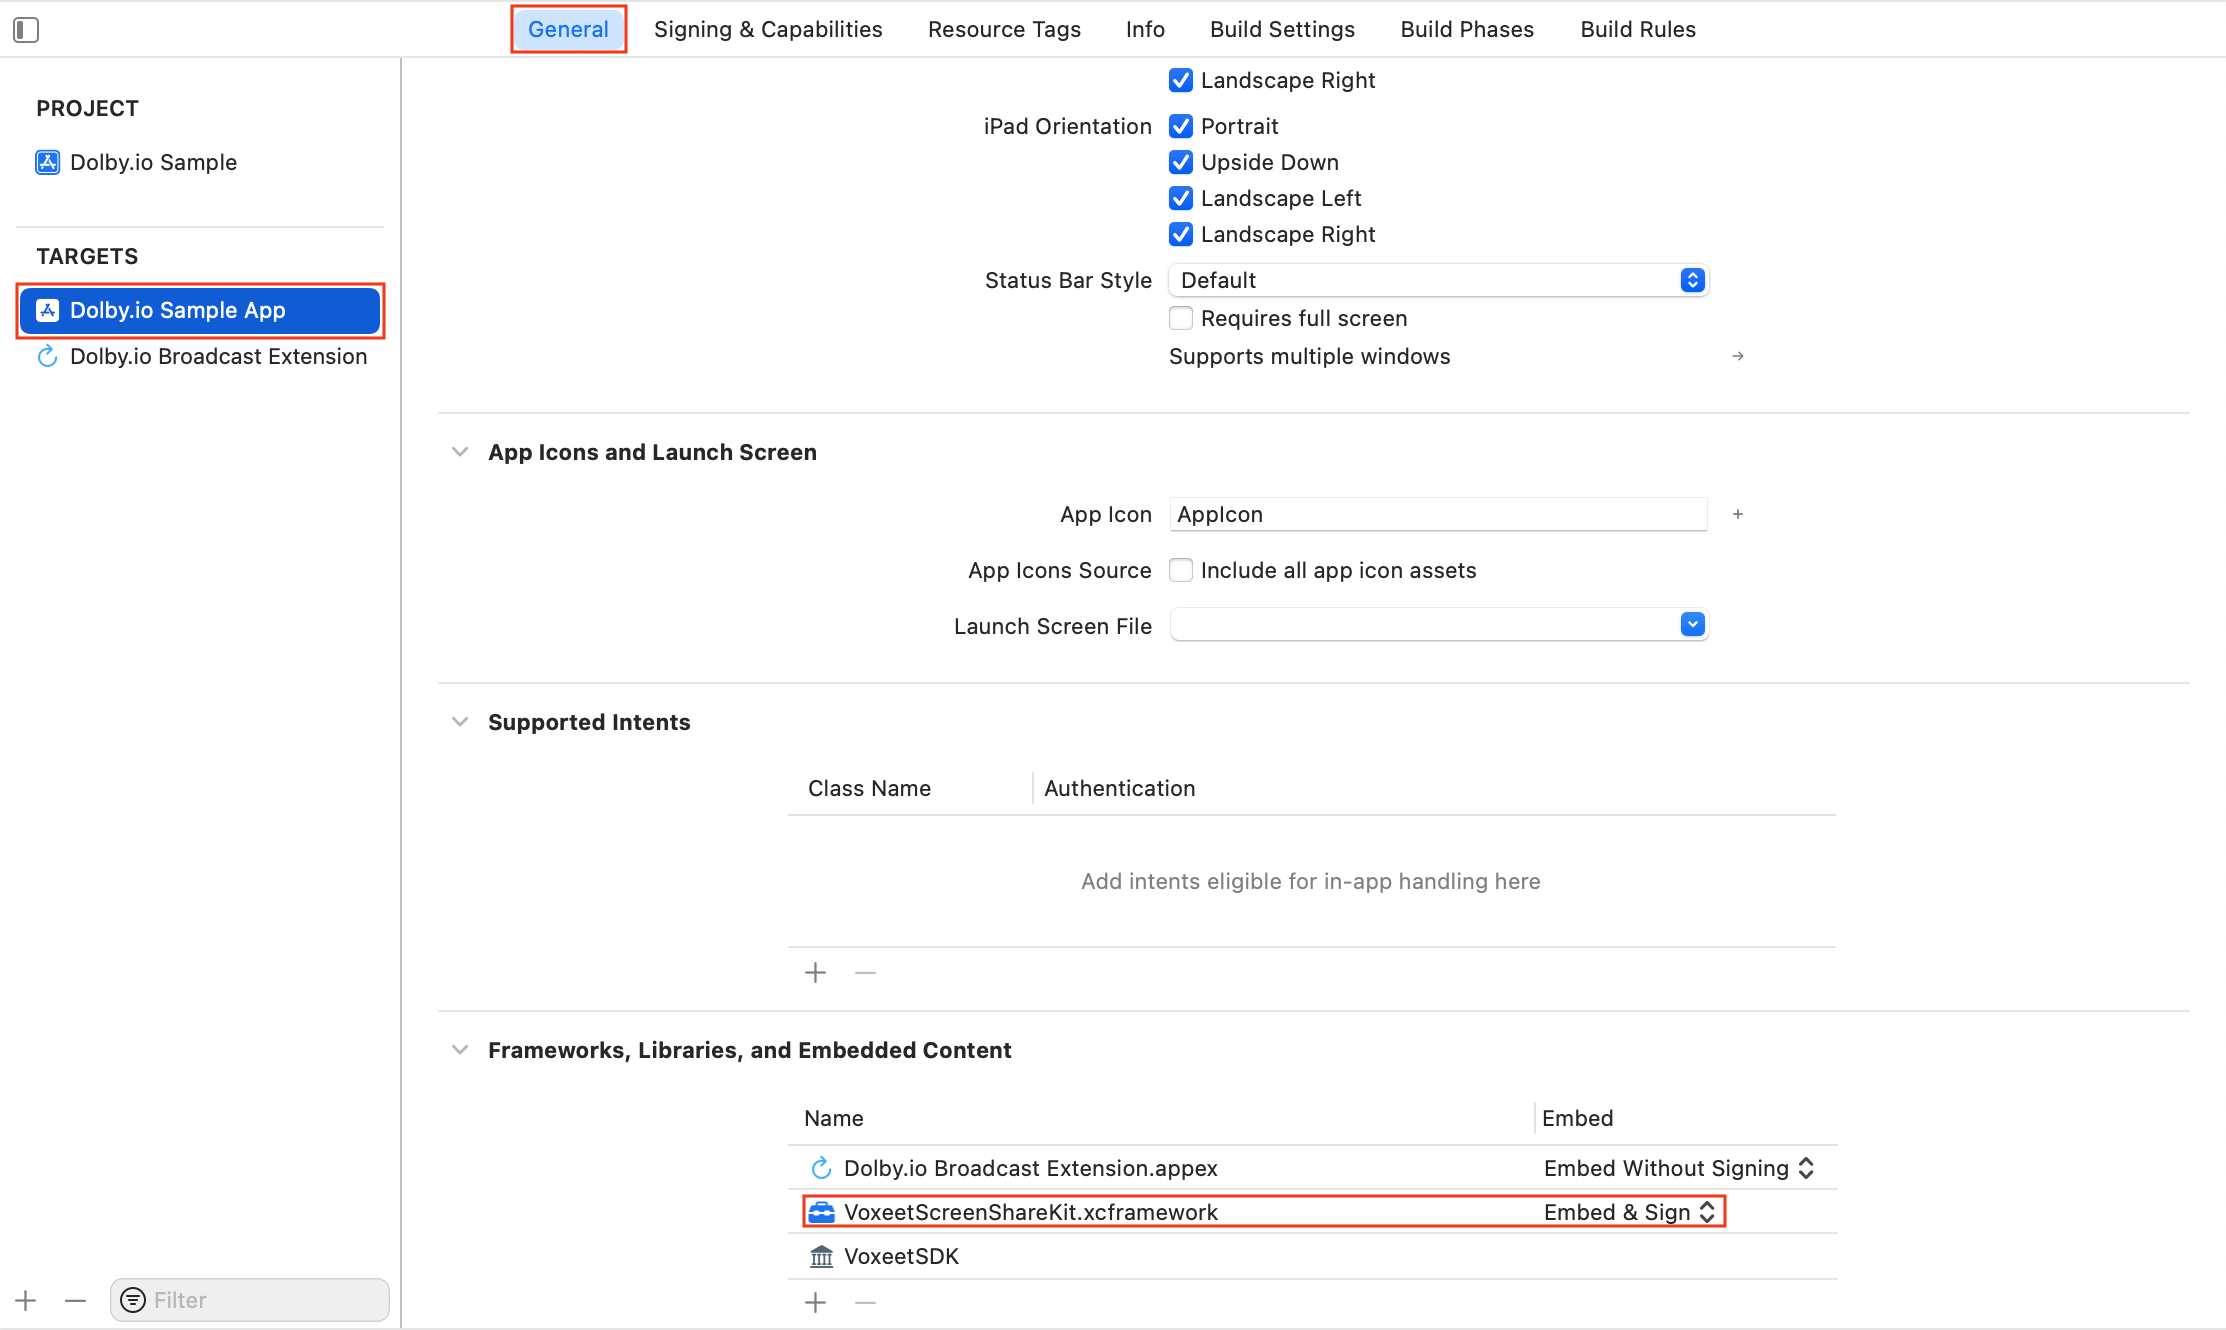
4. Select the General tab and navigate to the Frameworks, Libraries, and Embedded Content section. In the section, add VoxeetScreenShareKit.xcframework to the application target and set the Embed & Sign option for the target.
5. In the application target, navigate to the didFinishLaunchingWithOptions method, where the SDK is initialized in the AppDelegate.swift file.
import VoxeetSDK

@UIApplicationMain
class AppDelegate: UIResponder, UIApplicationDelegate {
    var window: UIWindow?

    func application(_ application: UIApplication, didFinishLaunchingWithOptions launchOptions: [UIApplication.LaunchOptionsKey: Any]?) -> Bool {
        ...
        VoxeetSDK.shared.initialize(...)
        VoxeetSDK.shared.appGroup = "YOUR_APP_GROUP"
        VoxeetSDK.shared.preferredExtension = "YOUR_BROADCAST_EXTENSION_BUNDLE_ID"

        return true
    }
}
Replace the following phrases mentioned in the code:
YOUR_APP_GROUPwith theApp GroupnameYOUR_BROADCAST_EXTENSION_BUNDLE_IDwith theBundle Identifier, which you can find in theSigningsection of theSigning & Capabilitiestab
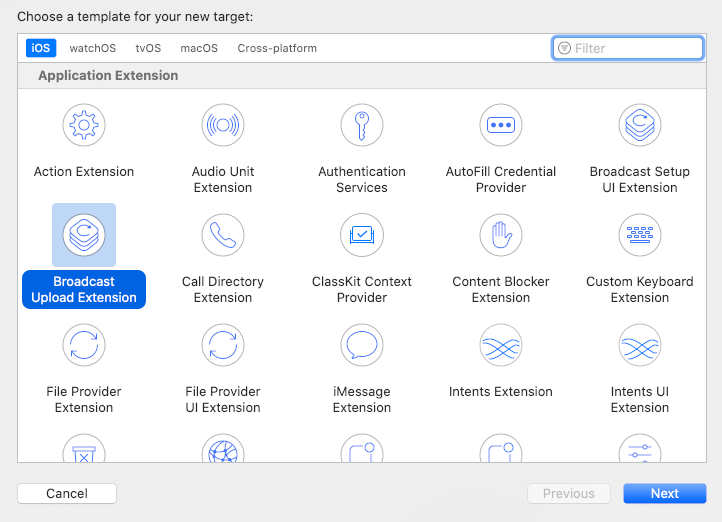
6. Click the + button at the bottom of the left-side menu to create a new target.
7. In the pop-up window, select the Broadcast Upload extension and click Next.
8. Click the Signing & Capabilities tab, and navigate to App Groups.
9. Click the + icon on the bottom of the App Groups section to create a new App Group in your extension and set its name.
10. Click the Build Phases tab and navigate to Link Binary With Libraries.
11. Click the Build Settings tab and set iOS Deployment Target to iOS 11.0.

12. Open the SampleHandler.swift file that was automatically created together with the Broadcast Upload extension. Replace YOUR_APP_GROUP mentioned in the code with the App Group name. Copy the sample code from this file to your iOS application.
import ReplayKit
import VoxeetScreenShareKit

class SampleHandler: RPBroadcastSampleHandler, VoxeetScreenShareKitDelegate {
    private var screenShareService: VoxeetScreenShareKit?

    override func broadcastStarted(withSetupInfo setupInfo: [String : NSObject]?) {
        screenShareService = VoxeetScreenShareKit(appGroup: "YOUR_APP_GROUP")
        screenShareService?.delegate = self
        screenShareService?.broadcastStarted(withSetupInfo: setupInfo)
    }

    override func broadcastPaused() {
        screenShareService?.broadcastPaused()
    }

    override func broadcastResumed() {
        screenShareService?.broadcastResumed()
    }

    override func broadcastFinished() {
        screenShareService?.broadcastFinished()
    }

    override func processSampleBuffer(_ sampleBuffer: CMSampleBuffer, with sampleBufferType: RPSampleBufferType) {
        screenShareService?.processSampleBuffer(sampleBuffer, with: sampleBufferType)
    }

    func finishBroadcastWithError(error: Error) {
        self.finishBroadcastWithError(error)
    }
}
13. Create a Screen Share button calling the startScreenShare method inside the application.
VoxeetSDK.shared.conference.startScreenShare(broadcast: true)
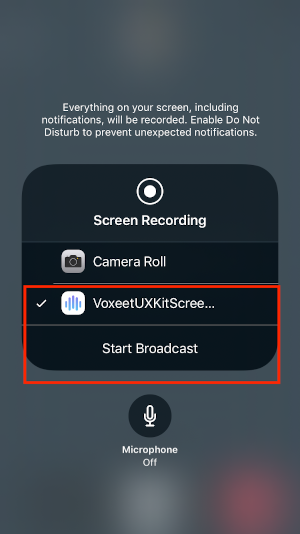
14. Tap the created Screen Share button to see the screen recording window. Select your created project from the available options to share your screen.
Updated 12 months ago