Creating a Custom Mixer Layout Application
A mixer layout application is a web application that the Dolby.io Communications APIs platform uses for recording and live streaming conferences. The layout is responsible for the final look of the recorded and streamed conference. It displays participants' video tiles, shared videos, and screens and assigns a specific size and location to each of these elements. By default, the Dolby.io Communications APIs platform uses an open-source dynamic mixer layout application. The application is based on React.JS and it is available on GitHub.
If you wish to use a different layout, you can create a new mixer layout application. This way, you can decide how exactly you want to display all video streams and you can customize the look of your layout to fit it to your corporate branding. This guide explains how to create a new dynamic mixer layout application that displays video tiles of conference participants and changes the layout during a screen-share session, video presentation, and a live streaming session.
Create a basic layout
-
Create empty
index.html,styles.css, andscript.jsfiles in a selected directory. -
In the
index.htmlfile, add links to thescript.jsandstyles.cssfiles:
<html>
<head>
    <meta charset="UTF-8">
    <meta name="viewport" content="width=device-width, initial-scale=1.0">

    <!-- Mixer layout script and styles -->
    <script type="text/javascript" src="script.js"></script>
    <link rel="stylesheet" type="text/css" href="styles.css" />
</head>
<body>

</body>
</html>
-
Select a background image for your layout that has a 1920×1080 resolution. Save the image as
background.jpgin the same directory. -
In the
styles.cssfile, set thebackground.jpgimage as the background.
body {
    background-image: url('background.jpg');
    background-size: cover;
    background-repeat: no-repeat;
}
- Load the Voxeet SDK and jQuery to the
index.htmlfile.
<!-- Voxeet SDK and jQuery from the CDN unpkg.com -->
<script type="text/javascript" src="https://unpkg.com/@voxeet/[email protected]"></script>
<script type="text/javascript" src="https://unpkg.com/jquery"></script>
Note: The jQuery library is not mandatory, you can import any JavaScript library you want. You can also connect your application to any backend you need. However, our platform requires using libraries and backend services that are publicly accessible.
- Open the
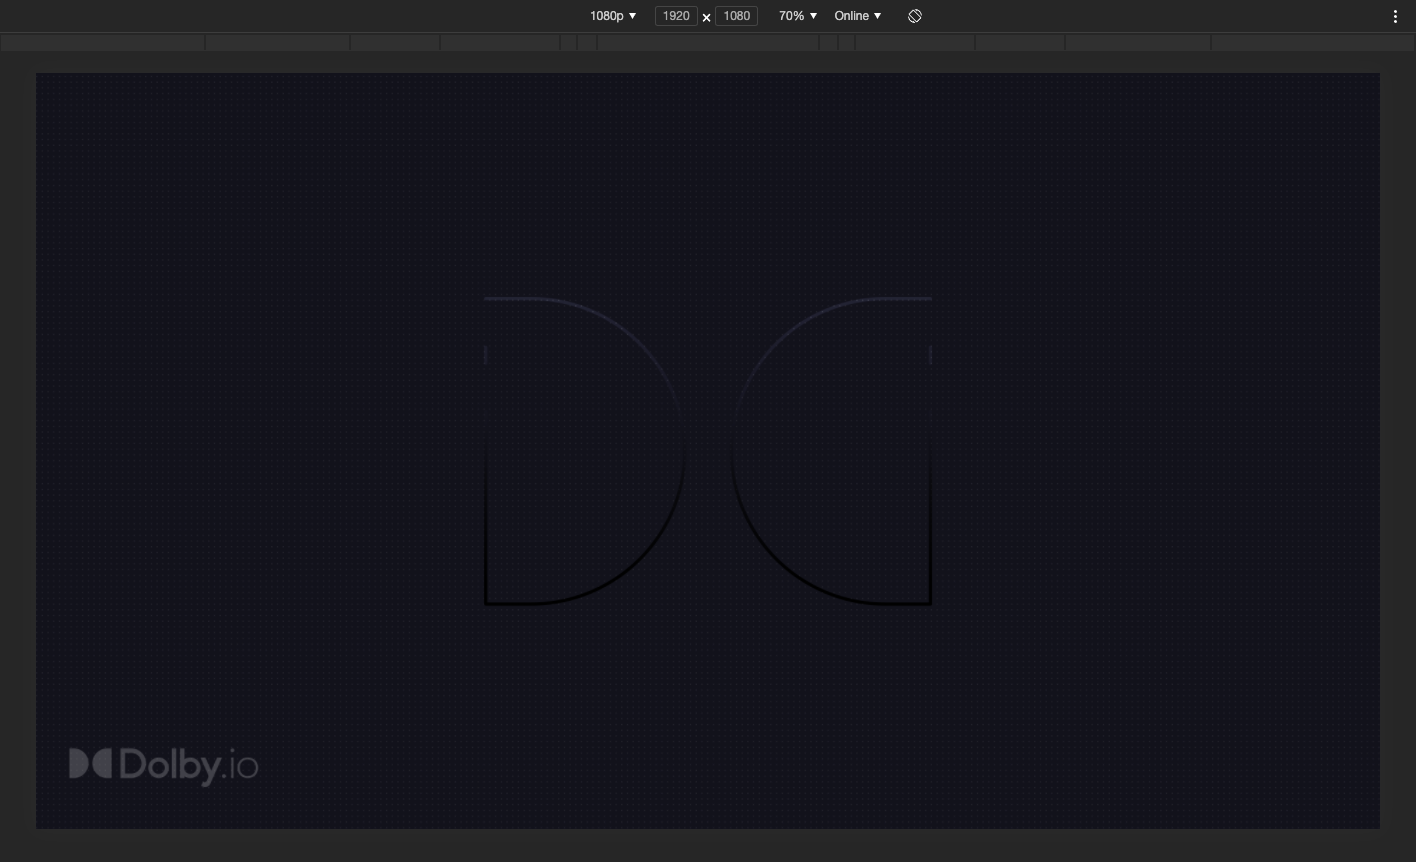
index.htmlfile in Chrome to check how your layout looks like. The following graphic shows how the application should look at this stage:

We recommend creating a custom “device” in Google Chrome Developer Tools and using the 1920×1080 resolution to get the same experience as in the output of the mixer.
The Dolby Mixer application uses Chrome 87 to load the mixer web application. We recommend using the same version on your local development machine.
For reference, see source code at this stage.
Initialize the layout
The mixer layout does not have any information about the required conference and Dolby.io credentials. When Mixer is requested to record or stream a conference, it passes the required information to the HTML file. This requires adding input elements to the HTML file.
- Add input fields to the application to collect the Dolby.io credentials and the conference ID. Additionally, add two buttons for joining and replaying conferences.
When Mixer is ready to process a conference, it simulates a click on one of the available buttons to let the mixer layout application join or reply a conference. These elements are not required on the UI so you can hide them using the hide CSS class.
<div class="hide">
    <input type="hidden" value="accessToken" id="accessToken" name="accessToken"/>
    <input type="hidden" value="refreshToken" id="refreshToken" name="refreshToken"/>
    <input type="hidden" value="refreshUrl" id="refreshUrl" name="refreshUrl"/>
    <input type="hidden" value="voxeet" id="conferenceId" name="conferenceId"/>
    <input type="hidden" value="1234" id="thirdPartyId" name="thirdPartyId"/>
    <input type="hidden" value="stream" id="layoutType" name="layoutType"/>
    <button id="joinConference">Join conference</button>
    <button id="replayConference">Replay conference</button>
</div>
.hide {
    display: none;
}
- In the
script.jsfile, create theinitializeVoxeetSDK()function that uses theaccessToken,refreshToken, andrefreshUrlsettings that will be provided by Mixer. The names of these hidden elements should not be changed as it is used by the Mixer service to inject the values based on their exact names.
// Initialize the SDK with the access token
const initializeVoxeetSDK = () => {
    // Load the settings injected by the mixer
    const accessToken = $("#accessToken").val();
    const refreshToken = $("#refreshToken").val();
    const refreshUrl = $("#refreshUrl").val();

    // Reference: https://docs.dolby.io/communications-apis/docs/js-client-sdk-voxeetsdk#initializetoken
    VoxeetSDK.initializeToken(accessToken, () =>
        fetch(refreshUrl, {
            method: 'POST',
            headers: {
                'Content-Type': 'application/json',
                'Authorization': 'Bearer ' + accessToken
            },
            body: { refresh_token: refreshToken }
        }).then(d => d.json().access_token)
    );
};
- Create a
divelement with theconferenceStartedVoxeetID at the end of the body of the web page to inform Mixer that the application is ready.
$(document).ready(() => {
    // Inform the mixer that the application is ready to start
    $("<div />").attr("id", "conferenceStartedVoxeet").appendTo("body");
});
- Create a
divelement with theconferenceEndedVoxeetID to inform Mixer about theleftandendedevents from the conference object and trigger Mixer to stop recording or streaming a conference.
const onConferenceEnded = () => {
    $('#conferenceStartedVoxeet').remove();
    $('body').append('<div id="conferenceEndedVoxeet"></div>');
};

VoxeetSDK.conference.on("left", onConferenceEnded);
VoxeetSDK.conference.on("ended", onConferenceEnded);
- Add a function that triggers opening a new session and joining a conference when Mixer clicks the
joinConferencebutton.
$("#joinConference").click(() => {
    // Initialize the SDK
    initializeVoxeetSDK();

    // Load the settings injected by the mixer
    const conferenceId = $("#conferenceId").val();
    const thirdPartyId = $("#thirdPartyId").val();
    const layoutType = $("#layoutType").val();

    const mixer = {
        name: "Mixer",
        externalId: "Mixer_" + layoutType,
        thirdPartyId: thirdPartyId,
    };

    const joinOptions = {
        constraints: {
            video: false,
            audio: false
        },
        mixing: {
            enabled: true
        },
        userParams: {},
        audio3D: false
    };

    // Open a session for the mixer
    VoxeetSDK.session.open(mixer)
        .then(() => VoxeetSDK.conference.fetch(conferenceId))
        // Join the conference
        .then((conference) => VoxeetSDK.conference.join(conference, joinOptions))
        .catch((err) => console.error(err));
});
- Add a function that triggers opening a new session and replaying a conference when Mixer clicks the
replayConferencebutton.
$("#replayConference").click(() => {
    // Initialize the SDK
    initializeVoxeetSDK();

    // Load the settings injected by the mixer
    const conferenceId = $("#conferenceId").val();
    const thirdPartyId = $("#thirdPartyId").val();
    const layoutType = $("#layoutType").val();

    const mixer = {
        name: "Mixer",
        externalId: "Mixer_" + layoutType,
        thirdPartyId: thirdPartyId
    };

    // Open a session for the mixer
    VoxeetSDK.session.open(mixer)
        .then(() => VoxeetSDK.conference.fetch(conferenceId))
        // Replay the conference from the beginning
        .then((conference) => VoxeetSDK.conference.replay(conference, 0, { enabled: true}))
        .catch((err) => console.error(err));
});
At this stage the base of the layout application is ready. Mixer can run the application, join or replay a conference, and release the resources at the end of the conference. For reference, see source code at this stage.
Customize the layout
This step shows how to create a layout in which a video presentation is displayed in a full-screen mode and a shared screen is displayed in a larger area, on the right side of the layout.
- In the
index.htmlfile, add the following container at the end of the body section to host video streams from participants.
<div id="videos-container"></div>
- In the
script.jsfile, create theaddVideoNode(participant, stream)function to add a video element of a participant when the participant joins a conference and theremoveVideoNode(participant)function to remove the video element when the participant leaves the conference or turns off a camera.
// Add the video stream to the web page
const addVideoNode = (participant, stream) => {
    let participantNode = $('#participant-' + participant.id);

    if (!participantNode.length) {
        participantNode = $('<div />')
            .attr('id', 'participant-' + participant.id)
            .addClass('container')
            .appendTo('#videos-container');

        $('<video />')
            .attr('autoplay', 'autoplay')
            .attr('muted', true)
            .appendTo(participantNode);

        // Add a temporary banner with the name of the participant
        let name = $('<p />').text(participant.info.name);
        let bannerName = $('<div />')
            .addClass('name-banner')
            .append(name)
            .appendTo(participantNode);

        // Remove the banner after 15 seconds
        setInterval(() => bannerName.remove(), 15000);
    }

    // Attach the stream to the video element
    navigator.attachMediaStream(participantNode.find('video').get(0), stream);
};

// Remove the video stream from the web page
const removeVideoNode = (participant) => {
    $('#participant-' + participant.id).remove();
};
- Create the
addScreenShareNode(stream)andremoveScreenShareNode()functions to add and remove the video element when the participant enables and disables screen sharing.
// Add a screen share stream to the web page
const addScreenShareNode = (stream) => {
    let screenshareNode = $('<div />')
        .attr('id', 'screenshare')
        .appendTo('body');

    let container = $('<div />')
        .addClass('container')
        .appendTo(screenshareNode);

    let screenShareNode = $('<video />')
        .attr('autoplay', 'autoplay')
        .appendTo(container);

    // Attach the stream to the video element
    navigator.attachMediaStream(screenShareNode.get(0), stream);
}

// Remove the screen share stream from the web page
const removeScreenShareNode = () => {
    $('#screenshare').remove();
}
- Create the
addVideoPlayer(videoUrl)function to manage video presentations and create a video player that displays video in full-screen. Create theremoveVideoPlayer()function to remove the video element when the video is stopped.
You can also create additional functions to support all scenarios related to video presentations, such as seekVideoPlayer(timestamp) and pauseVideoPlayer().
// Add a Video player to the web page
const addVideoPlayer = (videoUrl) => {
    $('<video />')
        .attr('id', 'video-url-player')
        .attr('src', videoUrl)
        .attr('autoplay', 'autoplay')
        .attr('playsinline', 'true')
        .appendTo('body');
};

// Move the cursor in the video
const seekVideoPlayer = (timestamp) => {
    $('#video-url-player')[0].currentTime = timestamp;
};

// Pause the video
const pauseVideoPlayer = () => {
    $('#video-url-player')[0].pause();
};

// Play the video
const playVideoPlayer = () => {
    $('#video-url-player')[0].play();
};

// Remove the Video player from the web page
const removeVideoPlayer = () => {
    $('#video-url-player').remove();
};
- Update the
styles.cssfile to style the UI.
.container {
    border: 4px solid white;
    border-radius: 4px;
    background-color: black;
    margin: 20px;
}

#videos-container {
    width: 30%;
    height: 100%;
    float: left;
}

#videos-container .container {
    margin-right: 10px;
    position: relative;
}

.name-banner {
    position: absolute;
    bottom: 10px;
    left: -20px;
    right: 0;
    background-image: linear-gradient(to right, #1E2DFF, #1264FF);
    color: white;
}

.name-banner p {
    margin: 8px 30px;
}

#screenshare {
    width: 70%;
    height: 100%;
    float: right;
}

#screenshare .container {
    margin-left: 10px;
}

video {
    width: 100%;
    height: auto;
}

/* Display a video player in full screen */
#video-url-player {
    z-index: 10000;
    position: absolute;
    left: 0;
    top: 0;
    width: 100%;
    height: 100%;
    object-fit: contain;
    background-color: black;
}
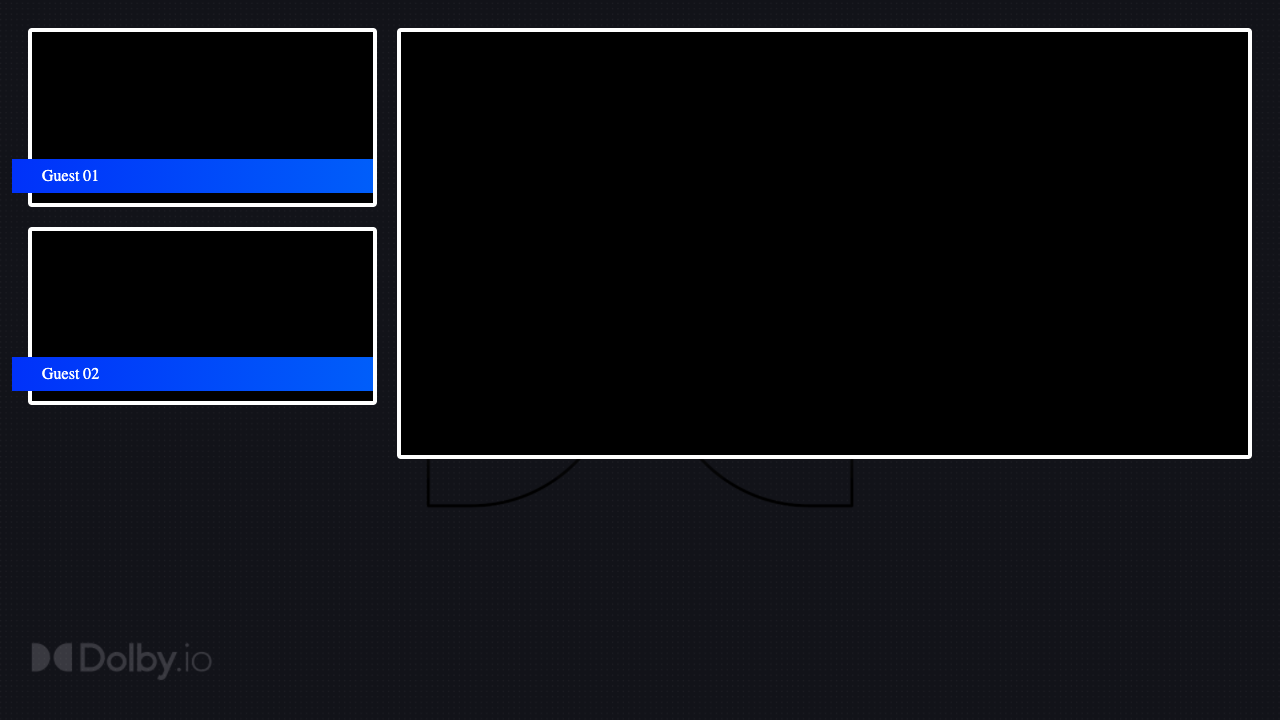
The following graphic shows the UI after adding two participants and one shared screen:

For reference, see source code at this stage.
Connect the Voxeet SDK to the layout
- Create a new
events.jsfile and reference the file in theindex.htmlfile.
<!-- Mixer layout script and styles -->
<script type="text/javascript" src="script.js"></script>
<script type="text/javascript" src="events.js"></script>
<link rel="stylesheet" type="text/css" href="styles.css" />
- In the
events.jsfile, handle subscribing to the conference events, such asstreamAdded,streamUpdated, andstreamRemoved. Based on these events, handle adding and removing video elements.
// When a video stream is added to the conference
VoxeetSDK.conference.on('streamAdded', (participant, stream) => {
    console.log(`Event - streamAdded from ${participant.info.name} (${participant.id})`);

    if (stream.type === 'ScreenShare') {
        addScreenShareNode(stream);
    } else if (stream.getVideoTracks().length) {
        // Only add the video node if there is a video track
        addVideoNode(participant, stream);
    }
});

// When a video stream is updated from the conference
VoxeetSDK.conference.on('streamUpdated', (participant, stream) => {
    console.log(`Event - streamUpdated from ${participant.info.name} (${participant.id})`);

    if (stream.type === 'ScreenShare') return;

    if (stream.getVideoTracks().length) {
        // Only add the video node if there is a video track
        addVideoNode(participant, stream);
    } else {
        removeVideoNode(participant);
    }
});

// When a video stream is removed from the conference
VoxeetSDK.conference.on('streamRemoved', (participant, stream) => {
    console.log(`Event - streamRemoved from ${participant.info.name} (${participant.id})`);

    if (stream.type === 'ScreenShare') {
        removeScreenShareNode();
    } else {
        removeVideoNode(participant);
    }
});
- Handle subscribing to the
started,paused,played,sought, andstoppedevents.
VoxeetSDK.videoPresentation.on("started", (vp) => {
    console.log(`Event - videoPresentation started ${vp.url}`);
    addVideoPlayer(vp.url);
    seekVideoPlayer(vp.timestamp);
});

VoxeetSDK.videoPresentation.on("paused", (vp) => {
    console.log('Event - videoPresentation paused');
    pauseVideoPlayer();
});

VoxeetSDK.videoPresentation.on("played", (vp) => {
    console.log('Event - videoPresentation played');
    playVideoPlayer();
});

VoxeetSDK.videoPresentation.on("sought", (vp) => {
    console.log('Event - videoPresentation sought');
    seekVideoPlayer(vp.timestamp);
});

VoxeetSDK.videoPresentation.on("stopped", () => {
    console.log('Event - videoPresentation stopped');
    removeVideoPlayer();
});
After this step, the mixer layout application is customized and works properly. For reference, see source code at this stage.
Add additional layout types
In the mixer layout application, you can use four types of layouts, depending on the usage. You can use a separate layout for:
- Recording live conferences
- Replaying conferences
- Streaming conferences to RTMP endpoints, such as YouTube and Facebook
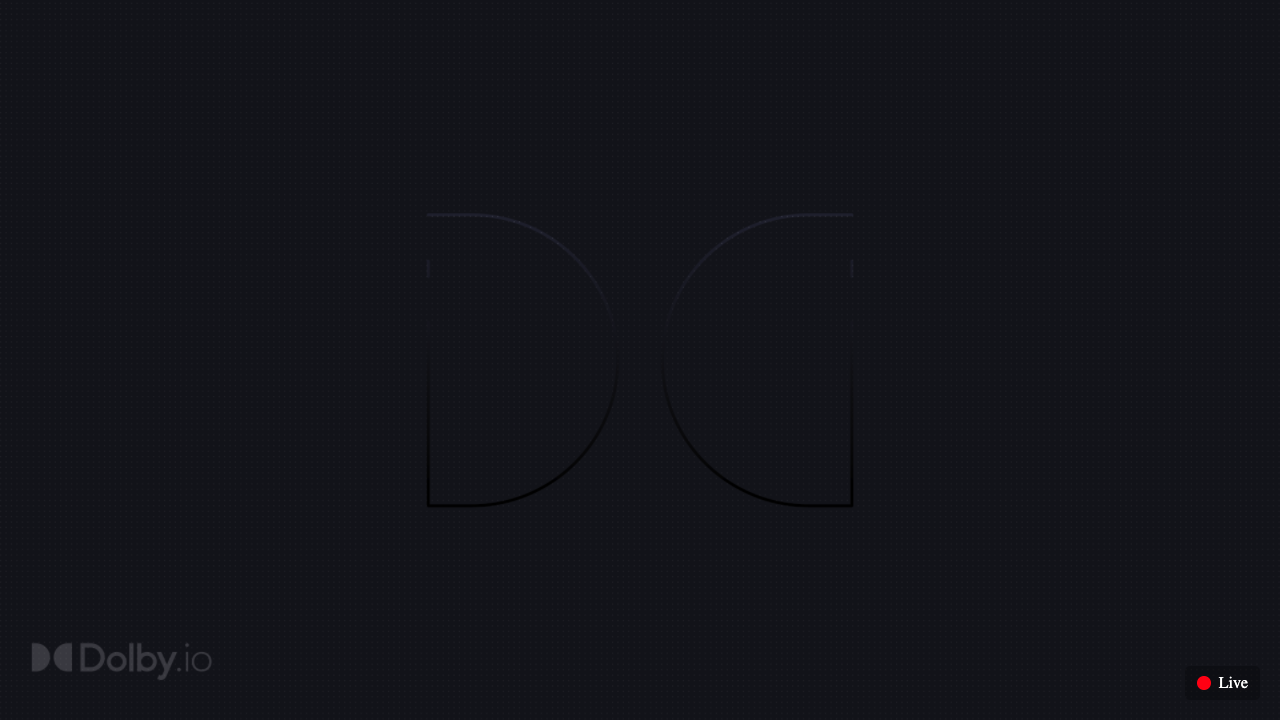
In this example, we use an additional live streaming layout to display a red circle in the bottom corner of the screen to notify users about live streaming.
- In the
index.htmlfile, add the following code sample at the end of the body section:
<div id="live" class="hide">
    <div class="circle"></div>
    <span>Live</span>
</div>
- In the
styles.cssfile, add the following style:
#live {
    position: absolute;
    bottom: 20px;
    right: 20px;
    padding: 8px 12px;
    border-radius: 5px;
    background-color: rgba(0, 0, 0, .25);
    color: white;
}

#live .circle {
    width: 14px;
    height: 14px;
    border-radius: 14px;
    background-color: red;
    float: left;
    margin: 2px 8px 2px 0;
}
- In the
script.jsfile, get a value of thelayoutTypeproperty when the document is ready$(document).ready(() => { });, but before adding theconferenceStartedVoxeetdiv. If the value containsstream, display thelivemessage.
const layoutType = $("layoutType").val();
if (layoutType === "stream") {
    // Display the live message for the live streams
    $('#live').removeClass('hide');
}
The following graphic shows the final live streaming layout:

For reference, see source code at this stage.
Test the layout
We recommend testing the layout before publishing and using another application for tests, for example, the Getting Started application.
-
Create and join a conference using another application.
-
In the
script.jsfile, add the following code at the end of the$(document).ready(() => { });function:
// Initialize the SDK
// Please read the documentation at:
// https://docs.dolby.io/communications-apis/docs/initializing-javascript
// Insert your client access token (from the Dolby.io dashboard) and conference id
const clientAccessToken = "CLIENT_ACCESS_TOKEN";
const conferenceId = "CONFERENCE_ID";

VoxeetSDK.initializeToken(clientAccessToken, (isExpired) => {
    return new Promise((resolve, reject) => {
        if (isExpired) {
            reject('The client access token has expired.');
        } else {
            resolve(clientAccessToken);
        }
    });
});

const mixer = { name: "Test", externalId: "Test" };
const joinOptions = { constraints: { video: false, audio: false } };

// Open a session for Mixer
VoxeetSDK.session.open(mixer)
    .then(() => VoxeetSDK.conference.fetch(conferenceId))
    // Join the conference
    .then((conference) => VoxeetSDK.conference.join(conference, joinOptions))
    .catch((err) => console.error(err));
Remember to set clientAccessToken and conferenceId to the proper values, so the script can successfully join the conference.
-
Record and live stream the conference and check if the layout looks as expected.
-
Remove the added code sample from the
script.jsfile before publishing your application. Mixer automatically inserts the access token to connect the Voxeet SDK to the Dolby.io Communications APIs.
For reference, see source code at this stage.
Publish the layout
- Publish your custom mixer layout application files on your web server.
Note: A simple file storage is sufficient; you do not need to use a backend. However, your files must be publicly available.
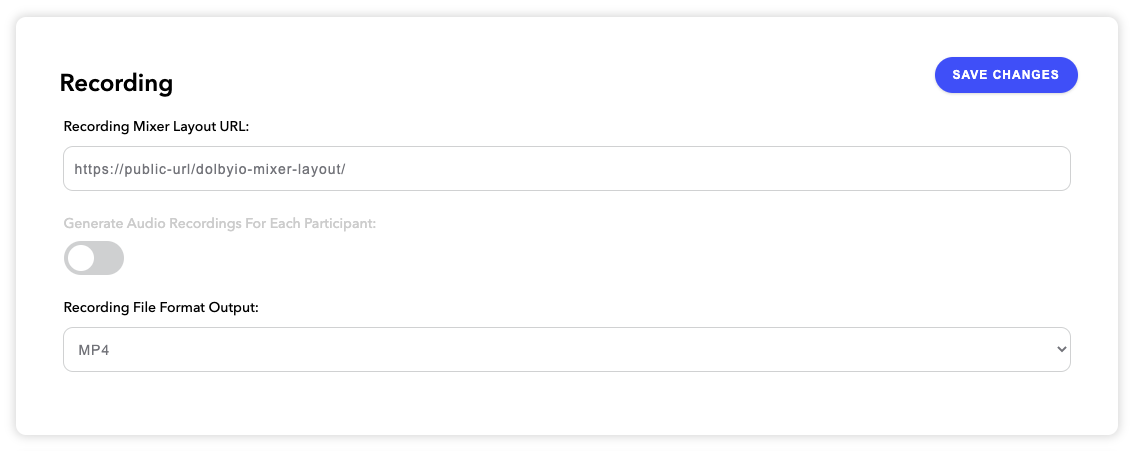
- Go to the Dolby.io dashboard. In the settings of your application, provide the URL of your mixer layout application.

After this step, all your conferences will be recorded and streamed using the provided mixer layout application.
Reference
For more information, see:
- The Recording Conferences article
- Dolby.io Communications APIs Mixer Layout App
- Dolby.io Communications APIs Browser SDK Getting Started App
Updated about 1 year ago