Gstreamer
How-to Broadcast Using Gstreamer with WHIP
GStreamer is a free open-source software project and multimedia framework to build media processing pipelines that support complex workflows. You may want to broadcast over WebRTC from a file on disk or another Real-time Streaming Protocol (RTSP). You can originate the broadcast through GStreamer that ingests the stream utilizing WHIP or forwards with WHEP.
This guide includes a number of examples:
- GStreamer WHIP Examples
- Using the Video Test Source
- Using a Media File on Disk
- Using an RTSP Video Source
- Using Surround Sound Content
- GStreamer WHEP Examples
- Simple WHIP Client
See the official gstreamer.freedesktop.org documentation for installation instructions and additional support.
Get your Dolby.io WHIP publish URL
You will need a WHIP endpoint and Bearer token in order to broadcast. From the Dolby.io Dashboard, navigate to the Publishing tab of your token. Under the Live broadcast - Publish tokens section, retrieve the WHIP endpoint and Bearer token.
Getting Started
If you haven't already, begin by following the Getting Started tutorial to create a Dolby.io application and start your first broadcast.
See the WHIP broadcast guide for more specific instructions on retrieving these values from the Streaming Dashboard.
- WHIP endpoint
- Bearer token
In the examples below, these values are referenced as environment variables. You may need to adjust how you reference these values depending on the specific shell you use when running GStreamer.
Recording Streams
If your token has recordings enabled you will also want to specify the
codecwith the WHIP URL to specify one of the supported recording formats. You can append the query string at the end of the URL such as:https://director.millicast.com/api/whip/{Stream Name}?codec=vp8
Get your Dolby.io WHEP playback URL
The WHEP endpoint is available from the Playback tab of your publish token in the Streaming Dashboard.
It will follow a pattern similar to:
https://director.millicast.com/api/whep/{Account ID}/{Stream Name}
GStreamer
The 1.22.0 release of GStreamer (January 2023) includes support for WebRTC that enables:
- WebRTC HTTP ingest (WHIP) to a MediaServer (whipsink)
- WebRTC HTTP egress (WHEP) from a MediaServer (whepsrc)
The whipsink element can be used to publish a gstreamer pipeline out to a Dolby.io real-time stream. The attributes that must be defined:
auth-token: should be set with your publishing bearer tokenwhip-endpoint: should be set with the Dolby.io WHIP endpoint
The [autovideosink](https://gstreamer.freedesktop.org/documentation/autodetect/autovideosink.html?gi-language=c](https://gstreamer.freedesktop.org/documentation/autodetect/autovideosink.html) element can be used to playback a Dolby.io real-time stream being broadcast into a gstreamer pipeline. The attribute that must be defined:
whep-endpoint: should be set with the Dolby.io WHEP endpoint
You can use the Hosted Viewer and Live Broadcaster to test your setups.
How-to broadcast the video test source
The videotestsrc element can be used to produce a simple test video and has a few patterns. Here is a simple example of a bouncing ball:
gst-launch-1.0 videotestsrc pattern=ball ! videoconvert ! x264enc ! rtph264pay ! \
  whip.sink_0 audiotestsrc wave=5 ! audioconvert ! opusenc ! rtpopuspay ! \
  whip.sink_1 whipsink name=whip \
  auth-token=$DOLBYIO_BEARER_TOKEN \
  whip-endpoint=$DOLBYIO_WHIP_ENDPOINT
Video test source with audio
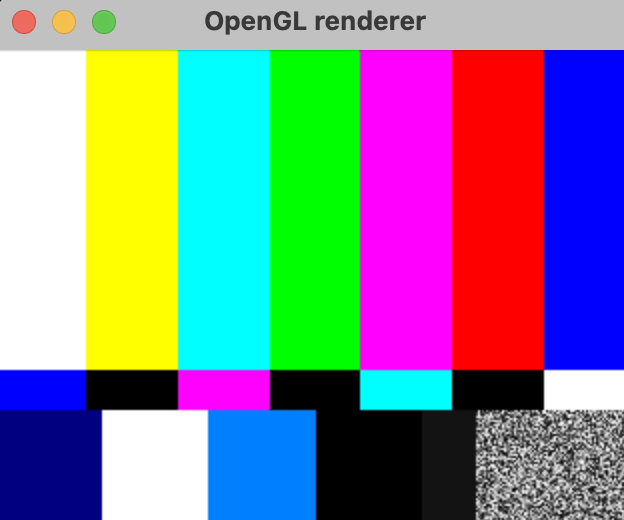
The default videotestsrc shows a more complex stream that includes audio and a color test. To view this locally run gst-launch-1.0 videotestsrc ! autovideosink:
In order to stream this video test variation you need to specify some additional steps for the audio encode settings:
gst-launch-1.0 videotestsrc ! videoconvert ! x264enc ! rtph264pay ! \
  'application/x-rtp,media=video,encoding-name=H264,payload=97,clock-rate=90000' ! \
  whip.sink_0 audiotestsrc wave=5 ! audioconvert ! opusenc ! rtpopuspay ! \
  'application/x-rtp,media=audio,encoding-name=OPUS,payload=96,clock-rate=48000,encoding-params=(string)2' ! \
  whip.sink_1 whipsink name=whip auth-token=$DOLBYIO_BEARER_TOKEN \
  whip-endpoint=$DOLBYIO_WHIP_ENDPOINT
You can watch these streams from a playback viewer.
How-to broadcast the audio-only test source
The audiotestsrc element can be used to produce a simple test of audio-only streaming. Here's an example:
gst-launch-1.0 audiotestsrc wave=sine !
    audioconvert ! opusenc ! rtpopuspay !
    'application/x-rtp,media=audio,encoding-name=OPUS,payload=96,clock-rate=48000,encoding-params=(string)2' !
    whipsink name=whip auth-token=$DOLBYIO_BEARER_TOKEN \
    whip-endpoint=$DOLBYIO_WHIP_ENDPOINT
How-to broadcast a media file
Instead of using the video test source, this example demonstrates reading and looping a media file from disk using the multifilesrc element. You can find example media to try this with such as Big Buck Bunny
Using a specific codec
If there is a requirement to use a specific codec such as with recordings you should use the codec query parameter of the WHIP endpoint.
gst-launch-1.0 multifilesrc location=bbb_sunflower_1080p_30fps_normal.mp4 loop=true ! \
  qtdemux ! decodebin ! videorate ! videoconvert ! timeoverlay ! \
  video/x-raw,format='(string)I420' ! vp9enc target-bitrate=4000000 keyframe-max-dist=2 deadline=1 \
  end-usage=1 cpu-used=8 lag-in-frames=0 ! video/x-vp9,profile='(string)0' ! \
  rtpvp9pay pt=100 ssrc=2 ! \
  whipsink name=whip auth-token=$DOLBYIO_BEARER_TOKEN \
  whip-endpoint=$DOLBYIO_WHIP_ENDPOINT?codec=vp9
Using audio-only MP3 file with custom encoding
This example demonstrates using opusenc with additional configured encoding options. These can also be omitted to use the defaults.
gst-launch-1.0 multifilesrc location=bbb_sunflower_1080p_30fps_normal.mp4 loop=true ! \
  qtdemux ! decodebin ! videorate ! videoconvert ! timeoverlay ! \
  video/x-raw,format='(string)I420' ! vp9enc target-bitrate=4000000 keyframe-max-dist=2 deadline=1 \
  end-usage=1 cpu-used=8 lag-in-frames=0 ! video/x-vp9,profile='(string)0' ! \
  rtpvp9pay pt=100 ssrc=2 ! \
  whipsink name=whip auth-token=$DOLBYIO_BEARER_TOKEN \
  whip-endpoint=$DOLBYIO_WHIP_ENDPOINT?codec=vp9
How-to broadcast a RTSP video source
This example demonstrates using a RTSP source such as with an IP camera while
gst-launch-1.0 rtspsrc location="rtsp://192.168.1.168/0" latency=0 name=rtsp ! \
  rtph264depay ! rtph264pay config-interval=-1 ! \
  application/x-rtp,media=video,encoding-name=H264 ! \
  whipsink name=whip auth-token=$DOLBYIO_BEARER_TOKEN \
  whip-endpoint=$DOLBYIO_WHIP_ENDPOINT
Source with Opus audio
You can ingest with support for an audio codec such as Opus:
gst-launch-1.0 rtspsrc location="rtsp://192.168.1.168/0" latency=0 \
  ! decodebin ! `application/x-rtp,media=video,encoding-name=H264` ! \
  rtph264pay config-interval=-1 name=rtsp rtsp. ! \
  decodebin ! audioconvert ! audioresample ! \
  audiobuffersplit output-buffer-duration=2/50 ! opusenc ! \
  rtpopuspay ! application/x-rtp,media=audio,encoding-name=OPUS,payload=100 ! \
  whipsink name=whip auth-token=$DOLBYIO_BEARER_TOKEN \
  whip-endpoint=$DOLBYIO_WHIP_ENDPOINT
How-to broadcast audio in surround sound
You can broadcast media files that include surround sound audio.
Using 5.1 source media
gst-launch-1.0 multifilesrc location=big_buck_bunny_720p_surround.avi loop=true ! \
  decodebin name=decoder ! queue ! video/x-raw ! \
  videoconvert ! queue ! video/x-raw,format='(string)I420' ! \
  vp9enc target-bitrate=6000000 keyframe-max-dist=24 deadline=1 end-usage=1 cpu-used=8 lag-in-frames=0 ! \ video/x-vp9,profile='(string)0' ! \
  rtpvp9pay pt=100 ssrc=2 ! queue ! \
  whipsink name=ws use-link-headers=true auth-token=$DOLBYIO_BEARER_TOKEN \
  whip-endpoint=$DOLBYIO_WHIP_ENDPOINT?codec=vp decoder. ! queue ! audio/x-raw,rate=48000,channels=6 ! \
  decodebin ! audioconvert ! opusenc ! rtpopuspay ! queue ! ws.
Simple WHIP client
The Simple WHIP client is an open-source implementation of a WHIP client that can be useful for testing. It requires a build of the C libraries including GStreamer.
You can find more details on the GitHub project:
https://github.com/meetecho/simple-whip-client
Testing your setup
First test your setup by using a video test source to a WHIP GStreamer pipeline.
Note: If you have recording enabled, you will need to add ?codec=h264.
For the example below, if recording is enabled: https://director.millicast.com/api/whip/streamName and ?codec=vp8.
./whip-client -u https://director.millicast.com/api/whip/kxhqovek \
-t 09598571d36bc70dd59871be7a322d0fd688d05decbd619db88ced1f780987a7 \
-V "videotestsrc is-live=true pattern=ball ! videoconvert ! queue !
    vp8enc deadline=1 ! rtpvp8pay pt=96 ssrc=2 ! queue !
    application/x-rtp,media=video,encoding-name=VP8,payload=96"
If everything is correct, you should see a command output like this:

And if you connect to the viewer, a bouncing ball will be shown:

Publishing an RTSP video-only source
Now, to connect to an RTSP source like an axis camera, you need to replace the GStreamer pipeline with one that connects to the Camera and passes the video data to Dolby.io Real-time Streaming without transcoding the content.
./whip-client -u https://director.millicast.com/api/whip/kxhqovek \
  -t  09598571d36bc70dd59871be7a322d0fd688d05decbd619db88ced1f780987a7 \
  -V "rtspsrc location=rtsp://98.100.xxx.xxx:5545/axis-media/media.amp latency=0 name=rtsp !
      rtph264depay ! rtph264pay config-interval=-1 !
      application/x-rtp,media=video,encoding-name=H264"
Publishing an RTSP audio and video source
If your camera also supports audio, you just need to add the GStreamer audio pipeline:
./whip-client -u https://director.millicast.com/api/whip/kxhqovek \
  -t 09598571d36bc70dd59871be7a322d0fd688d05decbd619db88ced1f780987a7 \
  -A "rtsp. ! decodebin ! audioconvert ! audioresample !
      audiobuffersplit output-buffer-duration=2/50 ! queue ! opusenc !
      rtpopuspay pt=100 ssrc=1 ! queue !
      application/x-rtp,media=audio,encoding-name=OPUS,payload=100" \
  -V "rtspsrc location=rtsp://98.100.xxx.xxx:5545/axis-media/media.amp latency=0 name=rtsp !
      rtph264depay ! rtph264pay config-interval=-1 !
      application/x-rtp,media=video,encoding-name=H264"
Publishing an RTSP source with authentication
Finally, if your setup requires authentication, pass the username and password to the GStreamer RTSP plugin
./whip-client -u https://director.millicast.com/api/whip/kxhqovek \
	-t 09598571d36bc70dd58971be7a322d0fd688d05decbd619db88ced1f780987a7
	-A "rtsp. ! decodebin ! audioconvert ! audioresample !
      audiobuffersplit output-buffer-duration=2/50 ! queue ! opusenc !
      rtpopuspay pt=100 ssrc=1 ! queue !
      application/x-rtp,media=audio,encoding-name=OPUS,payload=100" \
  -V "rtspsrc location="rtsp://admin:[email protected]:855/live latency=0 name=rtsp
      user-id=admin user-pw=admin ! rtph264depay ! rtph264pay config-interval=-1 !
      application/x-rtp,media=video,encoding-name=H264"
Updated 11 months ago