Securing Stream Playback
Securing the playback of your Broadcast is one of the most important features provided by the Dolby.io platform. Although securing your stream is optional, it is highly recommended for broadcasts that are non-public or paywalled.
To view a secured stream you first need to create a Subscribe token. With your Subscribe token in hand, you can then use it to authenticate a connection and view the broadcast. This guide outlines how to create a token and how to view a secure stream.
Creating a subscribe token to playback a secure stream
To secure broadcast playback, you need to enable the Secure Viewer setting when creating a Publishing token. For more information on enabling Secure Viewer, explore the Creating a Publishing Token guide.
Subscribe tokens are used to authenticate access to a "Secure stream". When enabled, streams that require a Subscribe token will block access to users not in possession of a valid token coming from a valid domain. Subscribe tokens also allow you to add time limits, specify IPs, and even set the token to only work from single or multiple specified domains. Even though restricting access to streamed content in selected geo-locations is possible using the publish token, the subscribe token lets you add additional geo-blocking rules.
To create a Subscribe token, follow the Creating a Subscribe Token guide, which outlines how to create a token in the Dolby.io dashboard, or the Token API guide which outlines how to create tokens programmatically. Once created, your token will be a string of alphanumeric characters looking something like the following:
fff04a5a1c02b2b8d48a9133e8461985aa482066cc3e9ed487baaac89588e26f
With your token in hand, proceed to Viewing a Secured Stream.
Viewing a secured stream
There are two main ways you can use the Subscribe token:
- To view a stream via the Dolby.io Hosted Viewer.
- To view a stream via your own streaming app.
Viewing a secured stream with the hosted viewer
Playing back with the Hosted Viewer is a common way to test the Dolby.io platform. If you haven't already tested out the Hosted Viewer it is recommended you explore the Hosted Viewer Playback guide.
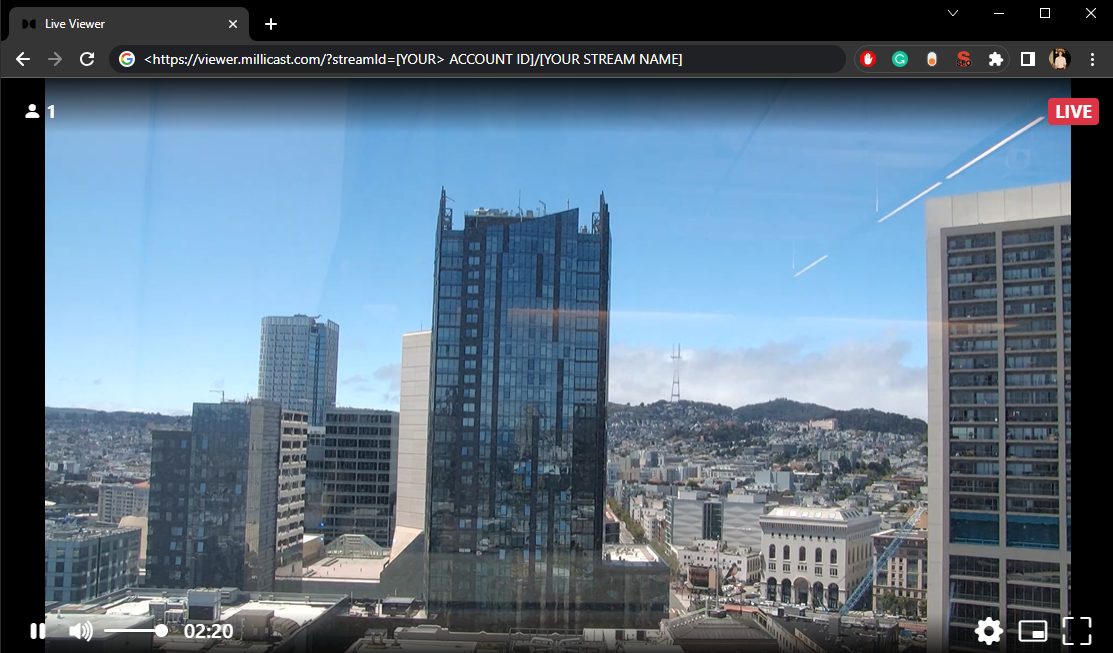
When an unsecured stream is live, you'll be able to view the broadcast at:
https://viewer.millicast.com/?streamId=[YOUR ACCOUNT ID]/[YOUR STREAM NAME]
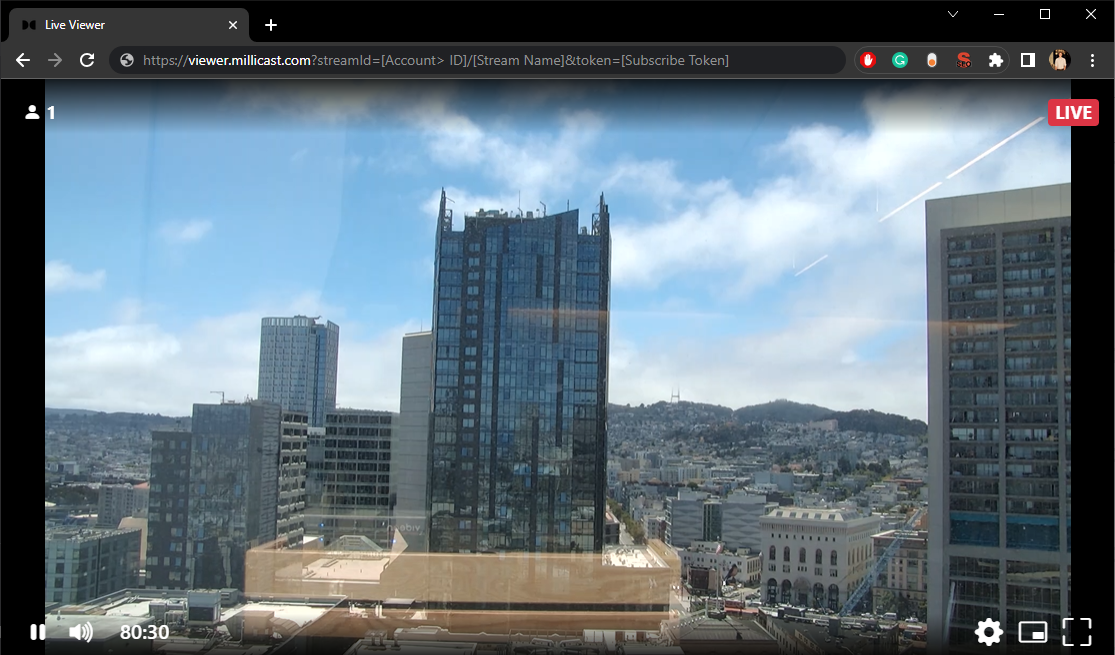
When a stream is secured, you'll only be able to view the broadcast with a valid Subscribe token. This can be done in browser with the Hosted Viewer by appending a token flag to the URL:
https://viewer.millicast.com?streamId=[Account ID]/[Stream Name]&token=[Subscribe Token]
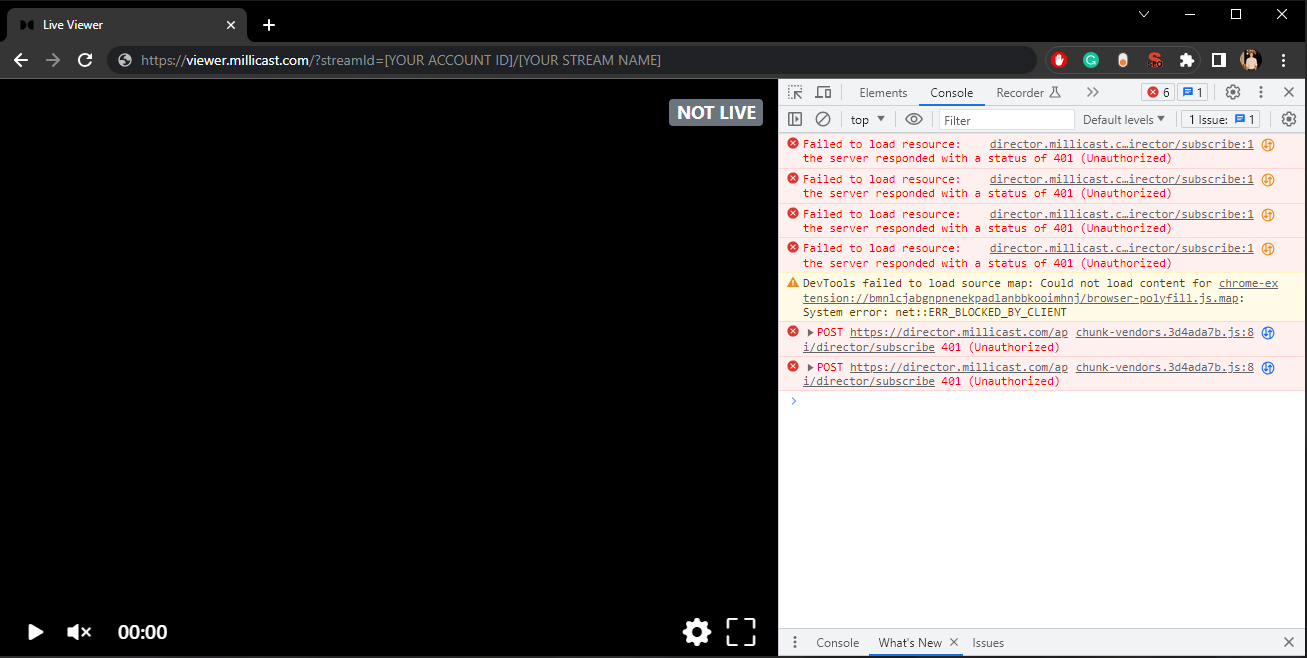
If you attempt to join the stream without a valid Subscribe token, you'll receive a 401 Unauthorized error:
Subscribe token exposed in the URL
For both the Embedded Viewer and the Hosted Viewer the Subscribe token is exposed in the URL. Unless your are using IP filtering, users can share the URL and by extention the stream itself. To prevent this, each user should be served a Subscribe token unique to them. To learn about how to acomplish this continue to Preventing Stream Sharing with Subscribe Tokens.
Viewing a secured stream with the embedded viewer
You can also embed the Dolby.io Hosted Viewer into your webpage as an <iframe></iframe>. To secure the embedded viewer, include the Subscribe token in the iframe:
<iframe src="https://viewer.millicast.com?streamId=[Account ID]/[Stream Name]&token=[Subscribe Token]" allowfullscreen width="640" height="480"></iframe>
Preventing stream sharing with subscribe tokens
Whilst using the Hosted Viewer is a great option, you may have noticed the Subscribe token is exposed in the URL. For a truly secure playback experience, viewers should be served a Subscribe token that is unique to them and can't be shared. This is accomplished with the Binds IP on Usage feature, which binds the Subscribe token to the IP address of the first person who joins the stream with that specific Subscribe token.
For example:
Angelik may be served the stream URL
https://viewer.millicast.com?streamId=DevAcc/WorldCup2023&token=fff04a5a1c02b2b8d48a9133e84619889588e26f
which she uses to join the stream.Because this token has Binds IP on Usage enabled and set to bind to the first IP address, her IP address is saved by the Dolby.io CDN. If Angelik were to then share the URL to Jayson, he would be unable to join the stream since his IP address doesn't match Angelik's.
If Angelik were to leave the stream and return an hour later, she would still be able to join the stream because her IP address is associated with the token.
To learn more about other access control features you can enable for your Subscribe token, check out the Access Control guide.
Viewing secure streams with your own viewer app
Building with the Dolby.io SDKs for the first time?
Check out the Getting Started tutorial for a quick and easy introduction to using the Dolby.io SDKs and platform.
To view a secure stream in your own viewer app, you'll need to create a Subscribe token. Depending on the size of your platform, you may want to create these tokens programmatically using a token server and the Token APIs. This part of the guide gives an example of how to programmatically create a Subscribe token, and how to use it to authenticate a connection to a viewer.
To get started we first need to define a function, getToken to create our Subscribe token. The Create Token API provides a UI to help with defining our API call. Each Subscribe token that our getToken function creates will be associated with a single stream denoted by the streamName, expire after one hour (3600 seconds), and bind to the IP of the first person who connects to the stream with that token. In other words, this token will only grant access to a specific stream, for one hour, and for one user.
async function getToken(streamName, apiSecretKey) {
  const options = {
    method: "POST",
    headers: {
      accept: "application/json, text/plain, */*",
      "content-type": "application/json;charset=utf-8",
      authorization: "Bearer " + apiSecretKey,
    },
    body: JSON.stringify({
      label: streamName,
      streams: [{ isRegex: false, streamName: streamName }],
      expires: 3600,
      bindIpsOnUsage: 1,
    }),
  };

  const response = await fetch(
    "https://api.millicast.com/api/subscribe_token",
    options
  );
  const subscribeToken = await response.json();
  return subscribeToken;
}
Creating Subscribe tokens should take place on a secure server, not in the client-side application. You should create a "Token Server", which serves a Subscribe token to the client-side application, which uses it to connect.
In this case, for demonstration purposes, getToken function will return a Subscribe token, which can then be used for authenticating a connection to Dolby.io along with the streamName and the accID.
const response = await getToken(streamName, apiSecretKey);
const subscribe_token = response["data"]["token"];
console.log("Your Subscribe Token: " + subscribe_token);

const tokenGenerator = () =>
  window.millicast.Director.getSubscriber({
    streamName: streamName,
    streamAccountId: accID,
    subscriberToken: subscribe_token,
  });
Using code from the 2. Create a Streaming Web App tutorial, we can put everything together to create a very basic web app that uses a Subscribe token to view a secure stream.
API Secret
The below example is for demonstration purposes only and should not be used in production. You should never expose your API secret publicly, and should instead set up a token sever to create and manage tokens rather than the client side example below.
<!DOCTYPE html>
<html>
  <head>
    <meta charset="utf-8" />
    <meta name="viewport" content="width=device-width, initial-scale=1.0, shrink-to-fit=no" />

    <title>Dolby.io Getting Started with Streaming Web SDK</title>
    <link rel="shortcut icon" href="https://go.dolby.io/hubfs/Dolby_April2021/images/favicon-32x32.png" />

    <!-- Step 2.1b: Include Millicast Web SDK -->
    <script src="https://cdn.jsdelivr.net/npm/@millicast/sdk/dist/millicast.umd.min.js"></script>

    <!-- Bootstrap Bundle -->
    <link
      href="https://cdn.jsdelivr.net/npm/[email protected]/dist/css/bootstrap.min.css"
      rel="stylesheet"
      integrity="sha384-1BmE4kWBq78iYhFldvKuhfTAU6auU8tT94WrHftjDbrCEXSU1oBoqyl2QvZ6jIW3"
      crossorigin="anonymous"
    />
    <link rel="stylesheet" href="https://cdn.jsdelivr.net/npm/[email protected]/font/bootstrap-icons.css" />
  </head>
  <body>
    <div class="container bg-dark text-white gx-4 px-4 py-4 mt-3 rounded">
      <img src="https://go.dolby.io/hubfs/raw_assets/public/Dolby_April2021/images/dolby-io-logo.svg" />
      <h1>Getting Started with Streaming Web SDK</h1>
    </div>

    <div class="container px-4 mt-4">
      <br />
      <label for="fname">Enter Livestream Account ID:</label>
      <input type="text" id="accID" class="input_box" size="21" /><br /><br />
      <label for="fname">Enter the Livestream Name:</label>
      <input type="text" id="streamName" class="input_box" size="22" /><br /><br />
      <label for="fname">Enter Your API Secret Key:</label>
      <input type="text" id="apiSecretKey" class="input_box" size="24" /><br />
      <i>Your API Secret should never be shared publicly, this is just to showcase how to create a subscribe token!</i><br /><br />
      <button id="startBtn" onclick="connectStream()">Start Stream</button><br /><br />
      <div class="row justify-content-around mt-3">
        <div class="col-8 shadow p-3 mb-5 bg-body rounded text-center">
          <h1>Playback</h1>
          <video
            width="640"
            height="360"
            id="streaming-video-placeholder"
            class="vidBox"
            controls
          >
            This browser does not support video playback.
          </video>
        </div>
      </div>
    </div>

    <!-- Bootstrap Bundle -->
    <script
      src="https://cdn.jsdelivr.net/npm/[email protected]/dist/js/bootstrap.bundle.min.js"
      integrity="sha384-ka7Sk0Gln4gmtz2MlQnikT1wXgYsOg+OMhuP+IlRH9sENBO0LRn5q+8nbTov4+1p"
      crossorigin="anonymous"
    ></script>

    <!-- Dolby.io Starter Application -->
    <script type="text/javascript">
      async function connectStream() {
        // Get your text box inputs
        const accID = document.getElementById("accID").value;
        const streamName = document.getElementById("streamName").value;
        const apiSecretKey = document.getElementById("apiSecretKey").value;

        // Get Subscribe Token
        async function getToken(accID, streamName, apiSecretKey) {
          const options = {
            method: "POST",
            headers: {
              accept: "application/json, text/plain, */*",
              "content-type": "application/json;charset=utf-8",
              authorization: "Bearer " + apiSecretKey,
            },
            body: JSON.stringify({
              label: streamName,
              streams: [{ isRegex: false, streamName: streamName }],
              expires: 3600,
              bindIpsOnUsage: 1,
            }),
          };
          const response = await fetch(
            "https://api.millicast.com/api/subscribe_token",
            options
          );
          const subscribe_token = await response.json();
          return subscribe_token;
        }
        const response = await getToken(streamName, apiSecretKey);
        const subscribe_token = response["data"]["token"];
        console.log("Your Subscribe Token: " + subscribe_token);

        const tokenGenerator = () =>
          window.millicast.Director.getSubscriber({
            streamName: streamName,
            streamAccountId: accID,
            subscriberToken: subscribe_token,
          });

        // Step 2.1d: Attach a millicast view to the placeholder node
        const videoNode = document.getElementById(
          "streaming-video-placeholder"
        );
        const millicastView = new millicast.View(streamName, tokenGenerator);
        millicastView.on("track", (event) => {
          console.log("Stream has started.");
          videoNode.srcObject = event.streams[0];
          videoNode.hidden = false;
          videoNode.autoplay = true;
        });

        // Step 2.1e: Start connection to a publishing stream
        try {
          const options = {};
          await millicastView.connect(options);
        } catch (e) {
          if (!millicastView.isActive()) {
            console.log("Stream is not live, the broadcast will begin soon.");
          }

          console.log("Connection failed: ", e);
          millicastView.reconnect();
        }
      }
    </script>
  </body>
</html>
When you run the web app, you'll see three text boxes to input an account ID, Livestream Name, and API Secret key.
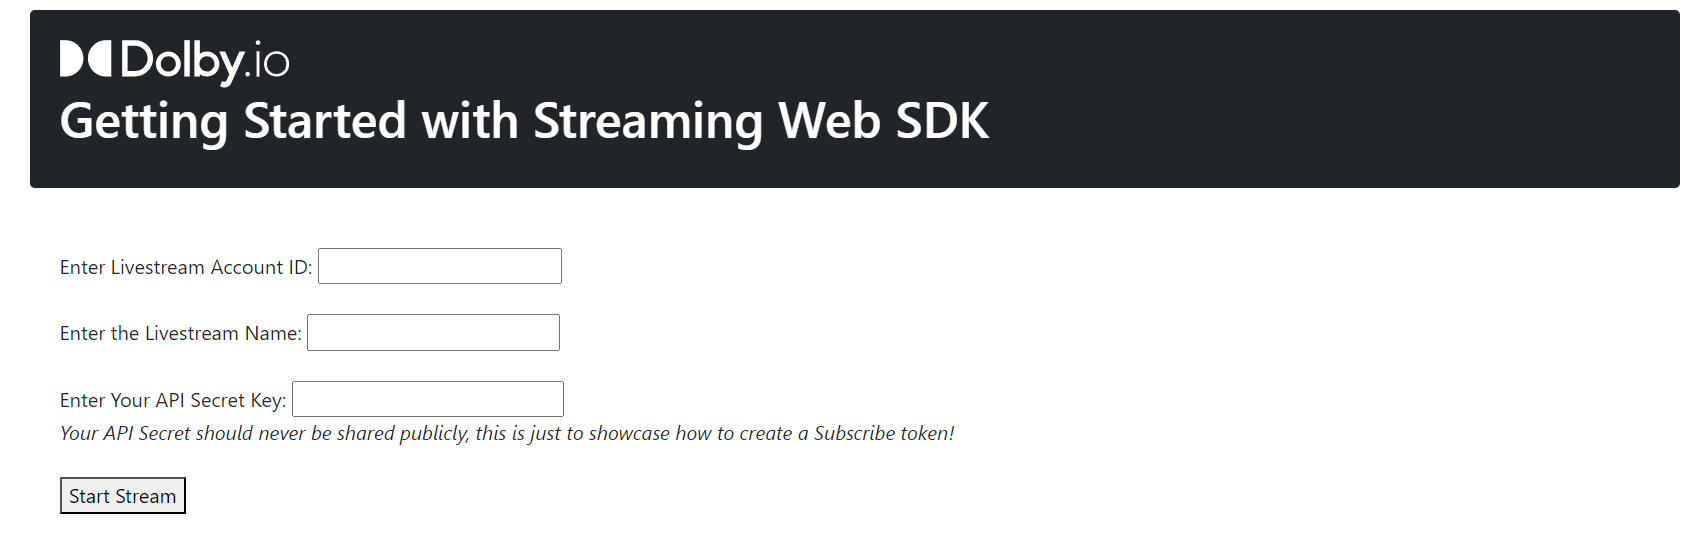
Start a secure broadcast, then add the values into the text box. The app will create a Subscribe token and use it to connect to the stream.
Troubleshooting
400 (Bad Request)
When you try to connect to a stream that has not yet begun to broadcast, you may see a 400 (Bad Request) error. This is expected, so you will want to create a user experience that does not attempt to connect() prematurely, by first checking if a broadcast has begun.
401 (Unauthorized)
This error occurs if the Subscribe token, Account ID, or Stream Name is incorrect when attempting to join a stream. Check that you are correctly creating a Subscribe token, and using the correct Stream Name and Account ID.
CORS related errors
When testing locally, you may encounter a Cross-Origin Resource Sharing or CORS error. This error is related to browser security and resource sharing and typically occurs because you requested resources without the appropriate headers. To proceed it is recommended that you learn more about CORS.
Updated over 1 year ago