Unreal Publisher Plugin
Dolby.io Real-time Streaming Publisher Plugin for Unreal Engine
- Supported Unreal Engine version 5.1
- Supported Unreal Engine version 5.0.3
- Supported Unreal Engine version 4.27
- Supported on Windows and Linux
- Version 1.6.0
This plugin enable to publish game audio and video content to the Dolby.io Real-time Streaming. You can configure your credentials and configure your game logic using unreal object, capture and publish from virtual camera.
The publisher plugin supports VP8, VP9, or H264 video encoding on supported platforms when available.
Installation
You can install the plugin from the source code, using the following steps:
- Create a project with the UE editor
- Close the editor
- Go at the root of your project folder (C:\Users\User\Unreal Engine\MyProject)
- Create a new directory "Plugins" and change to this directory
- Clone the Millicast repository:
git clone https://github.com/millicast/millicast-publisher-unreal-engine-plugin.git MillicastPublisher - Open your project with UE
You will be prompted to re-build MillicastPublisher plugin. Click "Yes".
You are now in the editor and can build your game using MillicastPublisher.
Note: After you package your game, it is possible that you will get an error when launching the game:
"Plugin MillicastPublisher could not be load because module MillicastPublisher has not been found"
Then, the game fails to launch. This is because Unreal has excluded the plugin. If this is the case, create an empty C++ class in your project. This will force Unreal to include the plugin. Then, re-package the game, launch it, and the issue should be fixed.
Enable the plugin
To enable the plugin, open the plugin manager in Edit > Plugins.
Then search for MillicastPublisher. It is in the category "Media". Tick the "enabled" checkbox to enable the plugin. It will prompt you if you are sure to use this plugin, because it is in beta. Click "Accept". After that Unreal will reboot in order to load the plugins.
If it is already enabled, just leave it as is.
Set up the publishing in the editor
Basically, you have several Unreal objects to configure in order to publish a stream from your game to Dolby.io Real-time Streaming.
We will see first how to create a Dolby.io Real-time Streaming source, set up your credentials, and add video/audio source, and then how to use the blueprint to implement the logic of the game.
MillicastPublisherSource
The MillicastPublisherSource object allows you to configure your Dolby.io Real-time Streaming credentials and manage the video and audio sources you want to publish to Millicast. To add a MillicastPublisherSource, add a new asset by clicking "Add/Import", and you will see the object in the "Media" category.
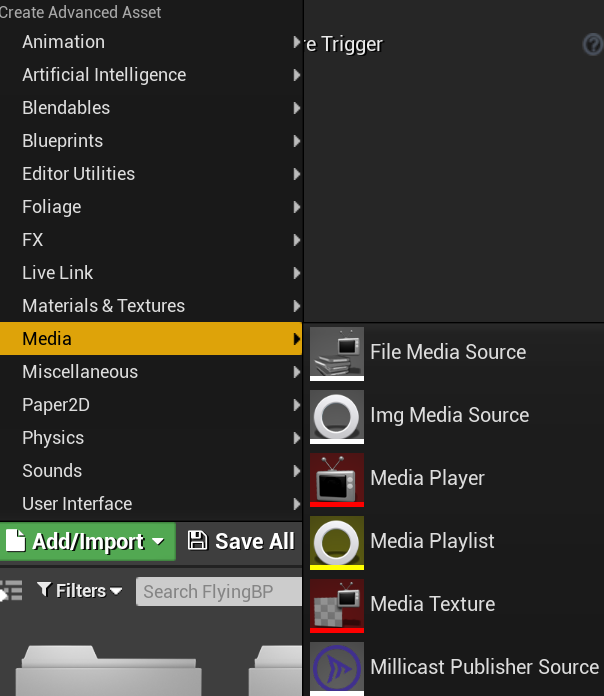
Then, you can double-click on the newly created asset to configure it.
First, you have the Dolby.io Real-time Streaming credentials:
- The stream name you want to publish to
- Your publishing token
- The source id. For now you can leave this field blank; we will see how to use it to configure multisource.
- The publish API URL, which usually is https://director.millicast.com/director/api/publish
You can find all this information in your Dolby.io dashboard.
Below, you can see that we can configure the video and audio sources. Both have a checkbox, to tell whether you want to disable it or not.
We will see in next section how to configure video and audio source.
Video
For the video capture, you can either capture the game screen or capture from a render target 2D object. Capturing from a device (e.g. webcam) is not yet supported.
SlateWindow capturer
In the video source section, you can see a field named "RenderTarget". This is to specify a specific render target, if set to none, it will create a Slate Window capturer, which is basically a screen capture of the game.
For example, if you launch the game from the editor, you will get this kind of output:
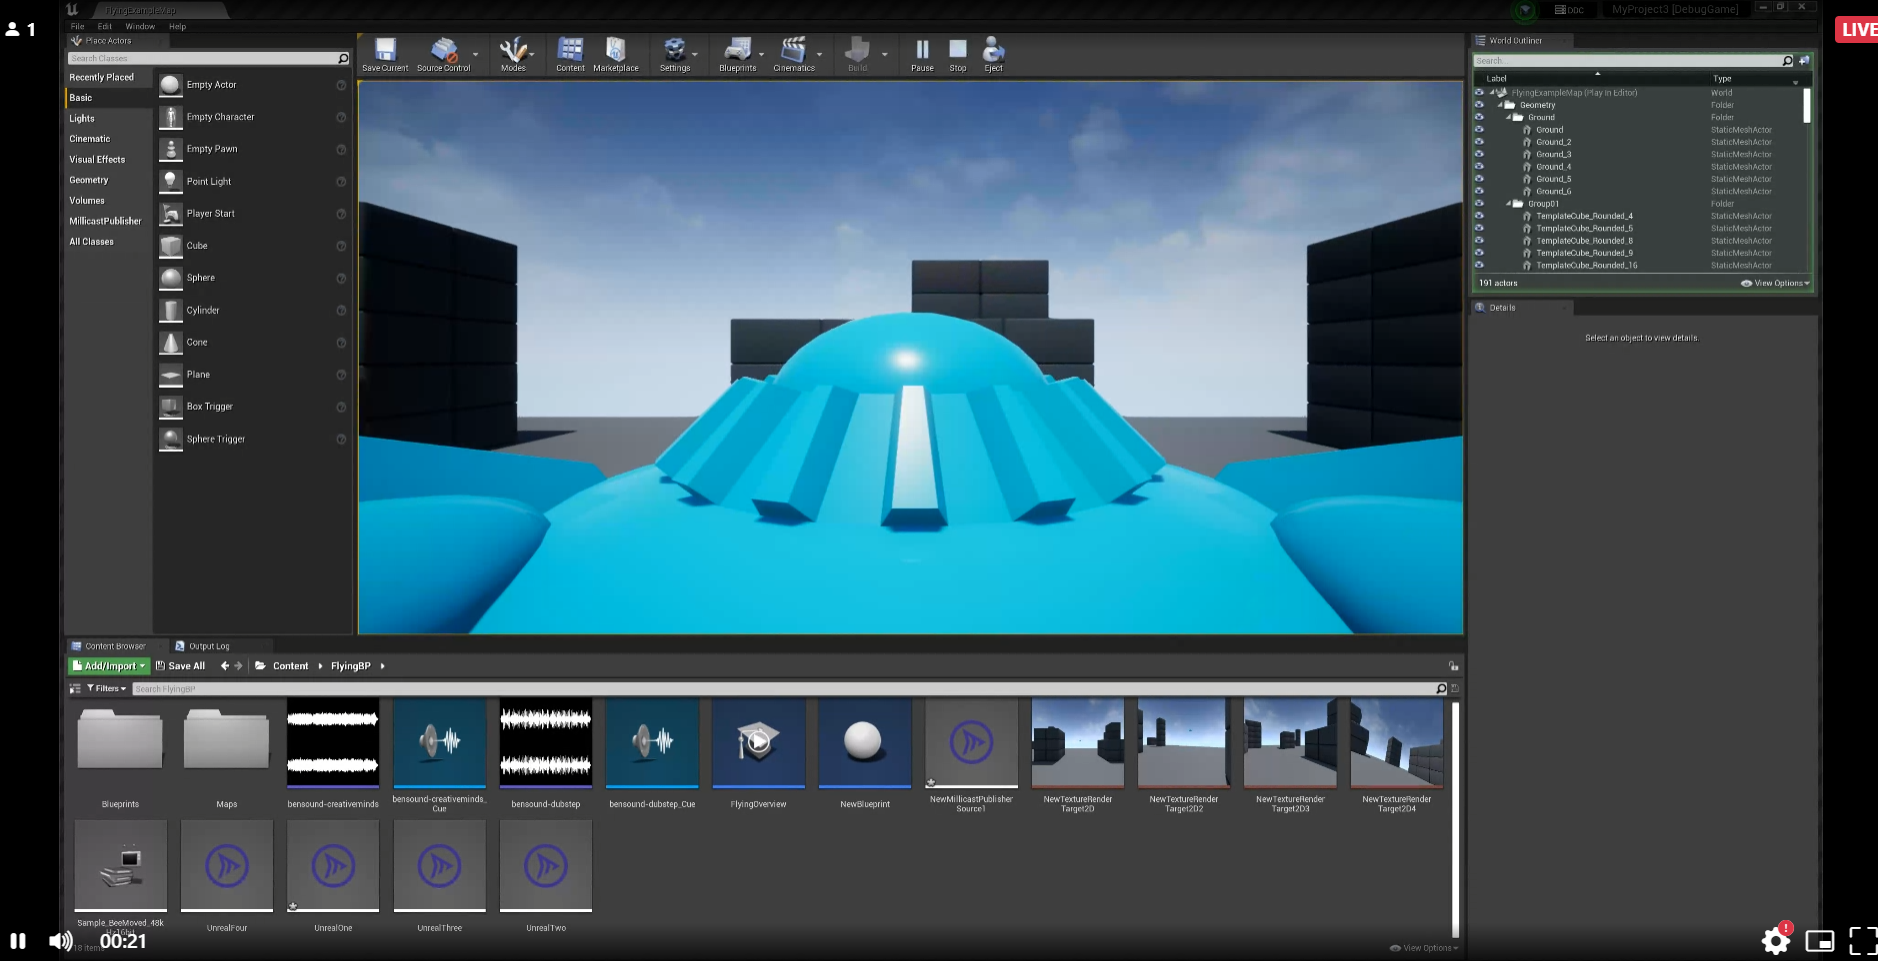
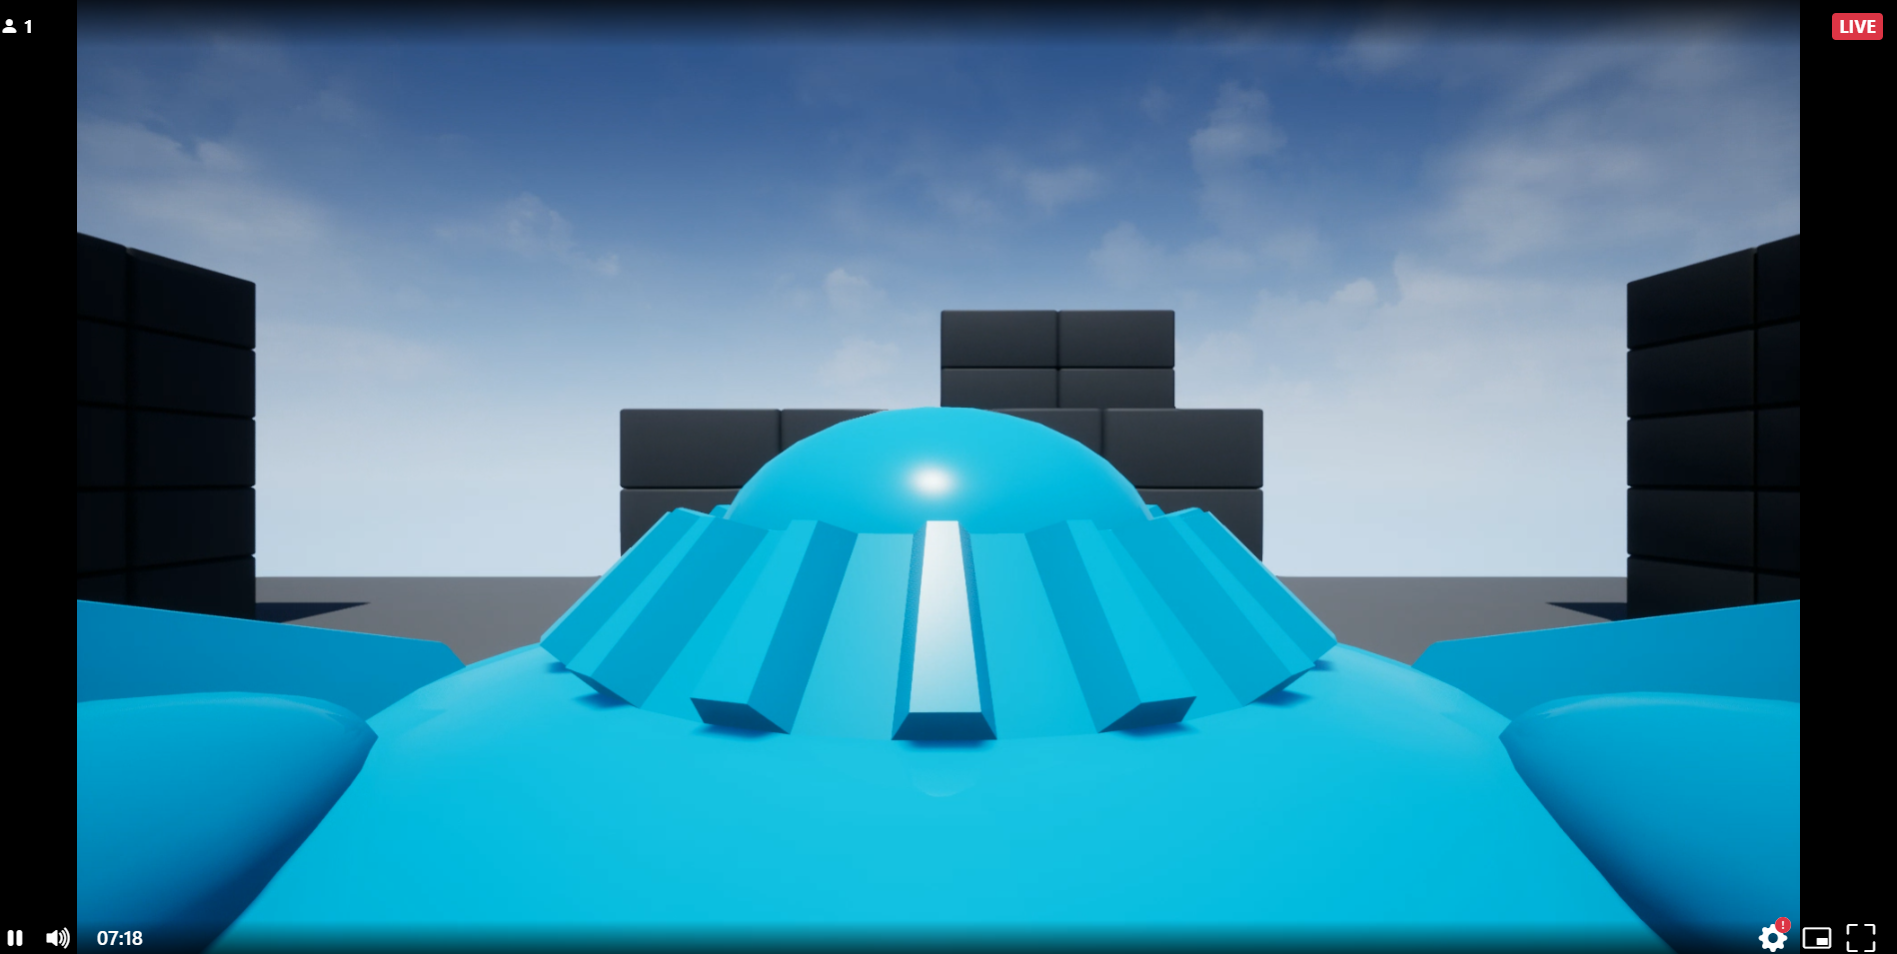
If launch from the game you can get this output. Also, if you log some messages you will see it in the stream.
Virtual camera: SceneCapture2D and RenderTarget
Now, we will see how to use a specific render target. This allows you to set up a virtual camera in your game and capture the scene under a different angle and position.
To do so, start by adding "Scene Capture 2D" actor to the level.
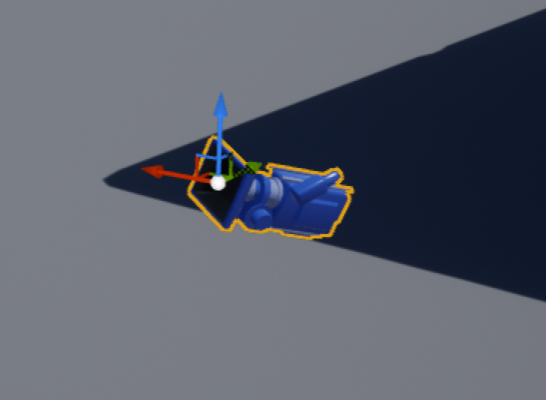
Select it and, in the parameters create a "Render target 2D".
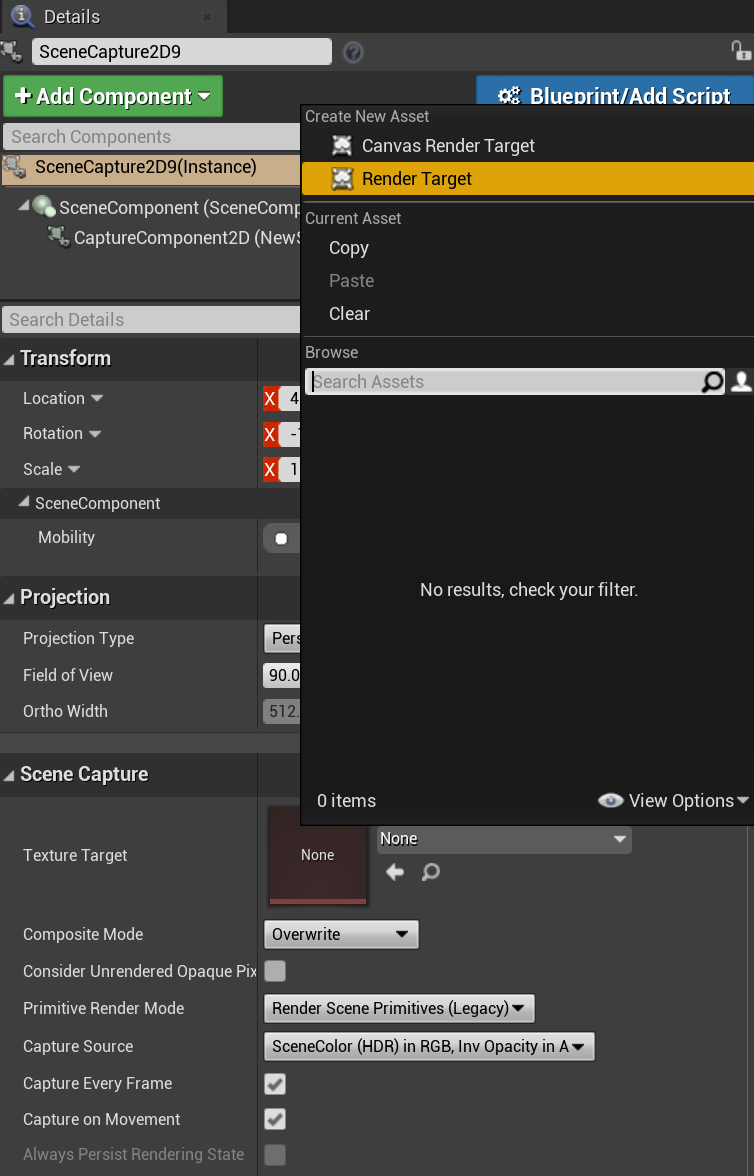
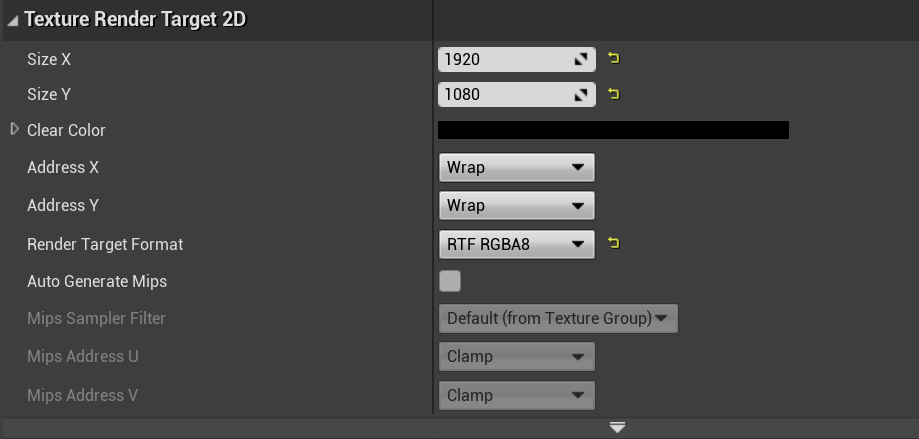
Save the render target in your assets and then double click on it to open its settings.
You can modify the size as you wish, for instance 1920x1080. Then, set the render target format to RTF RGBA8.
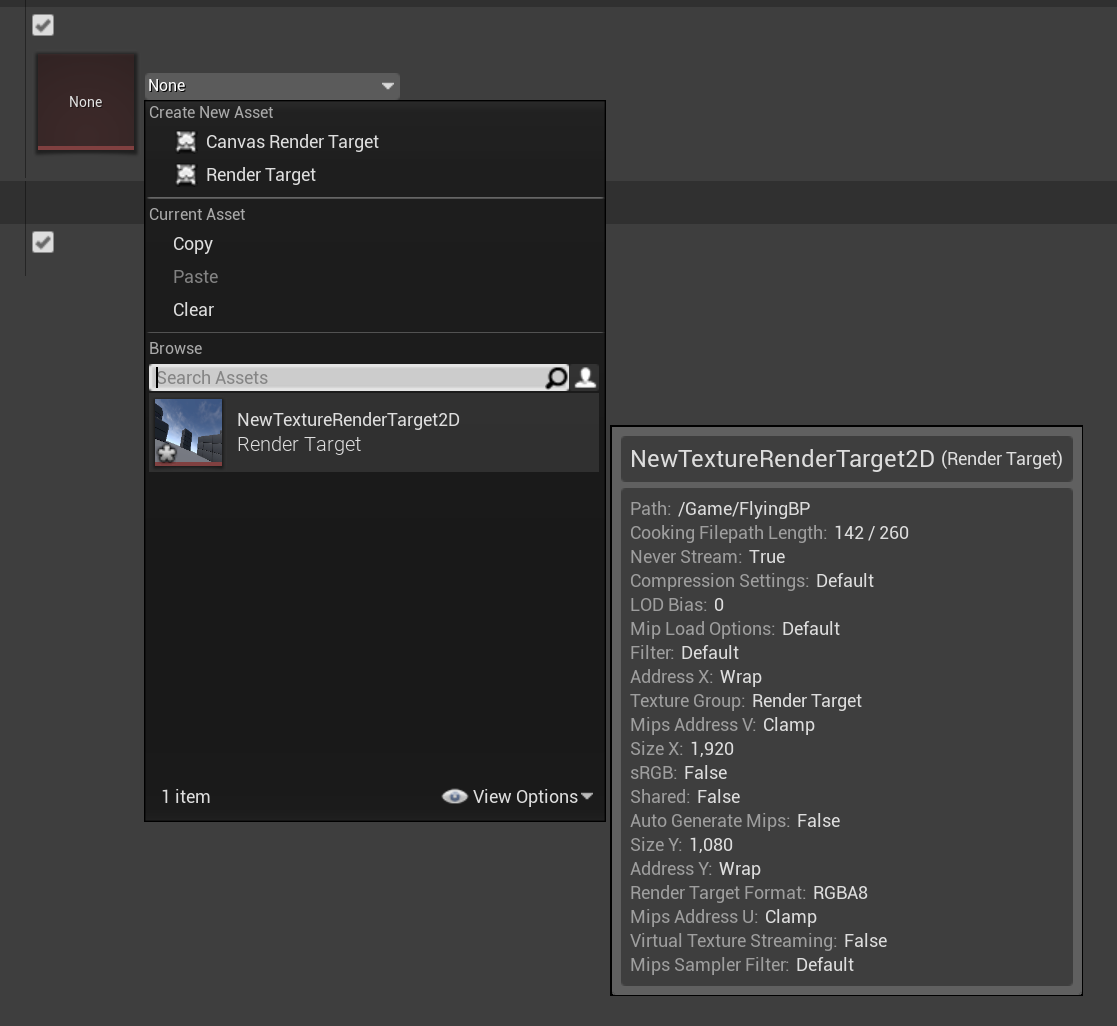
Finally, go back to the Millicast Publisher source and set this render target.
Virtual camera: Millicast Camera actor
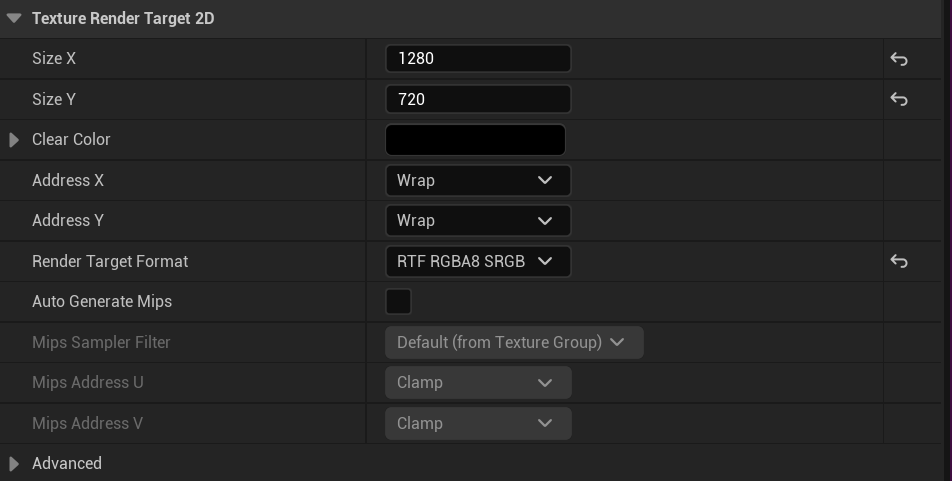
The plugin also has its own camera actor that allows you to capture the scene, which is a SceneCapture2D with some presets.You may encounter some color issue when using a SceneCapture2D. When you publish the game content, and are not viewing in an unreal game (in the web viewer for instance), the image may appear darker. In order to fix this color issue, you just need to go in your RenderTarget settings and change the render target format to RTF RGBA8 sRGB.
You can set the capture size and a RenderTarget2D to capture from this camera.
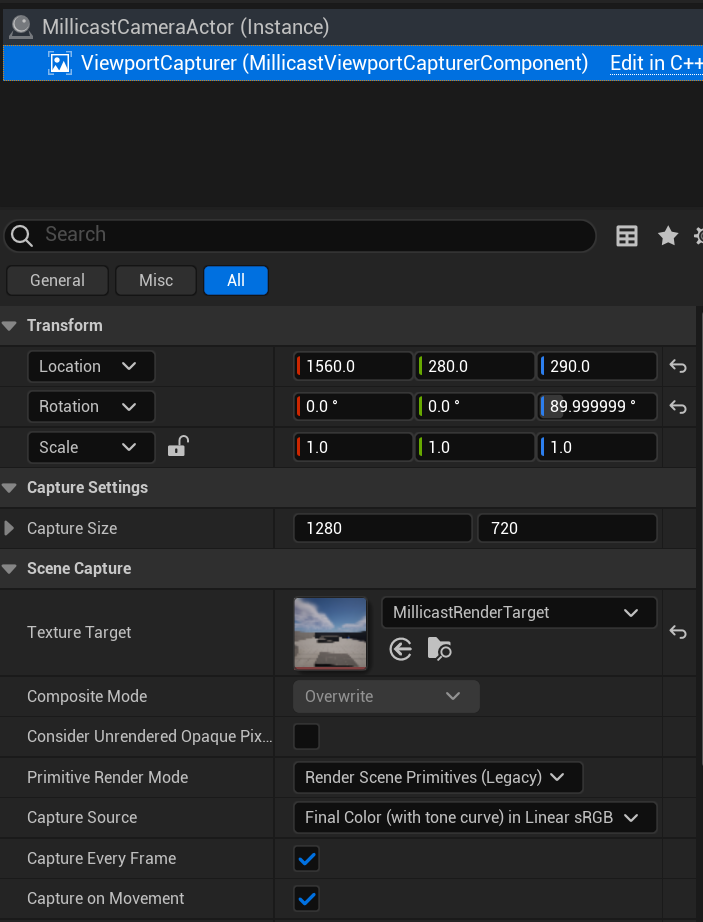
Capturing from the millicast camera object or from a capture scene can take some CPU. So, if you have multiple camera in your scene, it might be good to deactivate the cameras that are not used for publishing, and activate only those actually capturing to save some CPU load.
Audio capture
You can capture either the audio from the game or audio coming from a device (e.g. microphone, audio driver).
To choose if you want to capture from a submix object or from a device, you can select "Submix" or "device" from "audio capture type" in the audio section.
Audio capture from Submix
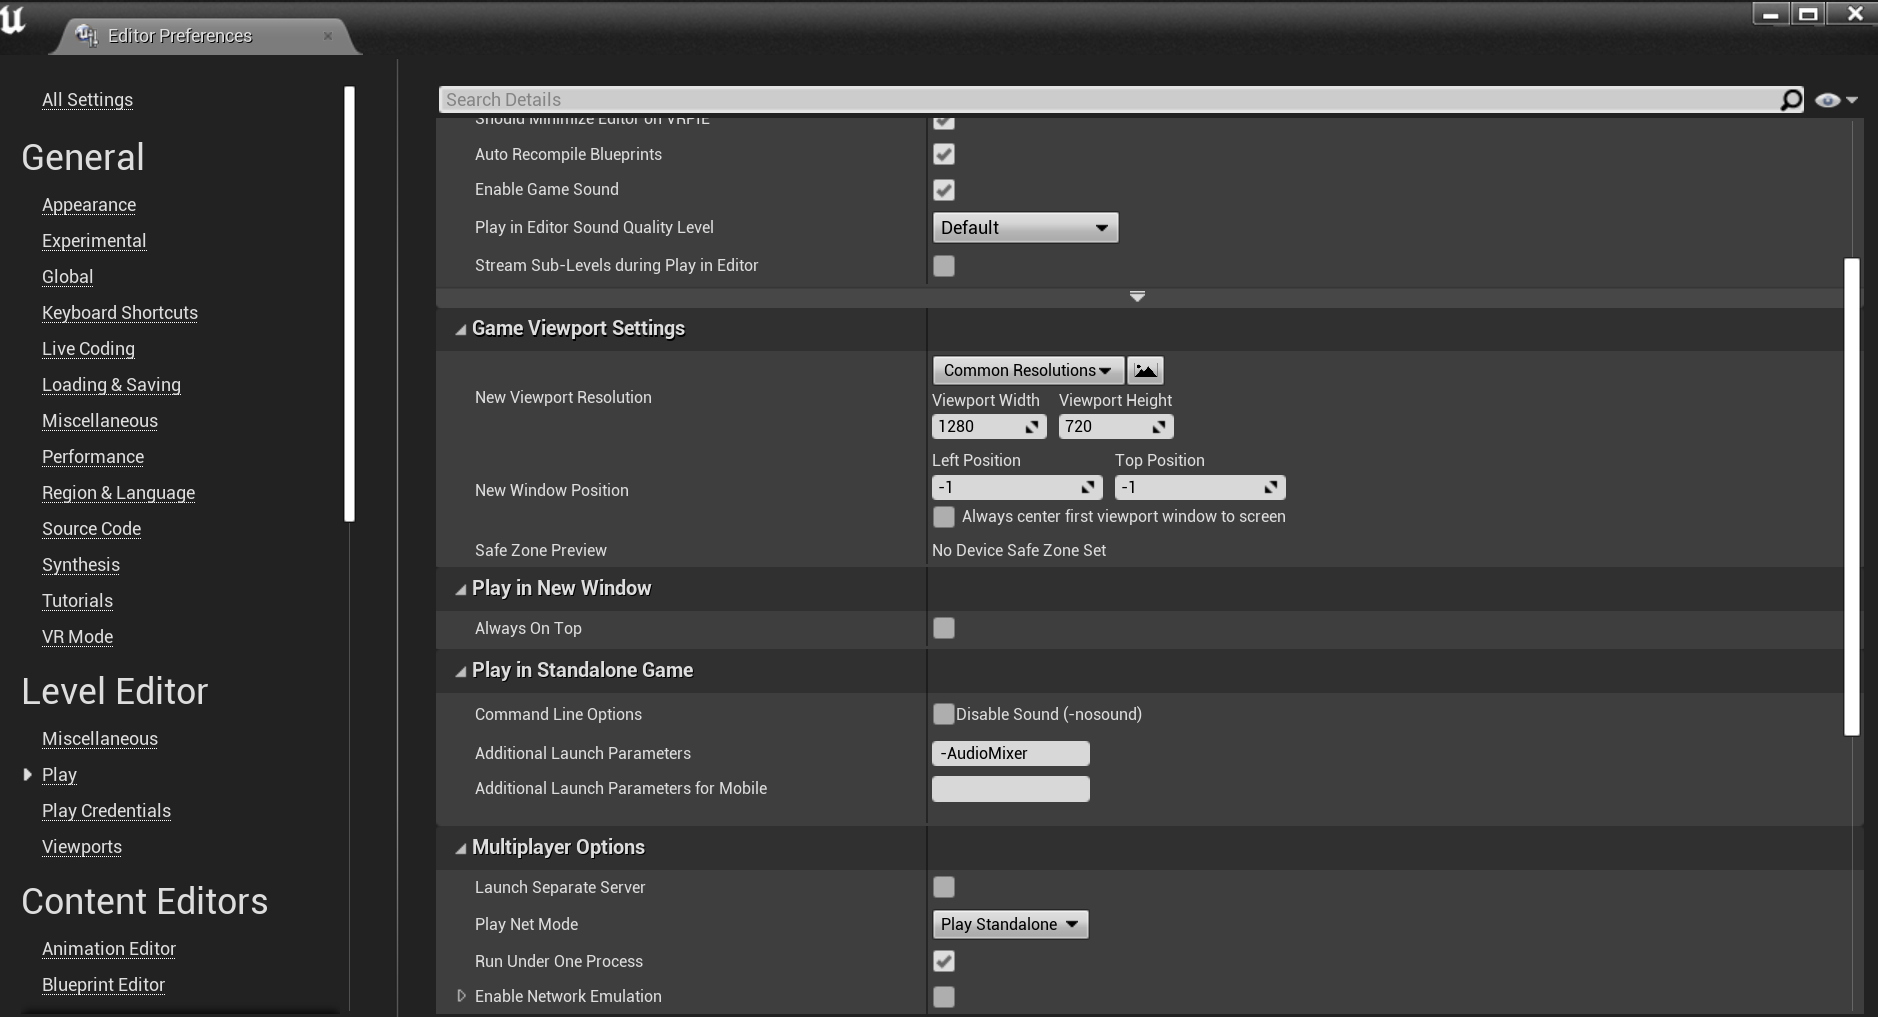
You can capture the audio game content from a submix object. If you add any sounds, music in your assets and it will be captured when playing the game. You can either specify your own submix object and leave it empty. If you leave this field empty, the audio will be capturde from the master submix of the main audio engine. In order to enable the audio capture, you must launch the game with the AudioMixer parameter. In order to launch your game with this parameter, navigate to "Edition -> Editor Preferences". Under "Play as a standalone game", add -AudioMixer.
Audio device capture
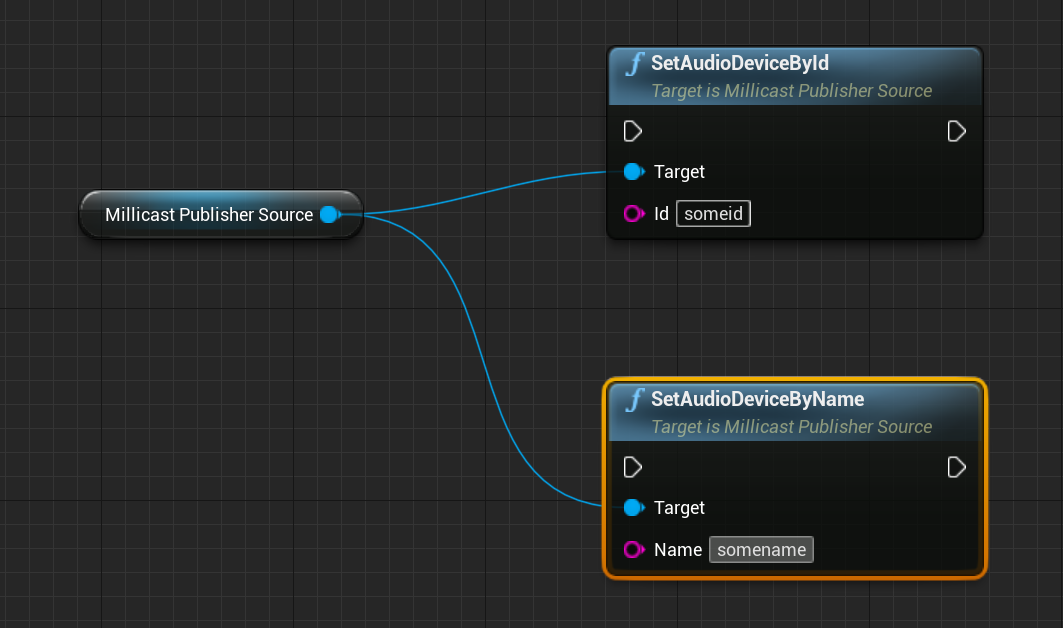
If you choose to capture from an audio device, you can select the audio device directly from the PublisherSource menu, but this is not recommended as it would be only for your machine. You can dynamically set an audio device from its id or index using the blueprints. In your blueprint, you can create a public variable of type MillicastPublisherSource. It will appear in the blueprint menu to set as your source asset.
In the source menu, you can see that there is a volume multiplier field. This is intended to boost the volume of the recording, because when hearing the recording, the sound might be faint.
Loopback
This feature is supported only on Windows. Loopback allows you to capture the output audio (what is playing on the speakers) as an input source.
Blueprint
Now that audio and video sources are all set up, let's implement the blueprint. Add a blueprint class in your assets (choose actor) and add it in your level. Now open it and go into the event graph.
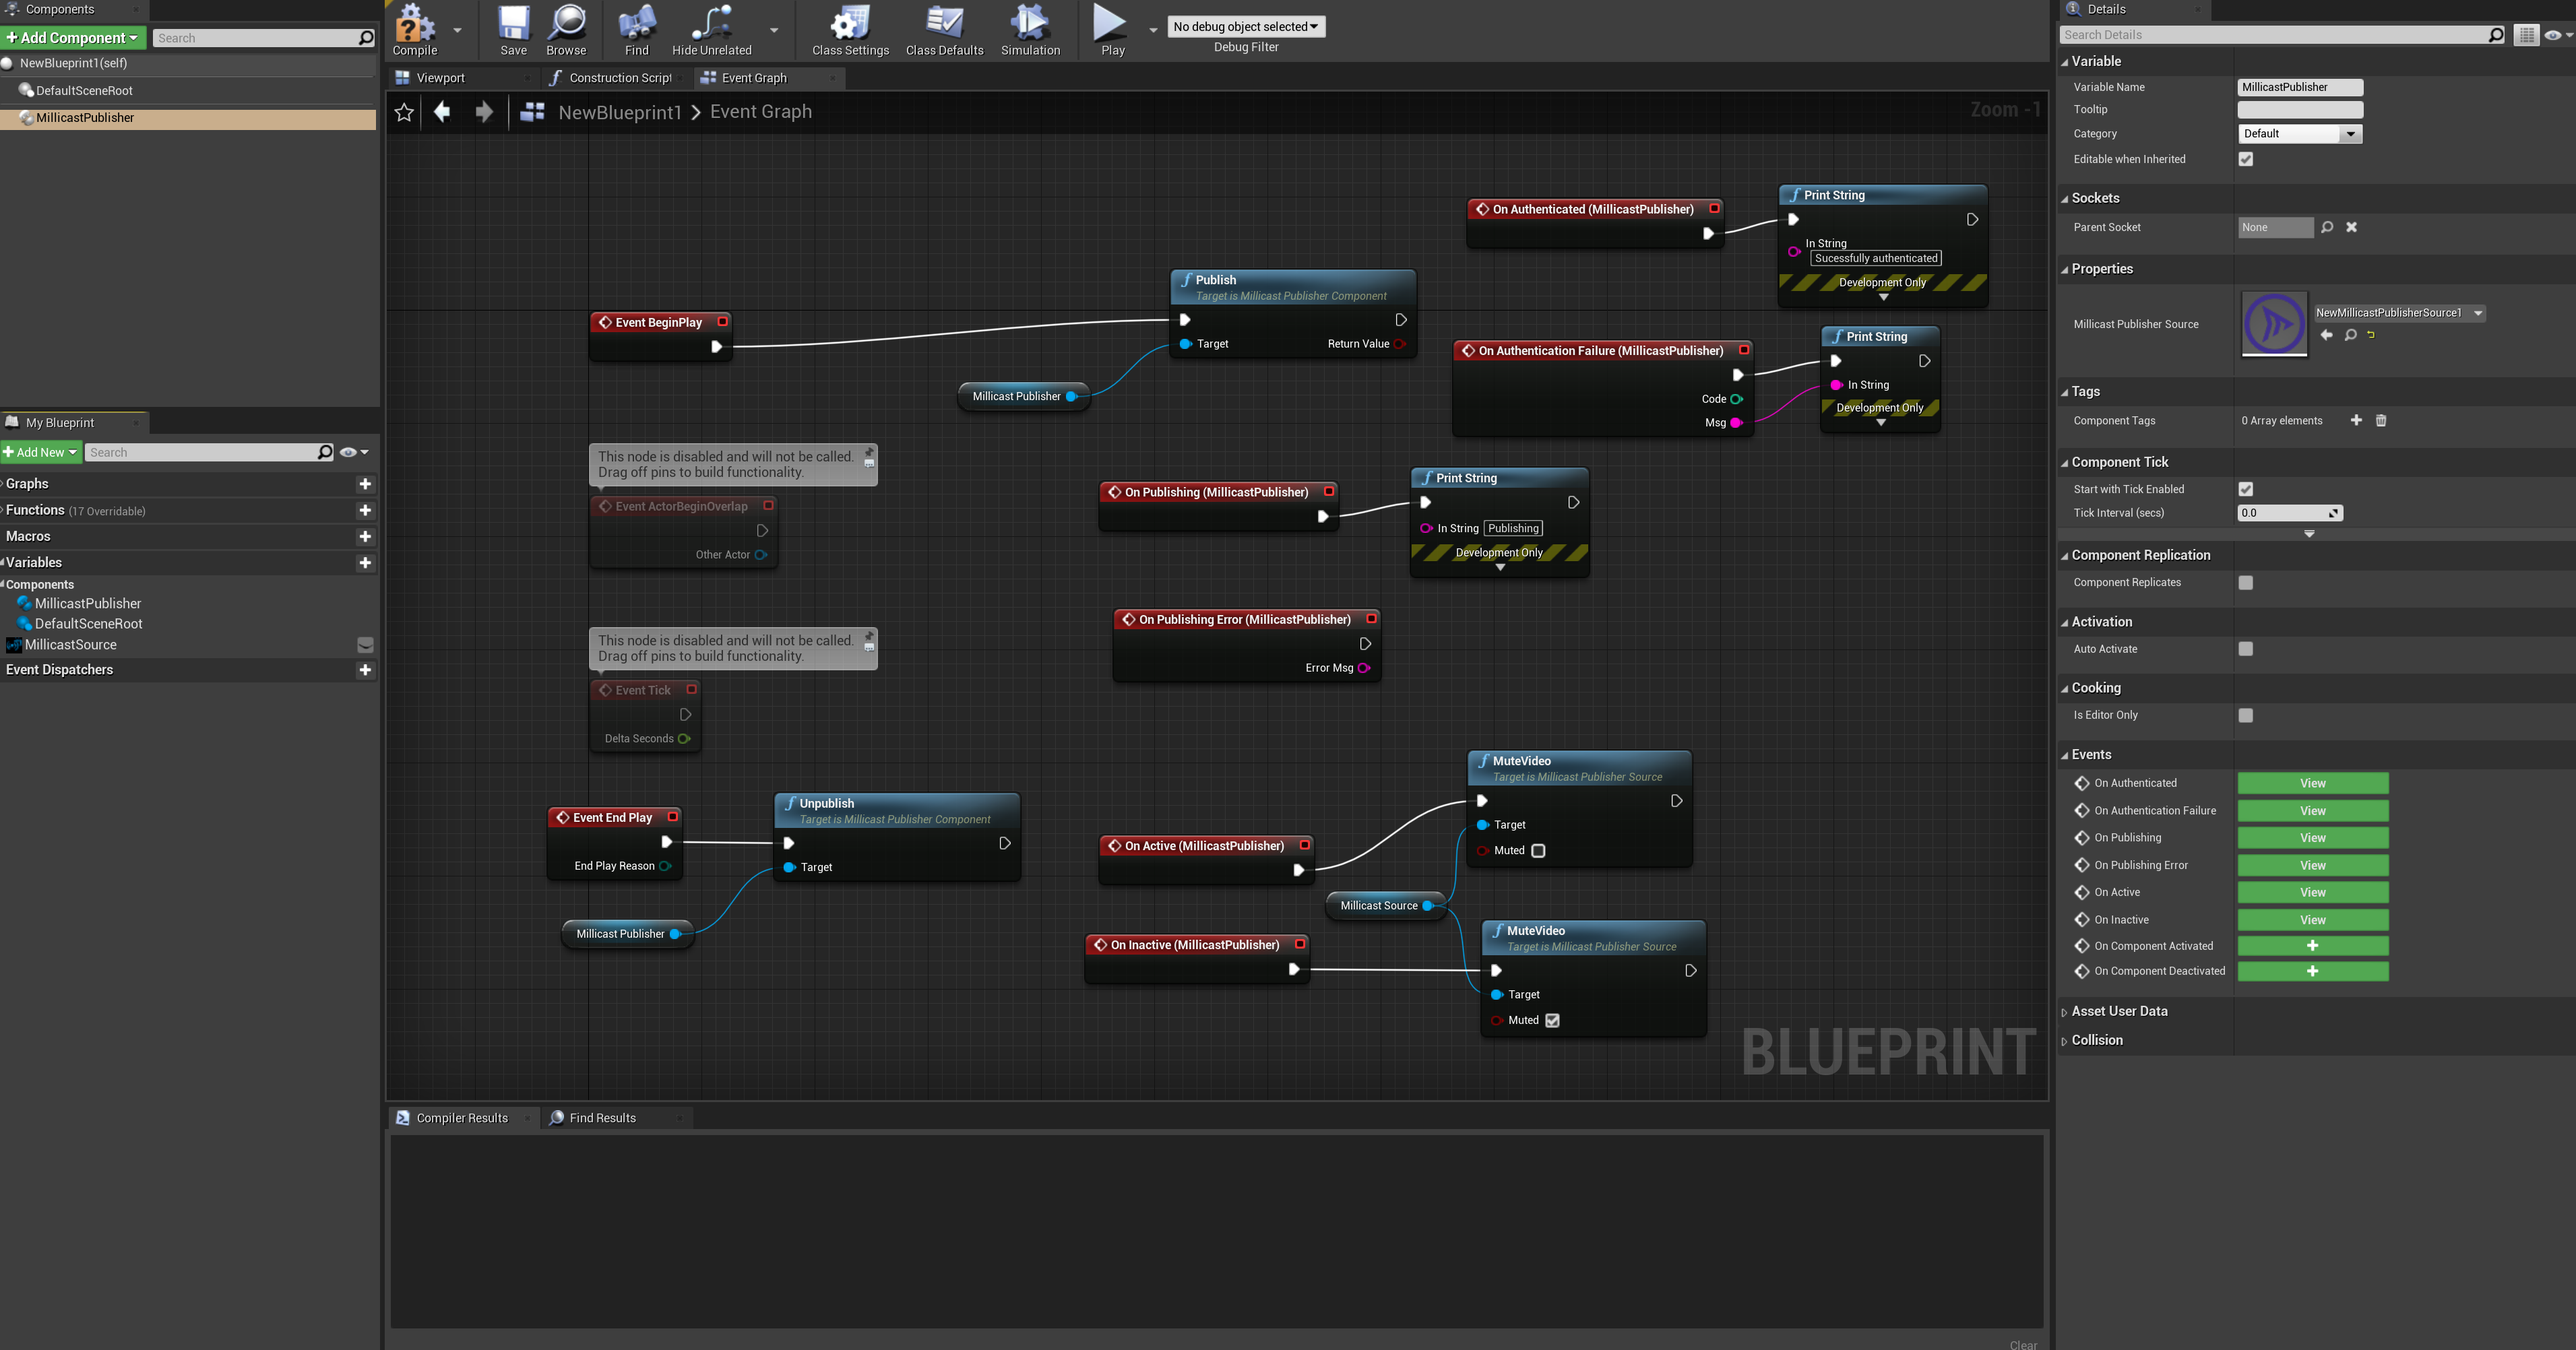
First, click "Add Component" and add a MillicastPublisherComponent. In the properties, add the Millicast Publisher source and then drag it into the graph, and call the function Publish. This will start the capture and publish to Dolby.io Real-time Streaming. It will authenticate you through the director API and then create a WebSocket connection with Dolby.io Real-time Streaming and finally establish a WebRTC peer connection to publish to Dolby.io Real-time Streaming.
This is an example of blueprint publishing when the game starts and muting the video if the stream is inactive, unmuting it when the stream is active, and unpublishing when the game ends.
Codecs selection
In the MillicastPublisherComponents properties you can select the video and audio codec you want to use for encoding. The plugin supports VP8, VP9, and H264 for video and Opus for audio. VP8 and VP9 use software encoding and H264 uses hardware encoding. In order to use H264, you must enable the plugin HardwareEncoders.
The Dolby.io Real-time Streaming Publisher Plugin for Unreal Engine also supports simulcast, which allows sending a video stream that contains multiple bitrates in it, where each offers a different video quality – the higher the bitrate the higher the quality. The quality of the viewers stream will be determined by network conditions or device type.
You can enable simulcast during configuration by clicking the Simulcast checkbox under the codec selection menu.

Not all codecs support simulcast; the checkbox will be greyed out if the current selected codec does not support simulcast.
Automute option
The automute option allows you to automatically mute the media tracks when no viewers are watching, and unmute them when the stream become active again, reducing bandwidth usage. This option is available in the MillicastPublisherComponent under the simulcast checkbox.
Add metadata to video frame
You can add metadata along with video frame, if you want to pass an XY position for example.
To use this feature, you must first enable the "Add metadata" option in the publisher component properties.
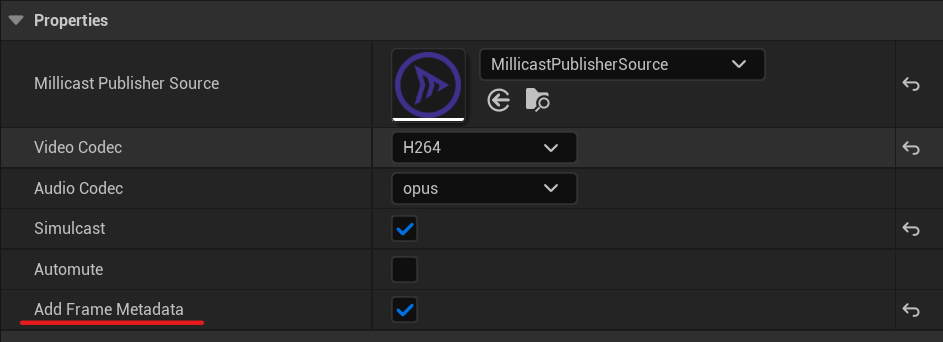
When this option is enabled, the plugin fires an event at each video frame so you can pass your metadata.
You need to bind the OnAddFrameMetadata event of the publisher component to receive it.
Once you receive the event, you can call the AddMetadata method of the component.
The following blueprint shows how to pass one byte, which we increment each time we receive the event:
https://blueprintue.com/blueprint/pfl1tt-j/
Broadcasts events
There are several events emitted by the publisher component:
OnAuthenticated: This event is called when the authentication through the director API is successful.OnAuthenticatedFailure: This event is called when the authentication through the director API fails.OnPublishing: This event is called when you start sending media to Dolby.io Real-time Streaming service.OnPublishingError: This event is called when the publishing step fails, which could be an error during the WebSocket signaling or setting up the WebRTC peerconnection.OnActive: This event is called when the first viewer starts subscribing to the feed.OnInactive: This event is called when the last viewer stops subscribing to the feed.OnViewerCount: This event is called when the number of viewers subscribed to the stream changes with the new viewer count.
Multisource feature
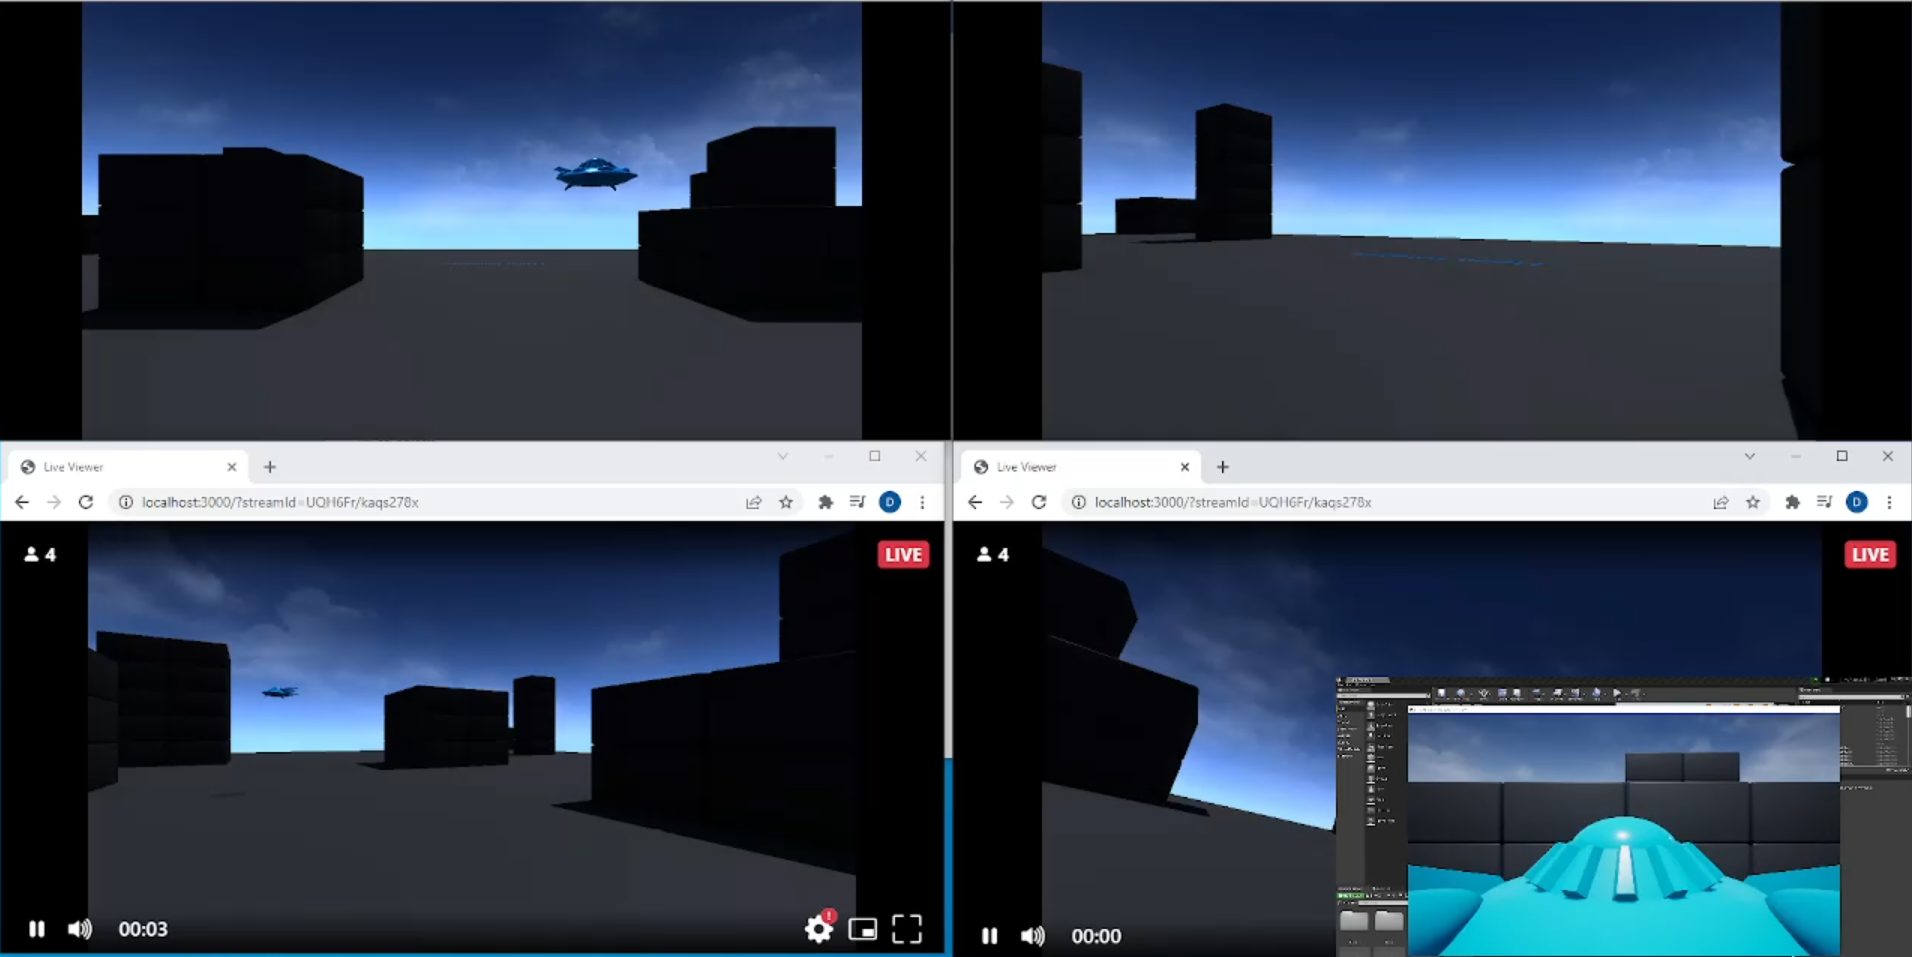
It is possible to use the multisource feature of Dolby.io Real-time Streaming in order to publish several audio/video sources with the same publisher. Consequently you can use several virtual video cameras from the game as video sources.
To do so, add several SceneCapture2D into your scene and add an equivalent MillicastPublisherSource.
Configure the render target for each one, and in each MillicastPublisherSource asset, you must set the sourceId field to a unique value. Regarding the blueprint, you must add the same number of publisher components as MillicastPublisherSource assets and then the rest remain the same as if you publish from only one source.
WebRTC Statistics
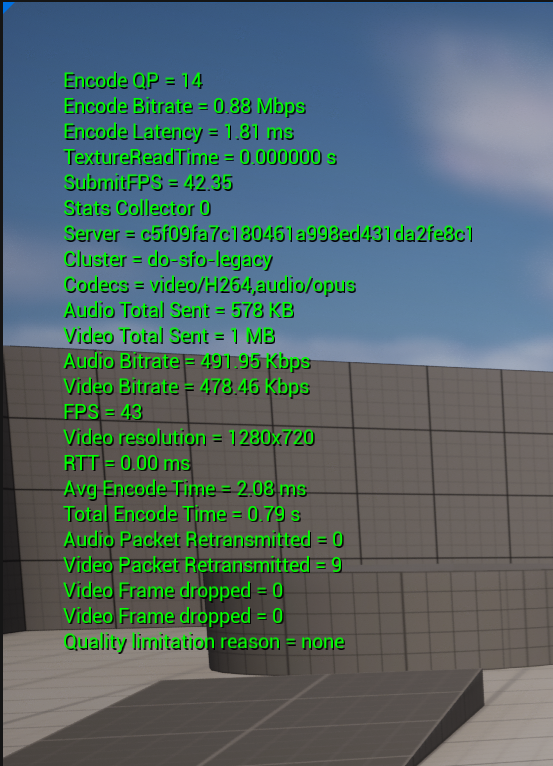
You can monitor the WebRTC Statistics of your current connection. In the Unreal console, enter this command : stat millicast_publisher.
This will display the stats of the plugin on the top left of the viewport.
Updated 4 months ago