Screensharing
Capture and stream content from the computer desktop
Screensharing or screen capturing is an important feature for virtual events, webinars, and many other types of broadcasts that involve sharing information. This guide will outline three options for managing screen capture in a way that is compatible with Dolby.io:
- Screensharing with the Dolby.io Dashboard Broadcaster
- Screensharing with OBS
- Screensharing with JavaScript
Sharing Screen and Video
If you want to enable both screensharing and share your webcam at the same time, you must enable multisource on the publishing token to broadcast multiple sources to the same stream.
Screensharing with the Dolby.io dashboard broadcaster
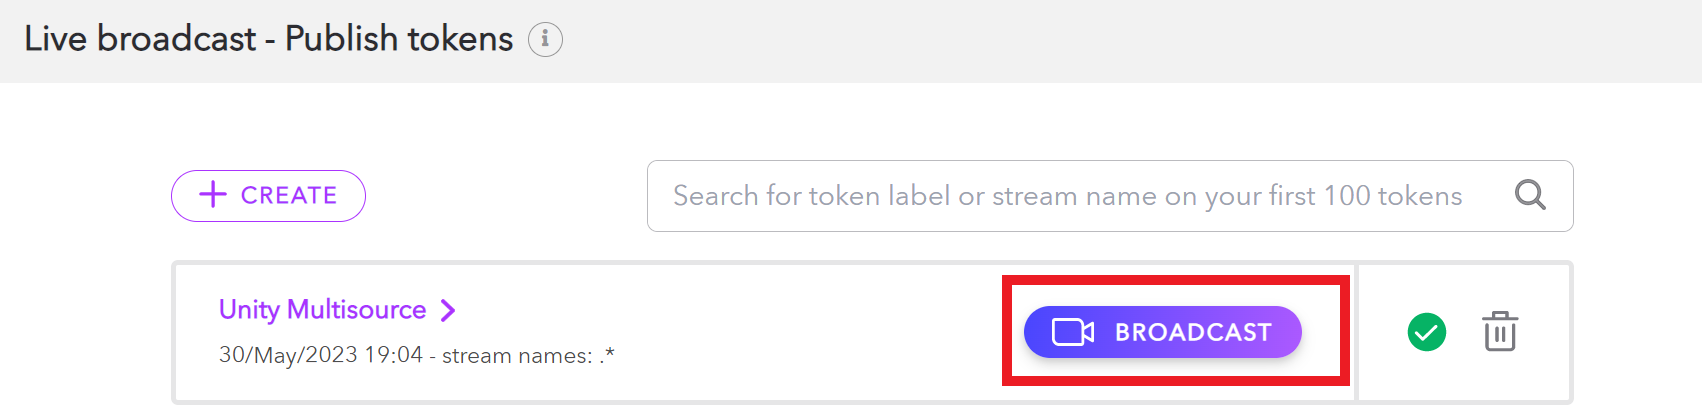
Once you have created a Dolby.io account, you can begin using the Dolby.io dashboard to create and manage tokens, manage your Dolby.io account, and broadcast and view active streams.
Inside the dashboard, click the Broadcast button located adjacent to the token.
Inside the dashboard broadcaster, click on the camera icon in the bottom left corner. To share your screen, select the "Share Screen" option and start sharing.
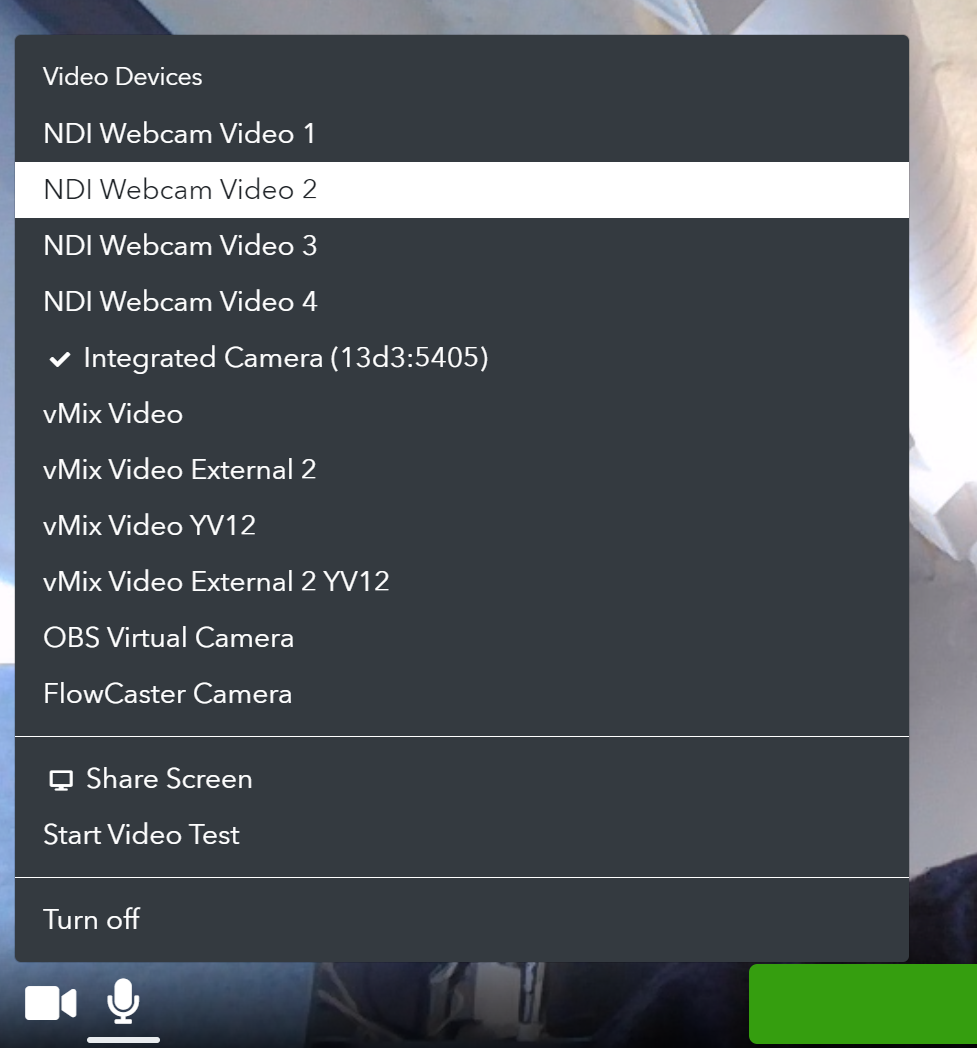
With your screen shared to the dashboard broadcaster, you are now set up to capture content from your desktop. You can click start to begin broadcasting or proceed to Broadcast to learn about broadcast settings.
Screensharing with OBS
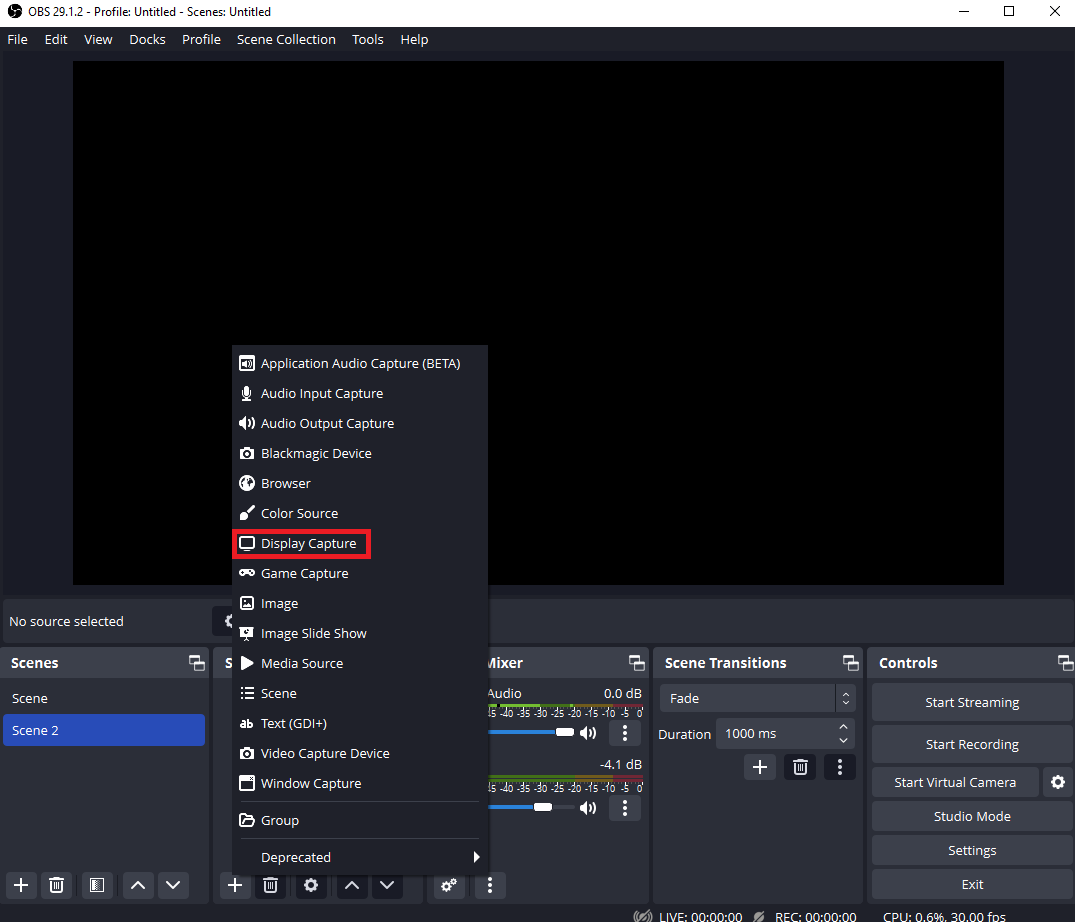
Open Broadcast Software, or OBS, is a popular screencasting and streaming app available as free open-source software. To connect a web camera to OBS you first need to download the software appropriate to your operating system. Once downloaded and installed, open the app.
Inside the app, click the plus icon within the Sources tab and add a Display Capture.
Select the screen you want to share and whether you want OBS to capture the cursor or not.
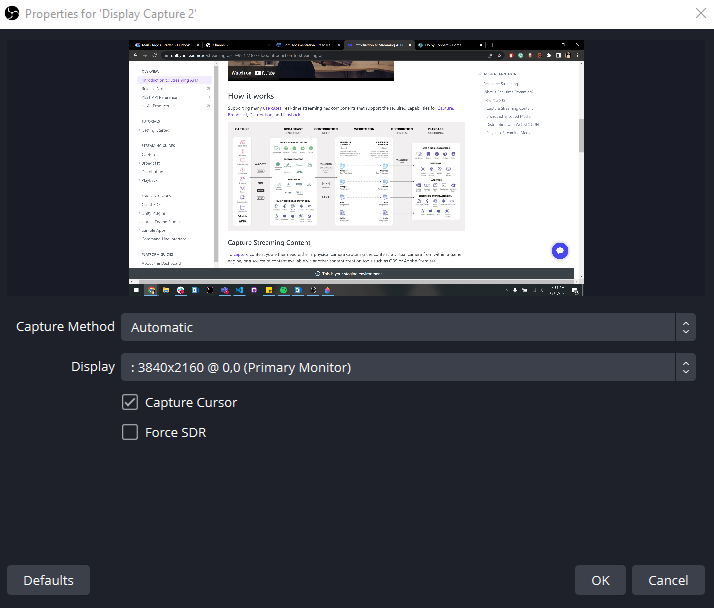
With your screen selected click "OK". You've now set up your screen for capture via OBS. To start streaming from OBS continue to the broadcasting with OBS guide.
Screensharing with JavaScript
Screen capturing with JavaScript is straightforward thanks to screen capture support with the getDisplayMedia method provided by the MediaDevices interface. The getDisplayMedia method is supported on both Windows and Mac devices for all major browsers, however, it isn’t currently available for mobile devices. For a full list of support for getDisplayMedia see this table here.
To get started using getDisplayMedia we first need to define our display media options:
const displayMediaOptions = {
    video: {
        displaySurface: "window",
    },
    audio: false,
};
In this case, display audio is not being captured, just the display window as a video feed. There are a number of different settings to adjust with the full list available here.
With our options defined, we can use the getDisplayMedia method to capture our screen:
const screenCapture = await navigator.mediaDevices.getDisplayMedia(displayMediaOptions);
With that, the screen is now being captured. When this function is called, users will receive a permissions prompt from the browser which they will have to approve for the device to begin capturing content. This screen capture can then be passed as a mediaStream into the Dolby.io Millicast JavaScript SDK. To learn more about how you can begin broadcasting a screen capture, explore the Client SDK guides or check out this detailed blog for screenshare streaming in JavaScript.
Additional Client SDKs
You can find similar capabilities as JavaScript from one of the other Client SDKs listed below:
Updated 11 months ago