Packaging Android Projects
This guide explains how to set up your environment to successfully package Unreal Engine (EU) projects for Android.
Requirements
Make sure that the following software is installed on your computer:
- Unreal Engine
- Android Studio
- Java SE Development Kit: JDK 8 for UE 4.27-5.3.0 or JDK 11 for UE 5.3.1 and later
- Android Native Development Kit (NDK): r21d for UE 5.1 and earlier or r25b for UE 5.1 and later
Procedure
-
Open Android Studio, click More Actions to open a dropdown list, and select SDK Manager.
-
Open the SDK Tools tab and mark the following checkboxes: 33.0.0, 32.0.0, 31.0.0, 30.0.3, and 29.0.2.
-
Open the
C:\\Users\\dolbyio\\AppData\\Local\\Android\\Sdk\\build-toolsfolder and look for files named d8 in all folders inside it. Rename the files to dx. -
Set the
JAVA_HOME,ANDROID_HOME,ANDROID_SDK_HOME,NDK_ROOT, andNDKROOTenvironment variables by assigning them to their locations on your computer, similarly to the following example:JAVA_HOME: C:\Program Files\Java\jdk1.8.0_202 ANDROID_HOME: C:\Users\dolbyio\AppData\Local\Android\Sdk ANDROID_SDK_HOME: C:\Users\dolbyio\AppData\Local\Android\Sdk NDK_ROOT: C:\Users\dolbyio\AppData\Local\Android\Sdk\ndk\android-ndk-r25b NDKROOT: C:\Users\dolbyio\AppData\Local\Android\Sdk\ndk\android-ndk-r25b -
In Unreal Editor, select Edit > Project Settings and provide the following data in the SDKConfig section:
- The location of the Android SDK on your computer
- The location of the Android NDK on your computer
- The location of Java on your computer
- The SDK API level
- The NDK API level

-
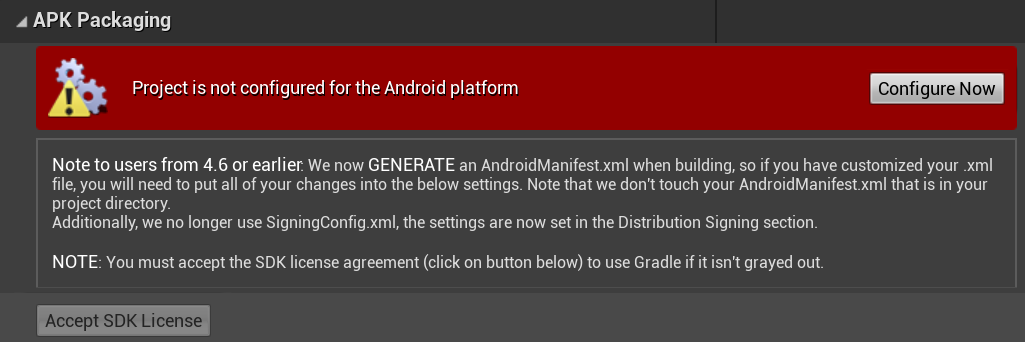
Locate the APK Packaging section in Project Settings and click the Configure Now button. Additionally, click the Accept SDK License button to accept the license agreement.
-
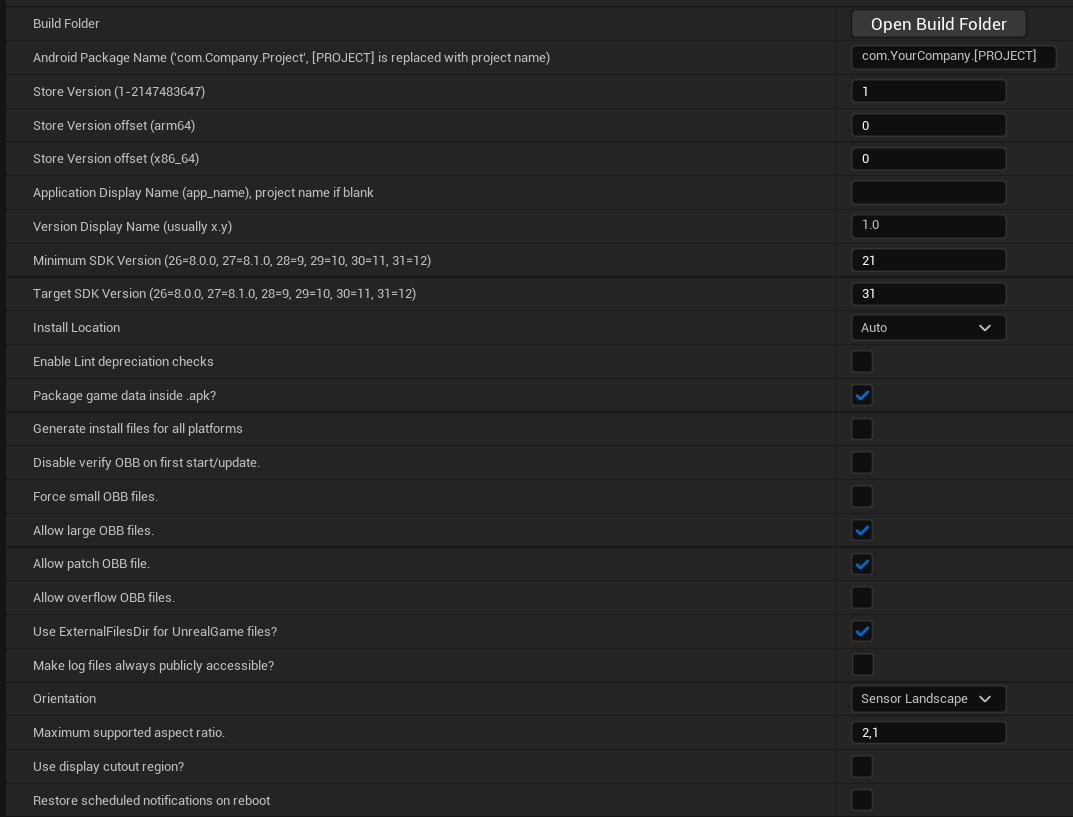
In the APK Packaging section, provide the following information:
- Android Package Name: com.yourcompanyname.yourprojectname
- Minimum SDK Version: 21
- Target SDK Version: The latest SDK version
- Install Location: Auto
- Select the following options:
- Package game data inside .apk
- Allow large OBB files
- Allow patch OBB files
- Use ExternalFilesDir for UE4Game files
- If you use Oculus, in the Package for Oculus Mobile devices section add Oculus Quest and Oculus Quest 2. Additionally, check Remove Oculus Signature Files from Distribution APK, write
vrin the search box, and select the Start in VR option.
-
Navigate to the App Bundles section in Project Settings and select the Generate bundle (AAB) option.
-
In the Build section, select the Support arm64 option.
-
Open a terminal as an administrator and run
cd C:\Program Files\Java\jdk1.8.0_202\bin. -
Run
keytool -genkey -v -keystore key.keystore -alias Mykey -keyalg RSA -keysize 2048 -validity 10000and provide the requested information to generate a unique keystore. For more information, see the Unreal Engine instructions. -
Open the
C:\Program Files\Java\jdk1.8.0_202\binfolder, copy the generated key.keystore file, and paste the file toProjectRootFolder/Build/Android/. -
In the Distribution Signing section, provide the following data:
-
Key Store: key.keystore
-
Key Alias: MyKey
-
Key Store Password

Next steps
After a successful packaging process, you should get a .apk file. Then, you can do the following actions:
- If you want to set up your Android device, follow the Setting Up Your Android Device For Development Unreal Engine instructions.
- If you want to install the .apk file on your Android device, use the following command:
adb install /path/to/file/file.apk. - If you want to add the plugin support to Android, you can add the third-party directory to
/Plugins/MillicastPlayer/Sourceand then regenerate project files.
Note that the H.264 and AV1 codecs are not supported, use VP8 or VP9 instead.
Updated 27 days ago