Multi-view
Multi-view lets you ingest and render multiple Dolby.io real-time video and audio streams simultaneously inside a browser or mobile native applications. Once rendered, you can switch seamlessly between streams, allowing you to control how you view the content. By giving viewers content control, broadcasters can enable real-time experiences and engagement that leave viewers wanting more.
To create a multi-view experience you must capture multiple video or audio feeds and then broadcast them as a multi-source stream. Once broadcasting a multi-source stream, you can view the stream using the Dolby.io Millicast viewer app, or by building your own multi-view application. Dolby.io also supports Audio Multiplexing for mixed audio playback.
Multi-view with the Dolby.io viewer
Once you have created a Multisource stream, you can open the stream viewer from the Dolby.io dashboard or by navigating to:
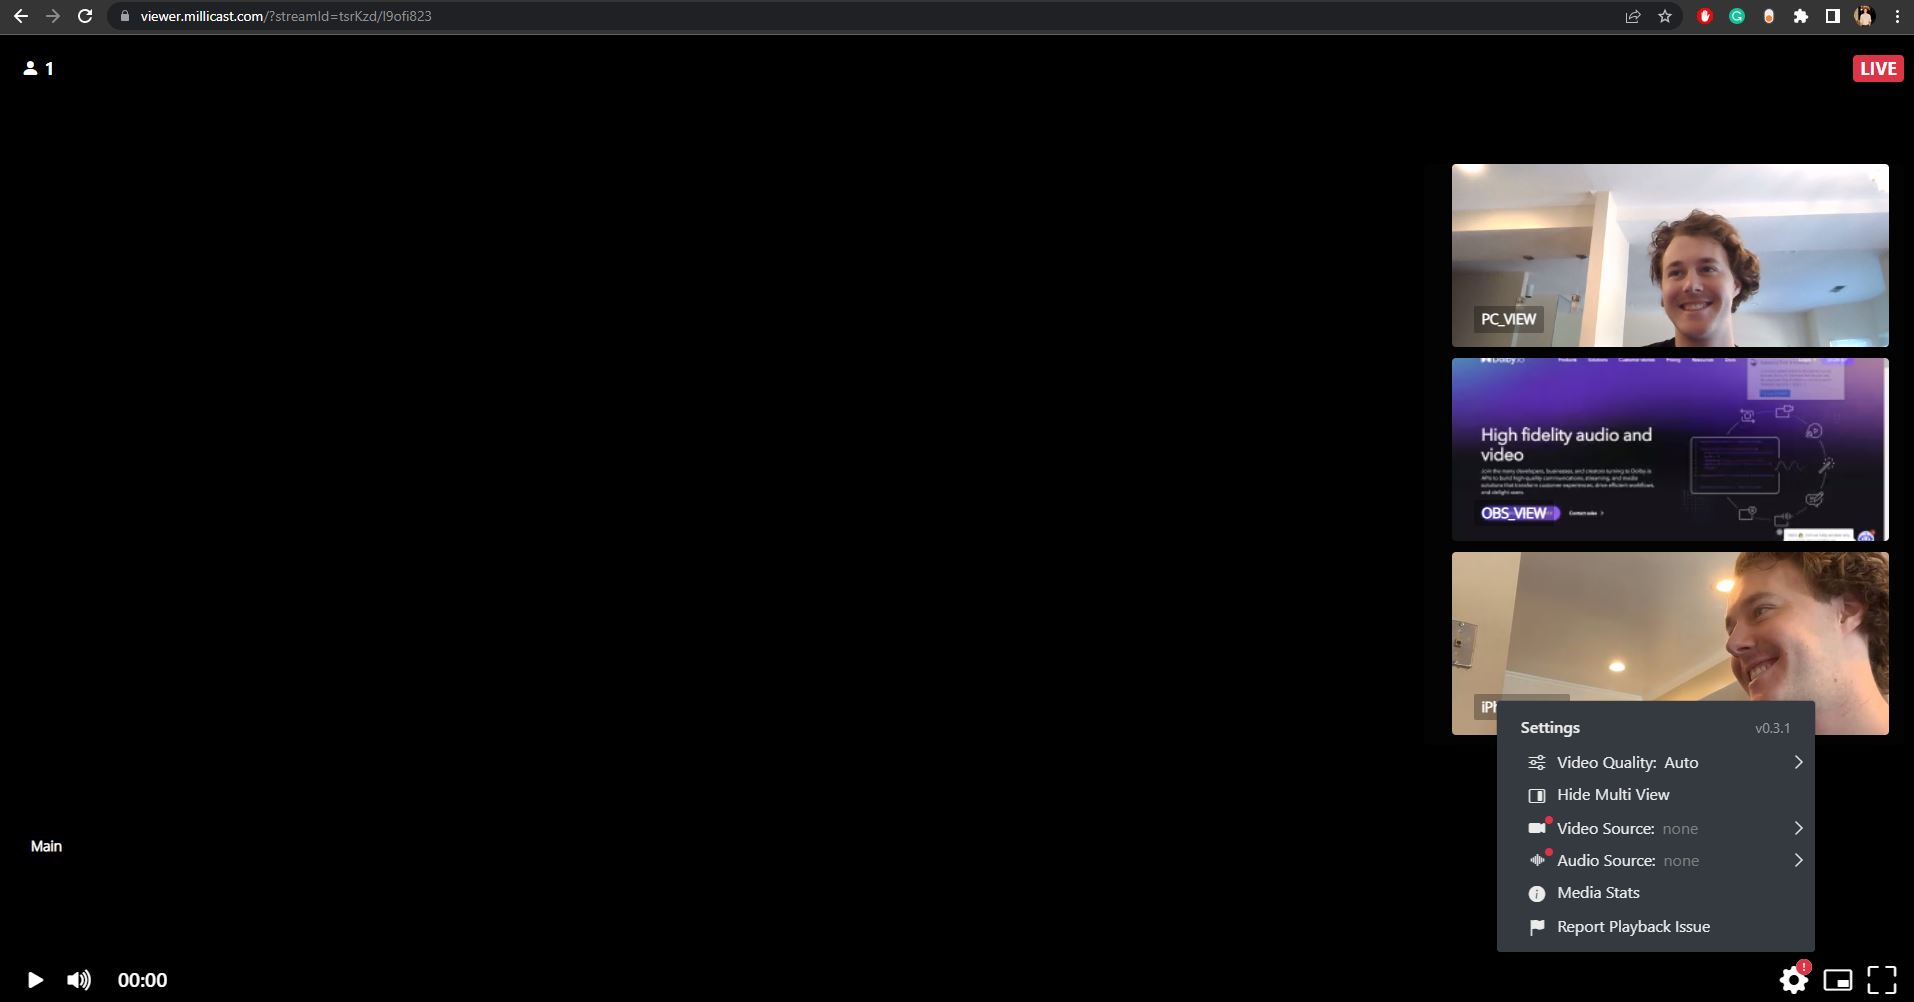
https://viewer.millicast.com?streamId=[YOUR_ACCOUNT_ID]/[YOUR_STREAM_NAME]
Once you join, the bottom right gear icon flashes a notification prompting you to enable multi-view. Enable it to begin viewing the streams.
Alternatively, you can force the viewer to open to multi-view by including the &multisource=true flag on the URL:
https://viewer.millicast.com?streamId=[YOUR_ACCOUNT_ID]/[YOUR_STREAM_NAME]&multisource=true
Creating a Multi-view web application
Dolby.io supports Multisource Playback via the Client SDKs, allowing you to build your own multi-view experience for your app or platform.
Before getting started building a multi-view application it is worth understanding;
- How to broadcast Multisource Streams.
- How to Create a Basic Streaming Web App.
- What Broadcast Events are and how to use them.
- How the Dolby.io platform organizes and handles Multisource Playback.
Store and track incoming Multisource feeds
Not building a Web App?
All Dolby.io Client SDKs support building Multi-view applications. Although the below example is using JavaScript the principles are the same for each SDK.
The Dolby.io platform tracks broadcasts by their account ID and stream name and individual streams within broadcasts by their sourceID, a unique identifier that can be used for selecting feeds to render from the viewer node. Unlike a traditional broadcast where there is only one stream to playback, a multi-view application must account for multiple feeds arriving asynchronously. To accomplish this, the application should listen for streams using a broadcastEvent, and store the stream sourceID as it becomes active.
const activeSources = new Set();

await millicastView.on("broadcastEvent", (event) => {
        const { name, data } = event;

        switch (name) {
            case "active":
                activeSources.add(data.sourceID);
...
};
Add video elements and render feeds
Once we've captured the sourceID of an incoming stream, we need to signal to the Viewer node which track the stream will play on. The Dolby.io Millicast SDKs include a function that allows you to dynamically add a track to the Viewer node called addRemoteTrack.
addRemoteTrack requires the media type of the incoming stream (audio or video) and a MediaStream, an interface that signals a stream of media content. addRemoteTrack will then return a promise that will be resolved when the RTCRtpTransceiver is assigned a mid value.
These newly created Transcevers can be stored alongside the sourceID, ready for when it is time to render the feed in the app.
const sourceIdTransceiversMap = new Map();

const addStreamToYourVideoTag = async (sourceID) => {
        const mediaStream = new MediaStream();
        const videoTransceiver = await millicastView.addRemoteTrack("video", [mediaStream]);
        const audioTransceiver = await millicastView.addRemoteTrack("audio", [mediaStream]);

        sourceIdTransceiversMap.set(sourceId, {
            videoMediaId: videoTransceiver.mid,
            audioMediaId: audioTransceiver.mid,
        });

        createVideoElement(mediaStream, sourceID);

...
};
To actually add the stream to the <video> tag we must create the <video> element and assign it the mediaStream created above. To disambiguate which <video> element holds which stream we can assign the element the sourceID.
const createVideoElement = (mediaStream, sourceID) => {

        const videoDiv = document.getElementById("videoDiv");
        const video = document.createElement("video");
        video.id = sourceID;
        video.srcObject = mediaStream;

        video.autoplay = true;
        video.muted = true;

        videoDiv.appendChild(video);
    };
In the above code videoDiv is where we want the <video> tag to show up in the HTML. Hence, at the end of the function, we append the newly created <video> element to the <div>.
To recap, we've:
- Captured the
sourceIDof an incoming stream by listening for anactivebroadcastEvent. - Created a new
mediaStreamobject and used it toaddRemoteTrackto the Viewer node. - Mapped the newly created
mediaStreamcalled aTransciverto the newly capturedsourceID. - Created a
<video>element and associate that element with the newly created media. - Added the
<video>element and itsmediaStreamto the<div>where it will render.
At this stage, all the pieces are together, however, the stream won't yet render. This is because you have yet to tell the Dolby.io Viewer node which stream to project onto the Transciver. This is done using the project function which tells the node to begin projecting the stream, identified by its sourceID, onto the Transceiver.
await millicastView.project(sourceID, [
            {
                trackId: "video",
                mediaId: videoTransceiver.mid,
                media: "video",
            },
            {
                trackId: "audio",
                mediaId: audioTransceiver.mid,
                media: "audio",
            },
        ]);};
Once projected the stream will begin playing within the <video> tag.
Put all together, a basic multi-view application would look something like this:
//Authenticate a Connection to the Dolby.io CDN
const tokenGenerator = () =>
		window.millicast.Director.getSubscriber({
			streamName: "YOUR STREAM NAME",
			streamAccountId: "YOUR ACCOUNT ID,
		});

	// Connect to the Viewer node and define sourceID mapping
	const millicastView = new window.millicast.View(streamName, tokenGenerator);

	const activeSources = new Set();
	const sourceIdTransceiversMap = new Map();

	// Capture sourceID and add to video tag
	await millicastView.on("broadcastEvent", (event) => {
		console.log(event, "broadcastEvent");
		switch (name) {
			case "active":
				activeSources.add(data.sourceId);
				addStreamToYourVideoTag(data.sourceId);
				break;
		}
	});

	// Create and add video streams with sourceId
	const addStreamToYourVideoTag = async (sourceId) => {
		const mediaStream = new MediaStream();
		const videoTransceiver = await millicastView.addRemoteTrack("video", [mediaStream]);
		const audioTransceiver = await millicastView.addRemoteTrack("audio", [mediaStream]);

		sourceIdTransceiversMap.set(sourceId, {
			videoMediaId: videoTransceiver.mid,
			audioMediaId: audioTransceiver.mid,
		});
		createVideoElement(mediaStream, sourceId); //Function below

		await millicastView.project(sourceId, [
			{
				trackId: "video",
				mediaId: videoTransceiver.mid,
				media: "video",
			},
			{
				trackId: "audio",
				mediaId: audioTransceiver.mid,
				media: "audio",
			},
		]);
	};

	// Add video stream to video element
	const createVideoElement = (mediaStream, sourceId) => {
		const videoDiv = document.getElementById("videoDiv");
		const video = document.createElement("video");

		video.id = sourceId;
		video.srcObject = mediaStream;
		videoDiv.appendChild(video);
	};
Final result
Additional features can be added, such as the ability to remove feeds once they stop or a button to switch between feeds. To learn more, explore this full guide on building a multi-view application from start to finish or try it out yourself with this working sample code.
Assigning lower-quality layers to small tiles
By allocating lower-quality layers to smaller video tiles, you can optimize bandwidth usage and ensure a smoother streaming experience. Small tiles may not require high-resolution details, so using lower-quality layers conserves resources and enables efficient distribution of the available bandwidth.
Start by creating a transceiverToSourceIdMap variable to associate the media IDs with corresponding source IDs. After establishing a successful stream connection, listen to the layers broadcastEvent that is triggered whenever the state of layers in the live stream is updated. Iterate through the media IDs in the created variable; when an ID is not equal to 0, project the lowest layer.
const updateLayers = (layers) => {
  //Iterate the current mapping of media ID sources
  for (var mid in transceiverToSourceIdMap) {
    //If not main source (mid is set to 0 by default)
    if (mid !== '0') {
      //Order the layers to get the lowest one and project it
      const lowerLayer = layers[mid].active.reduce((currentLower, currentValue) => {
        return currentValue.bitrate < currentLower.bitrate ? currentValue : currentLower
      })

      viewer.project(transceiverToSourceIdMap[mid], [
        {
          mediaId: mid,
          layer: {encodingId: lowerLayer.id},
          media: 'video'
        }
      ])
    }
  }
}
Limitations of Multi-view
Dolby.io Real-time Streaming does not limit the number of tracks that a viewer can receive, however, it limits the aggregate bitrate of all tracks to 12 Mbps. The pinned source is prioritized and allowed to exceed the 12 Mbps limit, and the other tracks share any remaining available bandwidth. The source with a null sourceId is pinned by default. You can change the pinned source by using the pinnedSourceId attribute in the View.connect command. You should configure the Simulcast/SVC bitrate of each source so that a viewer can receive the desired amount of video tracks in the viewer session while remaining under the aggregate bitrate limit.
| Example | Bandwidth Allocation |
|---|---|
| A 4 Mbps pinned track and four simulcast tracks | 4 Mbps is allocated to the pinned track and the other simulcast tracks receive 2 Mbps each. |
| A 4 Mbps pinned track and two 2 Mbps tracks | The overall bitrate is is under the 12 Mbps limit. |
| A 12 Mbps pinned track and four simulcast tracks | 12 Mbps is allocated to the pinned track and other tracks receive no bandwidth |
| A 10 Mbps pinned track and two 2 Mbps tracks | 10 Mbps is allocated to the pinned track and there is only space for one additional track |
Updated 9 months ago