Getting Started
Real-time streaming with Unity
Enhance your games with realtime video/audio publishing as well as viewing capabilities. The Dolby.io Real-time Streaming Publisher and Player plugins for Unity package acts as a client to the Dolby.io Real-time Streaming Service.
Overview
The Dolby.io Real-time Streaming Publisher and Player plugins for Unity allow game developers to publish and view streams from the Dolby.io Real-time Streaming service from within their Unity games. For example, users can publish scenes captured from their in-game cameras, as well as audio sources, for other viewers to subscribe to, as well as rendering video and audio streams incoming from the service onto textures and audio sources.
Requirements
- Unity Engine / Editor Versions: Unity 2019.4, 2020.3, 2021.3
- Development Platform: Windows, Linux, MacOS (Intel and Apple Silicon), iOS, Android ARM64
- Target Platforms: Desktop, Mobile
- Pending Support: iOS Simulator and Android ARMv7
Unsupported platforms
- Windows UWP
- iOS Simulator / Android ARMv7
- WebGL
Getting the code
GitHub Repo:
You may find package names and references referring to the Dolby.io Real-Time Streaming (RTS) product as Millicast; RTS and Millicast are the same service from Dolby.io.
Getting Started with the Dolby.io Real-time Streaming Publisher and Player plugins for Unity
Installing the package
- Create and open a new project - For example, a simple 3D template will do. You can also use an existing project.
- Open the
Package ManagerFrom the editor;Window -> Package Managerand click the+to add a package from aGit URLand insert the followinghttps://github.com/millicast/millicast-unity-sdk.gitinto the text field.

- Unity will warn you that the Unity SDK package uses the new input system. Click
Yes.

- To also import the Sample Scenes, you can click on the Samples menu item in the same package manager window and click on Import as follows:

- The window will update and you can verify that the
Packages-Dolby -> Millicast (RTS)package was installed. - Close the
Package ManagerWindow.
Fetching your credentials
Sign up or log into https://streaming.dolby.io/ to create your publishing token, preferably a wild-card token. Keep note of the following:
- Account ID
- Publishing Token
For more information about wild-card tokens, consult this section of the Dolby.IO documentation.
Using the publishing and subscribing Prefabs
The Dolby.io Real-time Streaming Publisher and Player plugins for Unity package contains ready-made prefabs for publishing a camera and audio feed from within your games, as well as subscribing to other Dolby.io Real-time Streaming streams (either coming from outside, or from other Unity publishers). To use the prefabs, we need to import the Samples provided with the Unity SDK package. Later, we will learn how to use the Dolby.io Real-time Streaming scripts rather than prefabs, for more fine-grained control.
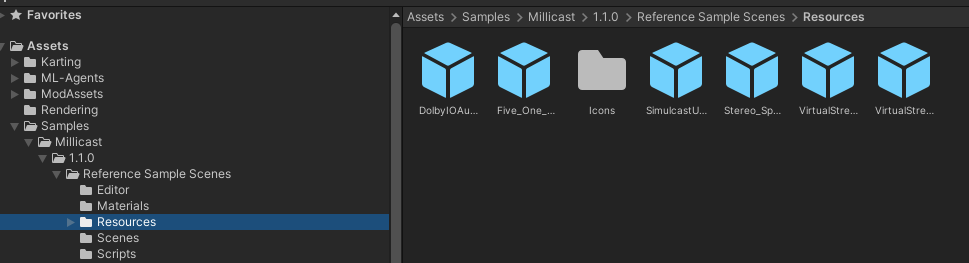
Go to the prefabs folder Assets > Samples > Millicast > 1.1.0 > Reference Samples > Resources in the project navigation menu as in the following image:
Create one instance of the VirtualStreamCameraPrefab prefab in the scene. Make sure to remove the existing main camera, as we will be using our new streaming camera now:
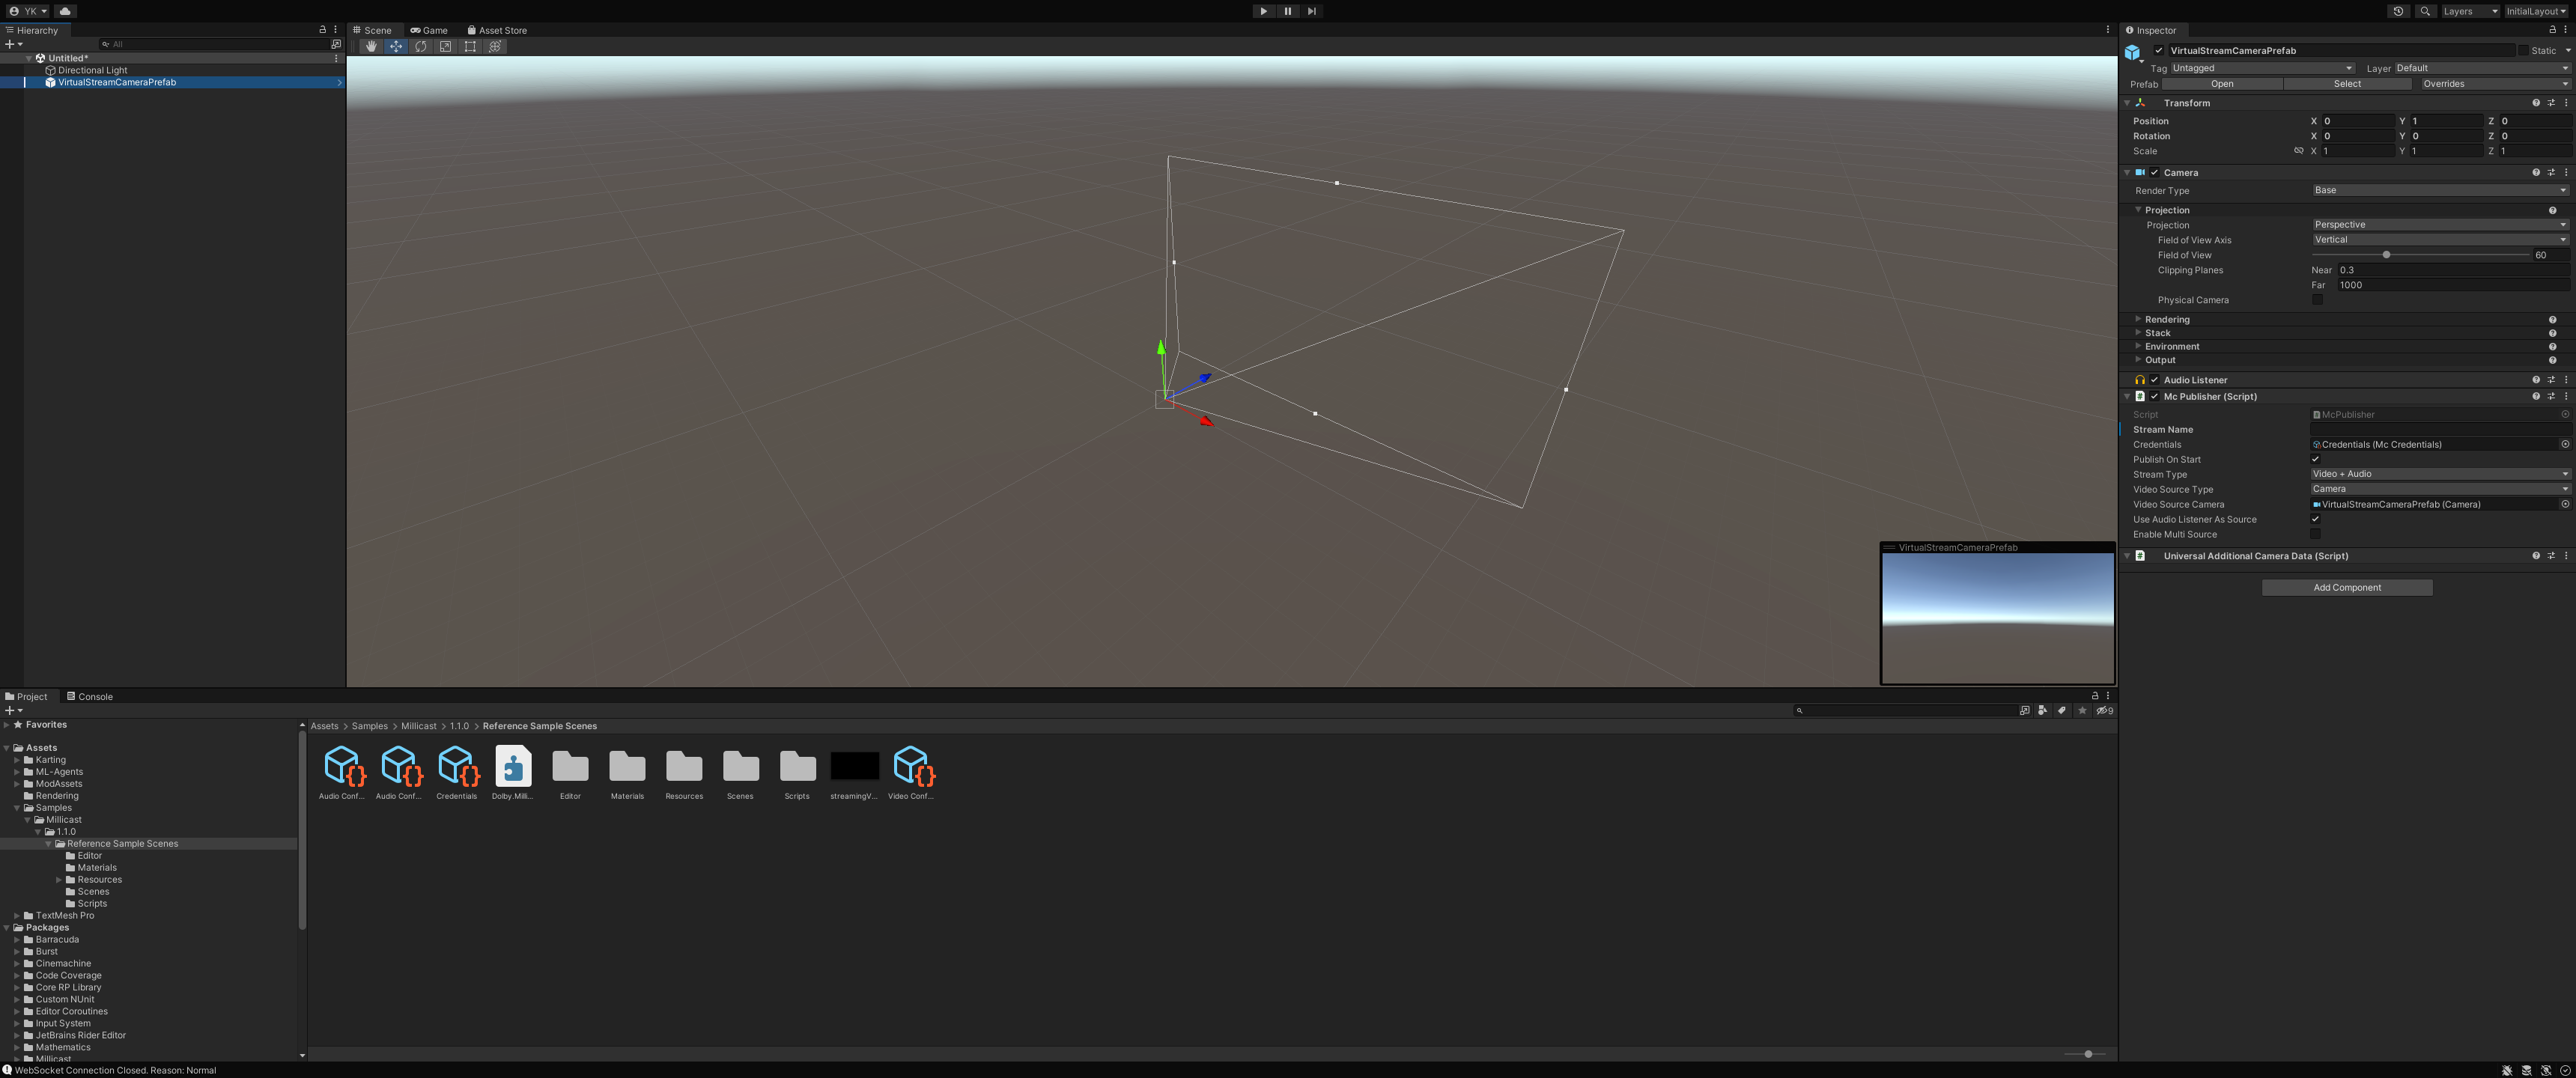
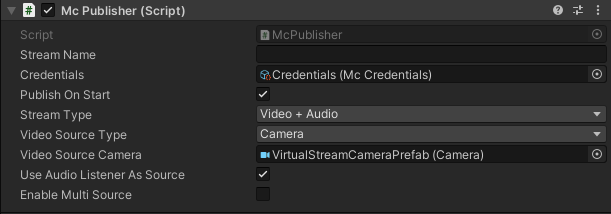
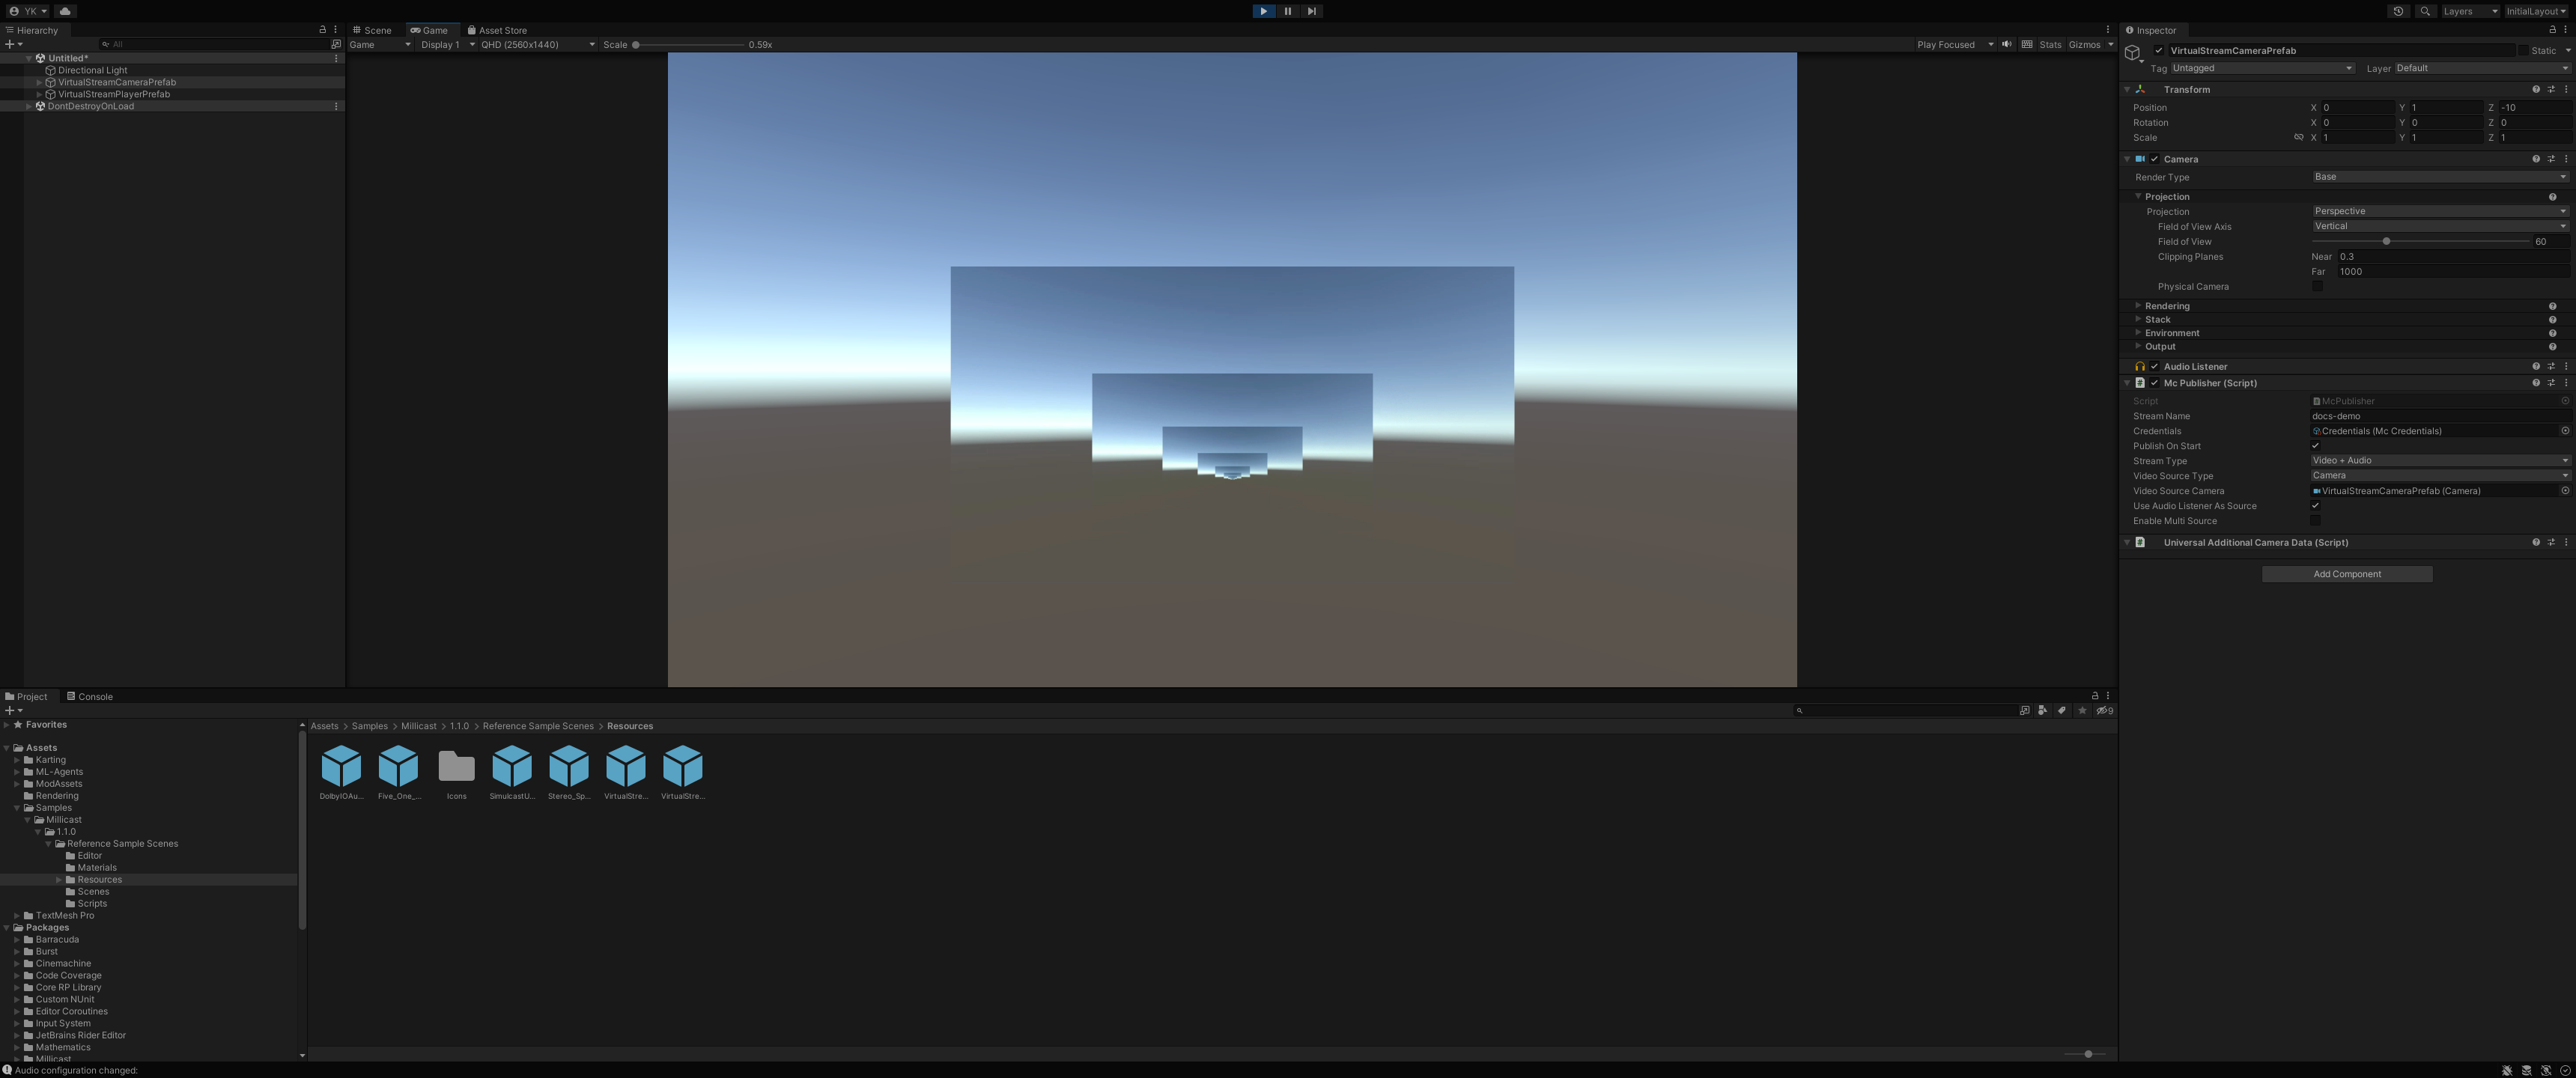
Next, fill in the credentials and stream name. If you are using a wild-card token, you can fill the stream name with whatever you like. If not, you need to fill it with the stream name provided in the Dolby.io streaming dashboard website. Double-click on the Credentials field in the inspector menu under the McPublisher component at the bottom right, and fill in your Account ID and Publishing Token in their respective fields.

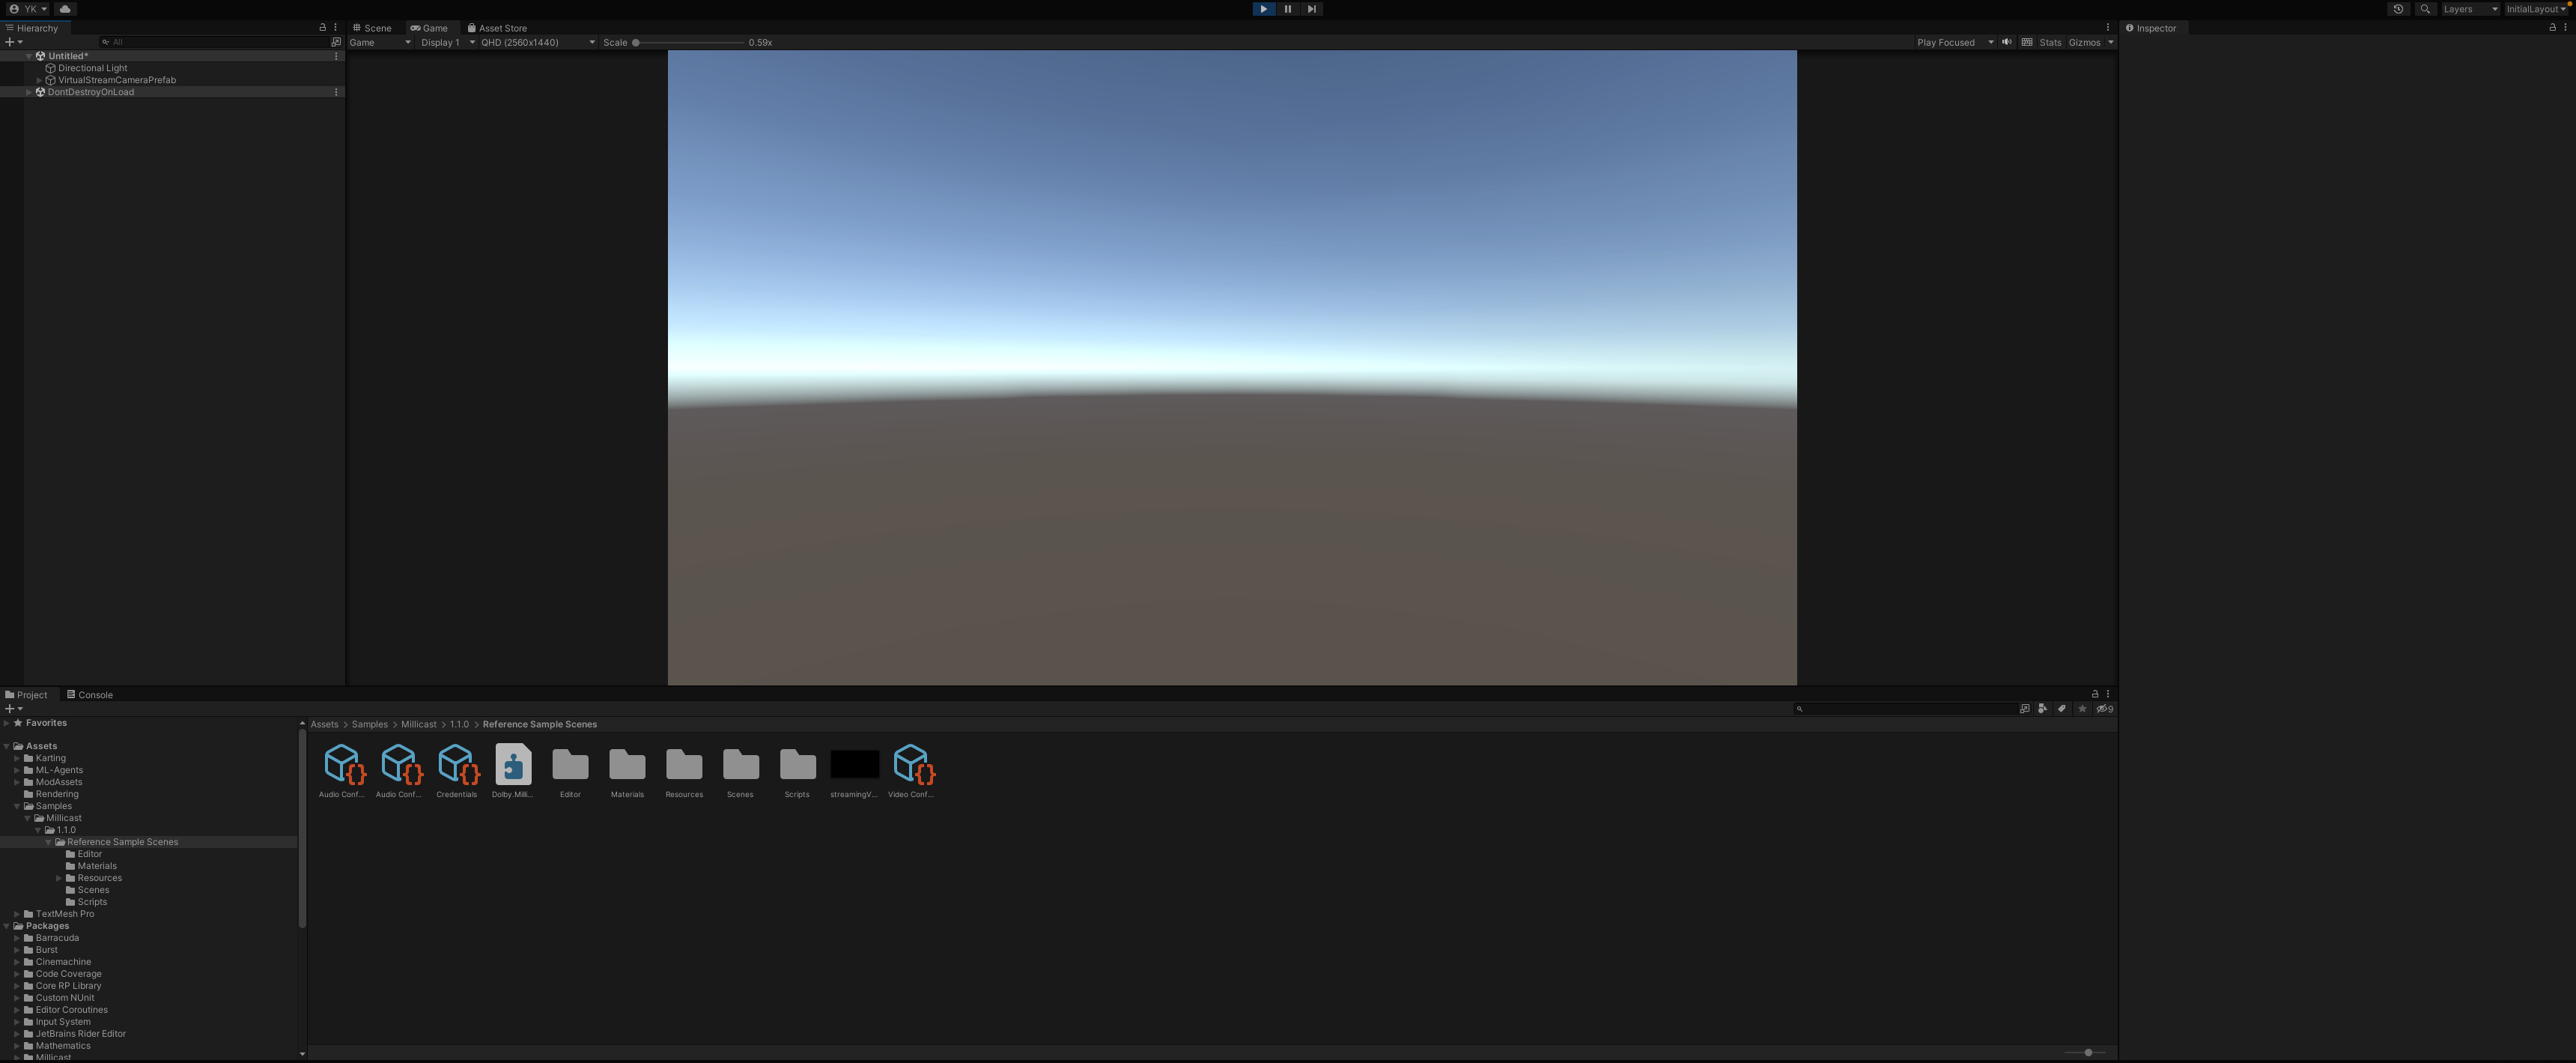
Once you have done so, start the game by clicking on the top start button, and you will be publishing a very minimalistic view of the world. In the following tutorial, we will learn how to integrate this into an actual Unity 3D game template.
You can view the stream you published by following the URL:
https://viewer.millicast.com/?streamId={accountID}/{streamName}. You need to replace{accountID}and{streamName}with your own values. The preview URL is also printed as a debug log statement in the Unity console for you to view.
Next, add a simple Subscribe prefab, which will allow us to render whatever we have published onto a mesh. From the previous Prefabs folder, create an instance of VirtualStreamPlayerPrefab. Make sure to move it in front of the VirtualStreamCameraPrefab by adjusting the transform's Z-axis to -10, for example:
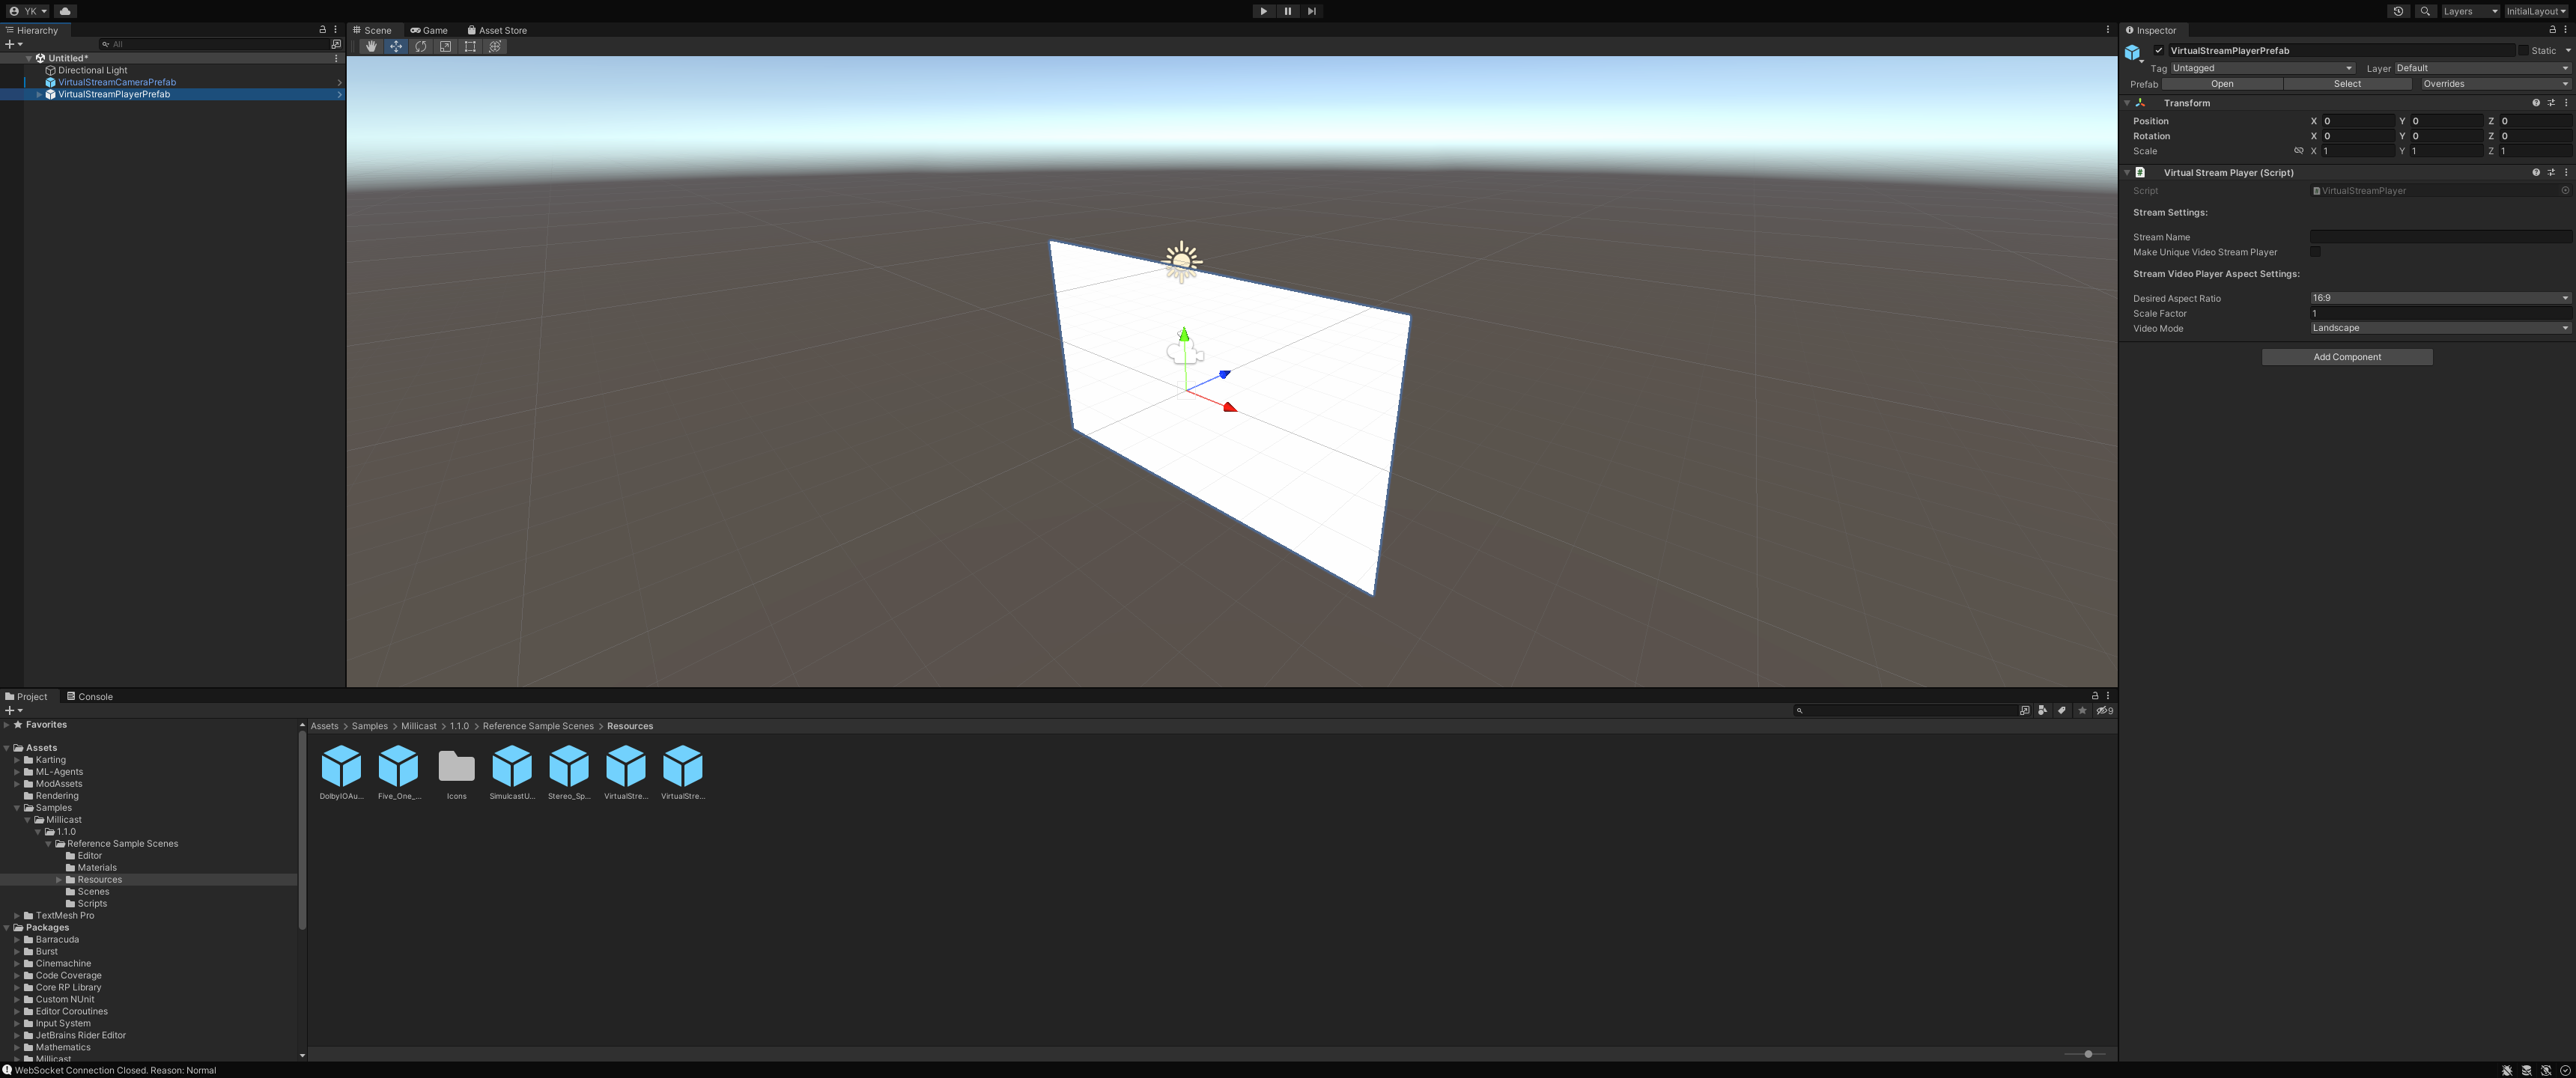
Now, fill in the Stream Name you have used for publishing, in the Virtual Stream Player component of the prefab in the inspector menu. Once that is done, start the scene once again and you can view that same view from the camera we published, now rendered onto a mesh.
Note: Rendering in
VirtualStreamPlayerPrefabhappens on Materials. Therefore, the optionMake Unique Video Streammakes each prefab instance separate from each other, meaning that you can have two separate prefab instances with different stream names, and each would render onto their own MeshRenderer's Material. Otherwise, if the options is turned off, all prefabs would share same materialVirtualStreamPlayerMaterialinReference Sample Scenes > Material. You can learn more about rendering virtual streams in the following tutorials.
Resources
- Real-time Streaming SDK for Unity API Documentation of the classes, structs, unions and interfaces
API Class Documentation
Next steps
- 3D Game Streaming Example: Unity Karting Game
- Learning more about the publisher and subscriber scripts
- Event based publishing and subscribing
- Configuring publishing video settings
- Add Real-time Spatial Audio and Communications to this example
Updated 4 months ago